
After finishing up the previous battle, we still had some time, and my opponent and I started setting up for an immediate rematch!
Lists and Scenario
We kept the terrain pieces but moved them around on the table for a new configuration, and we rolled up Loot for our scenario. All three tokens ended up being quite central. We then each produced a new list. The Salamanders continue to look like a really neat army, and my opponent brought the following:

The Rhinosaur Cav is now together as a singular scary horde, the Ceremonial Guard Horde remains, as does the Pale Rider, Clan Lord on Fire Drake and Phoenix. Yikes! The Priest has been dropped, replaced with some Ghekkotah Warriors, which look like nice chaff. My opponent opted for a formation this time, taking the Whispering Scales. They are Prime regiments, and are still Def5 with CS, but gain both Scout and Stealthy, making them pretty darn terrifying. They seem like they can close rather quickly, cause a lot of havoc, and be hard to remove.
Overall, the Salamanders seem pretty sturdy again, though the list is just 10 drops and 20 Unit Strength. The fliers and monsters are likely going to be an issue again, as will the formation now, but if I can take some good fights, I might be able to remove the big units, and depending on the scenario, win with my humans.

I brought the list above. This list was written up in May, after Battle 004. In that game, I focused almost exclusively on infantry regiments, which were just shredded by the Ice Elementals my opponent brought. While I definitely played poorly, the list itself was pretty flawed as well, as my infantry did not have the tools to protect themselves. There was no way to help dictate fights or trade units. I really needed more reach to more proactively deal with scary things. So up to test here are:
- Triple Knight Regiments. These should provide some combat reach, letting me hit something before it can harm my infantry. I don't think I have used my Knights all that well in previous games, and they tend to get bogged down. Maybe three regiments will let me do something worthwhile with one of them?
- Mounted Scout Regiment. I have liked the troops, but wanted to test out the regiment again, to see if I can get a better feel for using it.
- Siege Artillery. This is now the middle-costing war machine option. Is it worth it?
- Lots of Foot Guard. Would they be good? Will the extra armor help, or would a mix of infantry units like Pike, Poles or Fanatics be better?
- Mounted Hero with no IW. I was still brainstorming while writing this. Would one hero without IW be worth taking, or is IW basically mandatory?
My list has got a decent number of drops, pretty high unit strength, but I regarded this as a pretty weak list with some serious shortcomings. It lacks good inspiring coverage for the number of units it wants to bring, and lacks any Indomitable Will to help mitigate that bad coverage. I've got a bunch of units, but not a lot of focus in the list. Despite this, the list was something I wanted to try out. Maybe the more elite Knights and Foot Guard could bully out a win with some air support from my General on Winged Beast.
I had won the roll off and elected to have my opponent go first, as I didn't have any good shots, and wanted to see what his fliers would be doing in the early game.
Top of Round 1: Salamanders
I out dropped my opponent slightly again, and while finishing all that set up without a big plan, I forgot to take final pictures of deployment, so we'll cover that now as we get into Round 1.
 |
| Post-scouting moves, and into my opponent's turn 1, in the middle of moving the formation. |
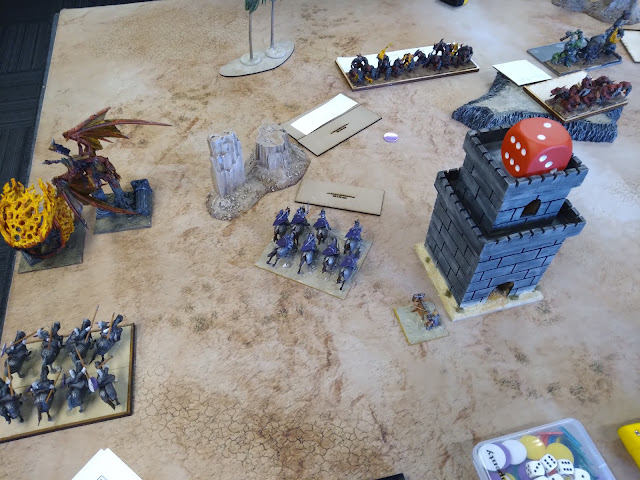
My opponent again deployed rather compactly. The Phoenix and Clan Lord arrived last, and ended up on my far left. The Rhinosaur Horde with Potion of the Catepillar set up just in the desert woods. The Ghekkotah Warriors screened the Ceremonial Guard. The formation were accompanied by their formation's legendary leader and helped screen the Pale Rider and Tyrants. The formation Scouted ahead prior to turn one, but neither went as far as I was expecting.
 |
| End of movement for the Salamanders. |
On their turn, the Whispering Scales formation moved up, with one taking the hill. Everything else just moved up. We were playing the little mesas as Height 9 Blocking Terrain, and the Rhinosaur horde moved to threaten the objective to my left. The Phoenix and Clan Lord moved at the double to block off that channel on my far left, aiming to run up and get behind my lines.
Bottom of Round 1: Kingdoms of Men
With a few exceptions on the flanks, I had deployed quite far back. The scenario scores at the end, so I wanted to put a lot of distance between myself and any the scouting lizards. With the Knights, I figured I might be able to pick something off if my opponent got too aggressive with say, the formation units. Otherwise, I might just get good tests out with the war machines. Either way back and defensive was the way to go with the Kingdoms of Men.
 |
| Strong movement forward from the Salamanders with a pretty tepid response. |
The Scouts could move 18, out of the charge arc of my opponent's Clan Lord, but would give their flank to the Phoenix. I didn't like my chances there, and feel like I'd be giving them and a knights unit for free, so on my turn the Scouts move in tandem with the Knights, to screen and protect them. Near the building was a Siege Artillery. I figured deploying near the blocking building would make it difficult for my opponent to engage it and just move on, so I am hoping to force a choice from my opponent on whether to engage the siege engine or not. In reality, I just had a limited field of fire. This should have been deployed somewhere back and with a better field of view. Siege Artillery seem more like mortars than I was expecting, and feel best just dropping shots from afar at tall units. The central hill kinda messed with lines of sight though, and I tried to get cheeky with the deployment. Anyways, both fire, but both miss this turn.
 |
| The forest screens the speedy advance on the right. |
The other Siege Artillery was near the middle, hoping to unleash some hell in the middle, though with the hill, this was a bit of dubious approach. On my right, we have two Def5 Foot Guard with the CS Foot Guard supporting. Near them is the ASB with Lute. The Def5 Guards should hopefully pin something down, and allow for a good trade.
My opponent had nothing on my far right. The palm trees should block line of sight to most things, creating a bit of a corridor, so late in deployment I dropped the General and a unit of Knights here. I did not fancy my General's chances against a superior flier with a breath attack, so the goal was to swing wide here and hopefully envelop my opponent's line before he could do the same to me.
My final unit to discuss was a unit of Bowmen out on my far right near the corner. I deployed these somewhere in the middle of the drop order, and pretty far back. I did not think I would get any meaningful shots off with these, so decided they would sit back, scoot forward slowly each turn, and just look to score the right objective late-game.
Top of Round 2: Salamanders
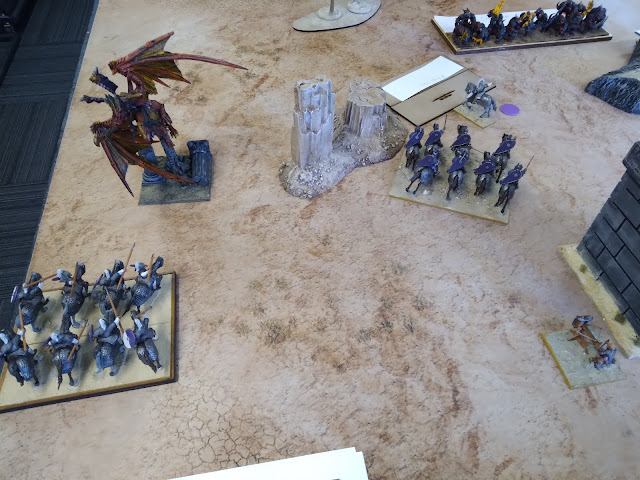
Unable to charge the knights, the Phoenix and Clan Lord charge the Mounted Scouts, obliterating them. My opponent opted to move the Phoenix forward, to screen for his Clan Lord. His thinking was that if the Phoenix holds, it could regenerate, and he did not want the Clan Lord damaged this early in the game. However, as the dice turned out for the victorious reforms, I should be able to charge either.
 |
| The angry Phoenix head moves up to try and take the hit for the mounted Clan Lord. The model was really neat, some Endless Spell mini painted up nicely with mostly Contrast paints. The result was a really nice and clean fire effect. Looked great on the table. |
The Ghekkotahs moved up to screen out my brutal Knights from bothering the midfield just yet while the hordes of Rhinosaurs and Ceremonial Guards lurked nearby. A regiment of the Whispering Scales took the hill, supported by the Pale Rider.
 |
| Good layering by my opponent. The Whispering Scales make for very strong screens. The tables were just 6x4 so apologies all the books and game aids are photo-bombing. |
Bottom of Round 2: Kingdoms of Men
On the right, my knights do still decide to spring that trap. I have move units that my opponent, so if I can tie these up 1:1 I feel like that should help me out elsewhere. Though hindered, the Knights do slip a few damage in.
I didn't think my General could break that fight if he committed, so just flew him up and over 10" to threaten other things.
A unit of Def5 Foot Guard had moved up to take the hit from the Whispering Scales on the hill, but in the center, my siege artillery roll hot, hitting on 6's against the stealthy regiment on the hill, rolling up 8 hits, and wounding 7 times. The unit is routed with some more hot Nerve checks. This was something quite unexpected, but a very welcome statistical oddity in my favor!
 |
| My opponent had apparently just recently painted up his Phoenix model too. These games were not good tests for it. |
My hero runs out from the far side of the building and up to gum up the Rhinosaurs. They can't charge around him, and going through should be a bit of a headache. The Knights meanwhile take the Ghekkotah Warriors for free, devastating them on the charge and seeing them off easily.
Top of Round 3: Salamanders
The Salamanders retaliate. The remaining Whispering Scales unit slugs back against the Knights, dealing two wounds and disordering them. The formation's leader, First Mate Zenthar, takes advantage of being an Individual to turn and charge and slice at my flying General, dealing a wound or two and grounding him. My opponent did have a nice model for this unit, but I didn't pay it much mind, unfortunately. I don't think it was back far enough for me to charge it last turn either, so this is just a good play from my opponent to stymie my General up. Thankfully it is akin to one of my heroes, so not too big of a threat on its own.
 |
| Another vicious fight begins in the center for our second game of the day. |
 |
| Gone? The dang Pole-Arms lasted longer last game. My Knights have let me down here. |
On the left, things go better for my opponent. On 3's and 3's the Clan Lord hacks his way through the entire regiment of Knights into double-digit damage and a high nerve check, and the knights are eliminated. That is amazingly disappointing for me; I wanted them to hold out one more turn, but it was some hot rolling for my opponent. In victory, the Clan Lord turns to face the center of the field, way sooner than I wanted it to.
The Rhinosaur Cavalry trample my hero, and decide to overrun, trying to screen out my knights from the flank of the Ceremonial Guard. Unfortunately, they don't roll too high, any while my opponent's goal was to block my Knights out, I still have a good inch or two of their flank that my Knights can most definitely see and easily reach.
Bottom of Round 3: Kingdoms of Men
While grounded, my General can also see a flank, and I decide to go for a big play this turn, charging the Knights into one flank of the Ceremonial Guard, and the disordered General into the other one.
 |
| A big, kinda risky charge into the Ceremonial Guard. At least I am smart enough not to be attacking them in the front! |
 |
| The big play workd! |
The Siege Artillery to the left of the building looks to have scored some damage against the Rhinosaur Cavalry, which is great, as damage is damage here. More importantly though, my big plays pay off! The pincer against the Ceremonial Guard works wonders, and the unit is routed. The General changes facing, and should be able to get the Rhinosaur Cavalry or the rear of the Pale Rider next turn.
Additionally, the Tyrants are cut down, with one victorious unit backing up and one reforming to face the Pale Rider, who did take a wound or two as well. Lastly, the Knights continued their fight against the last regiment of the Whispering Scales, and waver them. My Knights have more attacks, and are starting to win the engagement on their own it seems! This was a very solid turn for me.
Top of Round 4: Salamanders
Unfortunately, my Knights on my far-left had failed to hold up the nasty flying Clan Lord at all, who had victoriously repositioned to face the center field on my opponent's last turn. The Clan Lord is an unbloodied flier, and a rather significant threat. I was really hoping the Knights could hold him up for at least a turn.
 |
| This is the fate that awaits those daring knights. My opponent will be happy to take those charges. |
On this turn, the Clan Lord and the Rhinosaurs slam into the Knights (both in the front at least), eliminating them with ease. Both elect to back up as I recall, to avoid a possible flank charge by my own flying General on Winged Beast.
 |
| End the turn for the Salamanders. |
The Pale Rider counter-charges the Foot Guard that had hit them, and waver the human unit, but it is out numbered on the field.
Bottom of Round 4: Kingdoms of Men
I don't want to commit my General against the Pale Rider. Sure, I could maybe break it, but I feel like my General will be taking a charge himself next turn. So, instead I have him nimbly pivot, move 10" and pivot again, to stare down the flanks of the Rhinosaurs and Clan Lord, trying to turn the tables with some pressure.
 |
| My general opts to live, hoping the infantry can drag the monstrosity down. |
Wavered, the one unit of Foot Guard cannot retaliate unfortunately. Their unbloodied comrades try and take the beast in its flank. Alone though, they only hurt it. The Def5 ones do make it into the flank of the Whispering Scales unit this turn, and they and the Knights are able to finally win that fight. Both will turn to face the center of the field.
My Bowmen sidestep to get out of the charge arc of the Clan Lord and Rhinosaurs. I am keeping them close though to try and snag an objective at the end here. Both Siege Artillery fire at the Rhinosaurs, as to the side-stepping Bowmen, but nothing connects.
Top of Round 5: Salamanders
The flying Clan Lord and Pale Rider charge the frightened Foot Guard, scattering them. The Rhinosaurs take the flank of the unbloodied unit of Foot Guard that had come to help their comrades on my previous turn and break them as well.
 |
| The Clan Lord turns to get my General in his front arc. We don't think there is a way to get both the Bowmen and my General in the front, so the lord gives the wimpy human Bowmen the flank. |
Bottom of Round 5: Kingdoms of Men
We are both starting to run low on units. I have far more Unit Strength on the field though, and think I can still win this if I am smart about it.
 |
| My sneaky Bowmen (remember them, on my right?) have not shot at all this game. But after much creeping about, have made it to the objective on the right, as planned. Unfortunately, the Knights are stuck here, so my foresight and their arrival isn't as impressive as it might have been. |
The Siege Artillery shoots against the Pale Rider, and my dice go hot again. Both attacks hit, blasts rolls are high as is the damage and the monstrosity goes down! Writing up the report now though, I don't think we checked for the 12" safe-zone from Indirect Fire. The building did stick out a ways, so it is not the best indicator, and this would have been very, very close. I should have remembered to check that, so double apologies to my opponent for the hot rolls to a potentially illegal shot.
 |
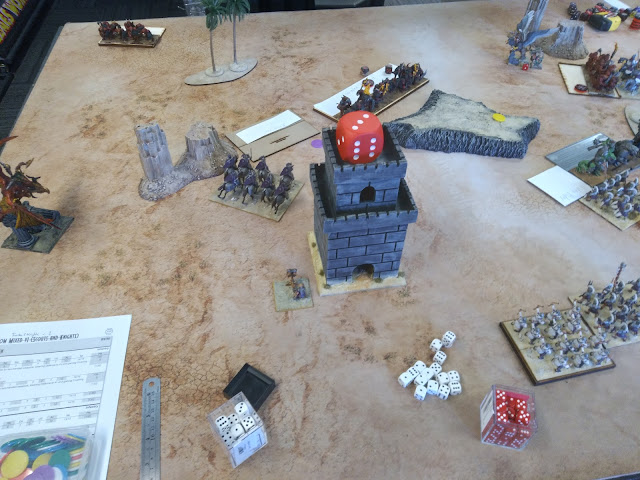
| At the end of the turn, my opponent is down to just their Clan Lord with 1 Unit Strength, and the Whispering Scales leader, who has 0, being an individual. |
My big play this turn is to remove the Rhinosaurs. My General hits their rear while both my remaining Foot Guard attack their front. My Knights countercharge the Whispering Scale Leader, as they are going to have a tough time extricating themselves from him, and with all my attacks, figure it might be the better play to try and just run him over. Alas, the Knights fail to rout the leader this turn, and will be stuck in another slog. My play against the Rhinosaurs here pays off, and they are seen off the field. I forget to reform anything, but am just out of the charge arc of the Clan Lord, which I was aware of.
Top of Round 6: Salamanders
The Clan Lord is my opponent's last remaining scoring unit, and flies to secure objective on my left. The distance isn't that far, and to use its two nimble pivots to face the center objective and roast my wounded, insane Foot Guard. They need double 1's to hold, don't get them this time, and flee.
Bottom of Round 6: Kingdoms of Men
My Bowmen (and Knights) secure the right objective, with the Knights counter-charging against the Whispering Scales leader, wavering it this time. Again, this was just a very good use of the hero unit by my opponent these last few turns. Things fell apart around him, but the scaly leader was used very well.
 |
| Down to the wire... |
A 2-0 Victory to the Kingdoms of Men!
Game Conclusion
It was another very close game! I very much enjoyed meeting my opponent in person and getting a few games in against a brand new army. I am very excited to see what they bring next time around!
With two games in now against the Salamanders, I think we can critique my opponent's list a bit? They seem like a cool army with some neat options and a lot of hobbying potential.
The Whispering Scales are terrifying to me and those worked well. The Rhinosaurs seem fun, and I personally liked the two regiment set up. Running all these together, they seem like they could give some fun disruption options for the army, drawing fire and messing with enemy lines and enabling hammer units to get into position.
I don't think the Phoenix was used well either game. I don't think you ever want that in combat, and I think it taking the hit in lieu of the Clan Lord this game was a mistake. I think you want that flying around to heal and support. I think a couple more units of chaff would also do my opponent well, and the Salamanders look to have quite the variety of it. We'll see what changes they make next time!
I was pleasantly surprised by my list. Most of my units were hitting on 3+, which felt great. I was surprised the first unit of Knights fell so quickly to the Clan Lord, but those were the dice.
Turn 5 I should have remembered to check the indirect fire range, but it looked far enough away on that day that I never considered measuring, so apologies to my opponent there. I did have other legal options, namely artillery into the Rhinos and stuff into the Pale Rider, so this was a game error on my part for sure, but thankfully, I don't think the error was determinative for the game. The hot dice were still a bit rough though for sure.
Knowing the shortcomings of my list, I thought I had an ok plan going into this, and felt we both played a good game. I had a great time! Many thanks to my opponent for the good games and a wonderful afternoon!
Testing Conclusion
- Triple Knight Regiments. For a human-centric list, knights seem almost mandatory, unless you are bringing hordes of stuff with CS. Something needs to do the damage, after all. Three regiments gave me some options, and while they were not used great, I did get a few decent moves in with them and felt like I got some good experience with them.
- Mounted Scout Regiment. I mean, they did screen ok? I think I play better with troops though and those will be my default going forward. I just can't wrap my head around running the regiment it seems.
- Siege Artillery. Each had one massive volleys during the game, which were definitely statistical outliers, and one may have potentially been an illegal shot. Regardless of the statistics, I don't think I used these well. It seems like Siege Artillery is best for hiding behind your large infantry lines and taking shots at tall monsters and such. I am not sold on these.
- Lots of Foot Guard. The Foot Guard worked pretty well! Having a bunch of units hitting on 3's is nice, though the ASB Lute around is seeming like a must-take for me though, to let the tankier choices contribute more meaningfully to combats. I liked the Foot Guard and liked both variations of them. I managed ok without the Pikes, but feel like a mix of units should probably be the general approach for Kingdoms of Men, so I will probably run more of a mix next time.
- Mounted Hero with no IW. No IW worked ok, but these heroes have so much utility that I think I will try to fit in two with IW in most of my future lists.
No comments:
Post a Comment