Saturday, July 23, 2022

Kings of War 3rd Edition: #009: KOM vs Nightstalkers [Modified Plunder]

I was lucky enough to get in a game against another new army for me, the spooky Nightstalkers! My opponent is a wargaming veteran, but was brand new to Kings of War. They already have a good amount of minis assembled and primed, including a massive Shadow-hulk, but they are still figuring out their basing and painting schemes and such. Their plan for this game was to pop a few minis off of the priming rods and (temporarily) glue them to the MDF bases to represent units. They ended up breaking 3 minis before they mostly giving up on this idea. So, most of the Nightmares here are blank bases, which is even scarier, right? They could be anything! 

Lists and Scenario

I have never played against the Nightstalkers before. I knew that don't get Inspiring normally, and instead needed to borrow it from their opponents using units with the Mindthirst special rule. That is just some wild interplay that should be neat to see evolve over the next few games against them. You would think that the army would be weak to ranged attacks then, but the army-wide Stealthy special rule seems to mitigate that vulnerability. They seem like a very strong and very interesting army with a lot of insidious tools at their disposal! My opponent brought the following for this first game: 

Ouch! I was not expecting anything so strong! He topped out at 990 points, and although there we a few magic items or Screamshards we could have popped in quick, he opted not to, I think in order to get a feel for the base units. Establishing a base line for each unit seems like a good idea for an intro game after all.

The Scarecrow horde is a nice tar pit; Doppelgangers are complicated but seem like a lot of fun; Reapers are little blenders; Butchers seem like tanky anchors; and the Mind-Screech and Shadow-Hulk seem like fun and capable monsters. This seems like a pretty solid foundation and should serve him very well going forward. He showed my some pictures of his AoS Sylvaneth army and I am very excited to see what he paints up for Nightstalkers!

I brought the list above, which, wow, was not the list to bring against Nightstalkers! Going into Battle 006 about a month ago, my opponent for that game was unsure what list he wanted to bring, so I had created a few introductory lists at both 1000 and 1250 points. I ran Version 1 at 1250 that intro game, so I figured I'd just run the Version 2 at 1000 for this intro game and mark that off my long list of lists to try. Version 1 was a little stronger and a little more mixed with its unit composition, while Version 2 here was more basic, with doubled units Shield Wall, Fanatics, and Mounted Scout. I thought this would be a very easy list for a newcomer to grasp, but it is pretty squishy with a lot of Def3 units.

The list draws some inspiration from the old TVI Style, namely a focus on infantry and counter-attacking, small cavalry units, and using combined arms to win. (See here for the old Tactica repost; here for some blabbering on some parallels between it and with Kings of War, and here for some additional list and lesson discussions.) Mostly, it's some regimental checkerboarding with small, supporting elements. If I was thinking ahead, I would have deployed more in that style as well, but I was not so you get mistakes and regimental checkerboarding. With this list I was looking to test out the following:

  • Ballista. How would the cheap war machine do, especially against the stealthy Nightstalkers?
  • Shield Wall / Fanatic checkerboard. This is simple, but is this too flimsy with just the cheaper Shield Wall and squishier Fanatics?
  • Talisman of Silence. I posited a question in a Facebook group, wondering what else besides the Lute might be worth running on an ASB. This (granting Mindfog) was suggested a few times, and is up to test first. How will it perform, especially against the uninspired Nightstalkers?
  • Mounted Scouts. I do like my troops, but need to continue to teach myself how to use them best. With a bad list-match up, will I make good use of their melee abilities?
  • Mounted Hero with IW. I am liking the Hero, but need to get better at using IW. How will I do?
  • Nightstalkers. This was my first game against them. What did I learn?

About 1/3 of my list is shooting (and most of that is base 5+ shooting!), which seems like a terrible idea against Nightstalkers! With a strong list from my opponent as well, I figured I was in for a rough game, but also felt this should lead to some good tests for myself and for my list. How would I fare with such a squishy, unideal army and so much shooting against a strong and stealthy army?

This being an introductory game, we followed most of my own advice for running one, which you can read more about here. We talked through the existence of rules for rolling for sides and for trading deployments, and for first turn decisions, but we did not do any of that. We deployed everything all at once while talking through things, and I gave my opponent first turn to get them making decisions and experiencing the rules right away. With my opponent being a wargaming veteran, we decided not not run Kill. We talked it out, and I offered up Domination, Invade, and Plunder as the possible scenarios to choose from. I didn't want to deal with picking up Loot tokens, but figured these could all be good and engaging examples of the scenario-focused games that Kings of War can result in! My opponent opted for a modified Plunder scenario, using three tokens. 

Table and Deployment

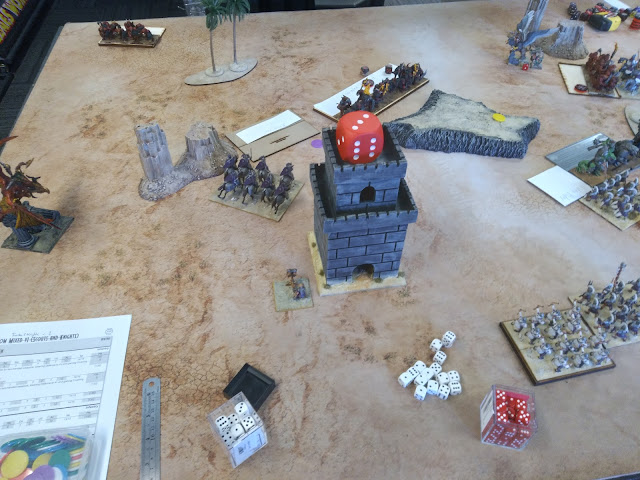
With just 1000 Points each (well, almost; my opponent was still running 990), we decided to shrink down to a smaller 4' x 4' table, using the suggested modification to the scenario for the smaller game. We have three tokens along the center line of the field, with the central objective worth 2 Points at the end, and with each of the the side ones worth 1 Point. We were on a big, normal 6x4 table, so we just tried as best we could to block that off with our travel bins and such. We weren't going to be sticklers for the table edge here, and hopefully that shouldn't come into play.

For the terrain, the Hills were Height 3, the graveyards Height 1 difficult terrain, and the spooky Forests height 6.

Being an intro game, I had just plopped my stuff down more or less to help talk things through with my opponent and their own deployments. Trading drops would have gone much better for me I think. Alas!

Rawr! That dragon is really cool. And the Mind-screech is the King in Yellow from Cthulu Wars. Lovecraft / Mythos stuff is also hobby of mine. The King in Yellow was incorporated into the Mythos, but is actually from a book of short stories by Robert W. Chambers, originally published in 1895 (so predating all the Lovecraft / Cthulhu stuff). It's a neat read if you like the Mythos. It's not a great read, though, but it is neat to see where Lovecraft and other authors drew some inspiration from.

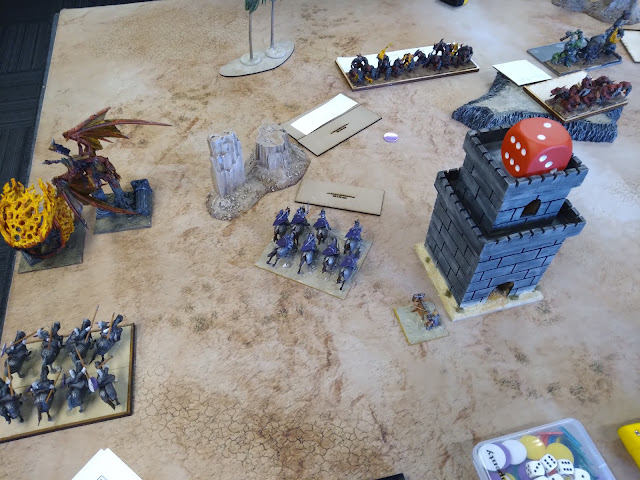
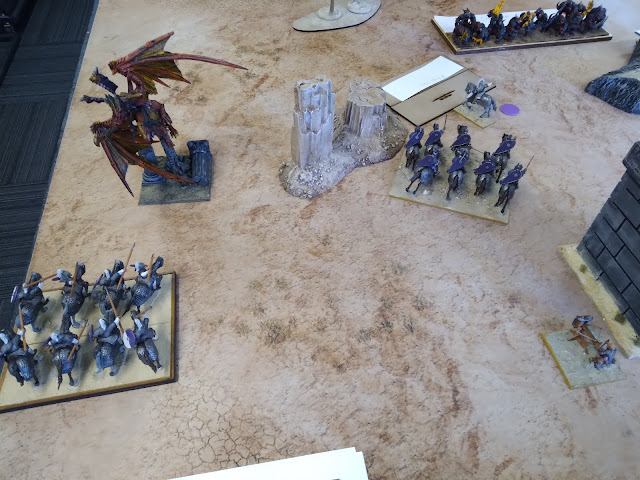
For my opponent's extra-stealthy list, moving from my left to my right, we have the Doppelgangers, a rad undead Dragon subbing in for the Shadow-Hulk that could not stand up on its own, the Horde of Scarecrows taking the center, the troop of Reapers screening the Mind-screech, and lastly the fearsome horde of Butchers. My opponent felt his army was stronger and decided to choose violence, deploying everything as far up as it could go. It seemed his goal was to box me out and draw me into combats.

The humans cower pretty far back. And they are apparently so nervous they deployed their war machine like a big dumb-dumb behind the forest...

Having the weaker list, I deployed back. Both my scouts went on my far-left, hoping to get around, but the Doppelgangers and giant opposing them would make this difficult. Next we have the hero, and the start of my little checkerboard and ASB with the Talisman of Silence. The checkerboard continued on,  occupying my center, with the Ballista going in the corner and the Bowmen taking the woods.

I did not do myself any favors with my deployment either! The ballista should be front and center I think, probably around where the Shield Wall in front of the ASB is. It has a bit of a lane, but I didn't even notice enough to pivot it toward the center, and it disparately needs like of sight. The Bowmen in the woods is fine. The scouts should have been split up, one on each flank I think to create some more pressure against my opponent with their larger charge range. I think all this can be blamed on the blob deployment. I have 4 drops over my opponent, and the Scouts and Ballista would have come down later and with more thought. 

Top of Round 1: Nightstalkers

Taking advantage of deploying up and going first, my opponent tried to be aggressive as the game got going. The Doppelgangers and Shadow-hulk moved up about 10" each to threaten the side objective on my left. The Scarecrow Horde got gummed up a bit by their Speed 4 and the terrain. Had my opponent deployed them a bit further to the right, they could have ignored the graveyard and gone up more aggressively as well. I didn't notice this either as my opponent was deploying, so instead the Scarecrows shuffle around a bit. The Butchers moved all the way up to try and pick a fight over the side objective on my right very soon, or maybe just barrel into my lines if the mood struck them. The troop of Reapers sort of followed up and into the nightmarish wake of the larger Butchers, pivoting and moving. 

The Nightstalkers advance!

I had deployed far enough back that I was out of range of the Mind-shreech's Lightning Bolt. While it has access to a few other spells, my opponent opted not to cast any. 

Bottom of Round 1: Kingdoms of Men

On my right, the Bowmen shoot into the Butchers, but nothing hits. One unit of Shield Wall needs to scoot backwards to give the Ballista a shot, as the war machine was very poorly deployed. The rest of the center shuffles around, trying to see what might threaten them first. The Butchers are a big threat, as is the Shadow-hulk, and I think I am going to need a lot of forces to tackle either. Even the smaller Reaper unit is likely going to take some effort to remove... so the humans are cautious going into this fight, and even with the scenario, are not eager to advance too quickly.

Shooting against Nightstalkers is not off to a good start. Go figure.

On my left, the duo of Mounted Scouts move forward to loose against the Doppelgangers, with nothing hitting against them either.

Not a good start at all. 

This was not a great start for me. This kind of "small arms fire" is not great generally, but even less so when I'm hitting on 6's. Go figure. The only bright spot was the Ballista shooting against the Scarecrows and getting a single lucky wound in.

Top of Round 2: Nightstalkers

My opponent continues to be aggressive, moving the Doppelgangers up again, while the Shadow-hulk leisurely advances and pivots to cover the Doppelgangers. The giant abomination is safe from any of my infantry, even with good Wild Charge rolls.

My opponent pointing out his cunning trap, should I wish to charge the Doppelgangers. 

The Scarecrows again pivot and move, lazily moving up to almost contest the central objective. The Butchers move up, staying out of max charge range from my Fanatics, but looking to start a fight soon. The Reapers move and pivot to get behind the brutes to cleverly use them as something to shield them from line of sight, which, yeah, seems like a good play generally. 

The Fanatic unit pictured will get zapped.

Unfortunately, my opponent seems to have brought the better ranged options here, and his Mind-screech deals 3 damage to my right-most unit of Fanatics. If there is a bright spot here, it's that my opponent might be being too aggressive? Things are moving up along the wings, but the center is lagging a bit behind, so I might be able to isolate something and win a fight if that trend continues.

Bottom of Round 2: Kingdoms of Men

The Bowmen decide to move up to take the hit from the menacing Butchers. Unfortunately, starting in difficult terrain, I don't think they can move at the double to really block them up. So they move their 5", and shoot. incurring penalties for moving and for shooting against a Stealthy unit. Obviously nothing lands. The Fanatics and Shield Wall respect the charge threat of the Butchers, and should be just out of it if I recall correctly, but do move up for a potential counter attack themselves. Bowmen for Butchers seems like it might be a good trade if I can swing it.

Poor Bowmen.

I think this could be argued as bad plays? The Bowmen are in the forest, which is difficult terrain. They maybe should have stayed and baited the charge from in there, causing it to be hindered, with the Shield Wall and injured Fanatics still threatening a reprisal. 

My concern was that I expected the Bowmen to be splattered in one go. If I stayed, then in my counter-attack the Butchers would have repositioned and in the forest, so I would now be charging into the woods to try and remove the stronger Butchers, and getting into a grind with them. Getting my Bowmen out of the forest seemed like a better call, and insured that my Fanatics at least were unlikely to be hindered when I went to retaliate.

This is not the ideal use of Mounted Scouts.

I think the Ballista shoots at the Mind-screech, but misses decisively. On my left, the Scouts scoot back to avoid the trap, instead using their steady-aim to fire their shortbows into the Doppelgangers again, and again, nothing goes through against them. Hitting on 6's is just incredibly rough and I am really feeling pressured here with my speedy elements basically pushed into a corner. 

Top of Round 3: Nightstalkers

My opponent decides to take his foot off the proverbial gas, and the Doppelgangers actually back up to hold the objective now, daring me to come and get it. The Shadow-hulk simply swivels slightly to get a few more things into its line of sight, though everything is out of range currently. The Scarecrows just pivot and move again to secure the very valuable central objective. 

A bit of a reprieve it seems.

The Mind-screech again shoots lighting into the Fanatics, dealing another three, but the Nerve Check comes up juuust shy of the rout result my opponent wanted, and the crazies thankfully hold.

My poor, sweet, squishy Fanatics...

On my right, the Butchers take the offering of Bowmen, and charge in. Amazingly, they only deal 5 damage, and the Bowmen hold! I thought the Butchers were 3+, not the 4+ in Melee that they really are. This was a really lucky result for me.

Bottom of Round 3: Kingdoms of Men

With the Bowmen holding, they counter-charge the Butchers while the Fanatics hit the nightmares in the flank. It would have been another front-charge, so I can't fit the Shield Wall into that combat, so they hang back in reserve, to help deal with the Reapers that are coming in soon.

The Fanatics vent their frustrations out on the big, stealthy Butchers.

In the center, my Hero runs up to get in the way of the Scarecrow Horde. He's been held back so far, but I don't want the Horde getting into any combat yet. This blockage allows me to move some stuff into position to maybe threaten it next turn while still respecting the Shadow-hulk's charge range. 

At least I think I was respecting it? The Fanatics were safe for sure, as the range ended just after the edge of hill in front of them. But the Shield Wall looks like it might just within range of the giant.

On the left, I decide to charge both Mounted Scouts into the Doppelgangers. I didn't get a copy of my opponent's list, and although I had been checking units in the book, I had gotten myself quite confused as it all turns out. I thought this was a pretty squishy unit that relied on its quirky rules to compete, but it's not, and it has good Nerve, and this was a very poorly-planned attack. I deal a total of two damage to the unit, which isn't great. It isn't even average, not that that would have helped enough.

This is a very big mistake from me. Even though shooting was very ineffective, I should have just sat tight here and done that again this turn. The Scouts were tying up nearly twice their amount of points and I should have continued to slow-play things here.

Bloodied, but victorious over the Butchers!

At least the other combat went well, and the Fanatics got the Butchers into some healthy double-digits for damage. Victorious, both reformed. I am hopeful that despite the injuries, I can persevere here, trading a unit for the Reapers next turn and winning this flank.

Top of Round 4: Nightstalkers

My plan was not to be. The Mind-screech tossed lighting into the Bowmen, damaging with most of the bolts and routing them now. The Reapers clipped the graveyard, hindering their charge against the Fanatics, but the Fanatics were routed as well. 

I had opted not to pop Indomitable Will on my turn. Against 30 attacks, I figured the Hero was a goner, and I decided I wanted to risk it to keep it and maybe remove a wavered result next turn if things actually went ok for me. As it turns out, Scarecrows only hit on 5+ and only 5 damage snuck in. The Nerve check was low, and the Hero held, all of which were incredibly fortunate for me. 

Double ouch! I figured I'd lose a unit for sure, but Lightning Bolt 6 has been pumping out some significant damage this game.

My opponent capitalizes on my blunder with the Mounted Scouts. The Doppelgangers are able to counter charge one unit, while the Shadow-hulk crashes into the other, and my Scouts are no more. The Doppelgangers reform 90 degrees to face the center, ready to move up to take the side objective next turn. The giant swivels as well, looking back to try and scare off anything threatening the Scarecrows with some violent counter-attacks in the coming turns.

Good plays by my opponent here to capitalize on my errors with the Mounted Scouts. 

It was a huge turn for my opponent, removing some 400+ points of my scoring units. A big part of that windfall was from me attacking with my Scouts in a very bad move after misreading the stats of the Doppelgangers, so I should take the blame there, and my opponent the credit for the counter-attack. There is no way my attack was going to work, even if I had some amazingly hot dice, and this was again a very blatant error on my part.

Bottom of Round 4: Kingdoms of Men

Things are not looking great for me, though with my hero holding, the Scarecrows are potentially vulnerable. The Hero, Fanatics and a unit of Shield Wall charge into them, and beat the straw out of them, getting them up to 17 damage or so. The plan was to try and punch through them and get out of the Shadow-hulk's charge arc, needing (I think) a 4+ overrun. Both the Fanatics and Shield Wall attempt to overrun. The Fanatics roll miserably while the Shield Wall does escape for now with a 6. The Hero is out of range of the giant, but now pops Indomitable Will now to try and survive the Lighting Bolts from the Mind-screech that are probably coming up soon.

Technically I'm victorious over the Scarecrows, but this feels like a mixed bag of success.

I commented on it almost immediately, but I think instead of charging with the Hero as well, I should have disengaged from the Scarecrows, and thrown him right into the path of the Shadow-hulk instead. My opponent offered to let me take that back, but I opted to see how the combat went instead. Looking at this again now, the bouncing Hero would still have been a better play I think. If the combat went poorly for me, the giant should still be tied up on the Hero next turn, giving me another chance at the Scarecrows. It's hard to say.

I should note that the ASB moved back to remove his Inspiring for the Scarecrows, and from my own units too. I didn't now if I could best them in one go, but I decided that I wanted to try. The ASB has been busy all game casting Mindfog. It continues to land, but the Nerve checks do nothing. Being Stealthy, the Nightstalkers have suffered only one ranged damage so far, and I am not grinding against anything. So, against fresh units, I am fishing for boxcars to get a lucky Waver on things to stutter up my opponent's moving. It's a long shot, but nothing is transpiring on the Nerve checks.

My other Shield Wall attacks the Reapers, and with 4+ to hit and 4+ to damage, they do a perfectly average 3 damage from their 12 attacks. I was hoping for a second unit in this fight, but I also thought the Reapers were Def3, so I'm not in the best spot. I roll a low Nerve check and the Reapers stick around, which can't be good for me.

Top of Round 5: Nightstalkers

The Doppelgangers hold the side objective while the Shadow-hulk crashes into the flank of the Fanatics, destroying them. The Reapers counter-attack the Shield Wall and remove them as well. Both Nightstalker units reform to eye up the remaining Shield Wall...

Somehow, my Hero survived.


I believe we talked through potential targets for the Mind-screech, and I think we decided that targeting the Hero to further isolate the Shield Wall was the right call. Even Inspired from popping IW, the Hero is wounded, and it shouldn't take much to see him off. Luckily for me, the Mind-screech fails to damage anything from the look of it.

Bottom of Round 5: Kingdoms of Men

The turns are passing pretty quickly now, especially for me, as I am down to almost no units! The Ballista fires against the Reapers but misses completely with a pair of commanding 1's. The ASB tries the Mindfog spell again, now also aiming for the Reapers. Unfortunately the ASB is inspiring them, but I still squeak in a waver result.

Getting to be a surprisingly close finish!

I sidestep the Shield Wall and now throw the surviving Hero in the path of the Shadow-hulk. Despite the dragon proxy, the unit is still the giant, terrestrially-bound Shadow-hulk. We measure it out, and the giant can't connect with the Shield Wall on an overrun either, so the Shield Wall is as safe as they can be going into Round 6. 

So, my Shield Wall control the center objective for 2 points, while my opponent controls both the side objectives for a total of 2 points total as well, meaning we have an even game going into the last turn.

Top of Round 6: Nightstalkers

I apparently did not take a picture here. The stunned Reapers simply hold and the Mind-screech floats back a bit, throwing more Lighting Bolts at the Shield Wall. The dice go a little cold again and only 1 damage slips in against the humans this time.

The Shadow-hulk stomps down the hero and overruns as far as it can. It rolls high and gets close enough to contest the central objective, but the Shield Wall still holds it with its higher Unit Strength.

The Doppelgangers are too far to charge the Shield Wall, but do inch up a bit towards the center objective while still holding the side objective on my left.

Bottom of Round 6: Kingdoms of Men

The Shield Wall simply changed facing, getting the Reapers and the Shadow-hulk into their front arc.

The Ballista again fires into the Reapers, this time connecting and dealing three damage to it. With that already taking a Nerve Check now, I opt to throw Mindfog at the Shadow-hulk, again fishing for boxcars and a lucky waver... but only roll up 11 for the check. Uninjured, the abomination does not care how close my roll is. Fortunately, the ballista bolt is enough to rout the Reapers, so my turn ends with some good news.

Round 6 ends with a 2-2 tie! The Shield Wall still hold the more valuable center, while the Nightstalkers hold both side objectives. 

Unfortunately for me, we do roll up a 7th round...

Top of Round 7: Nightstalkers

The Shadow-hulk charges the Shield Wall, and they take 4 damage but hold firm.

My opponent also makes a very good play here. I had written off the Doppelgangers, as I figured they needed to hold the outer objective. But, in moving and pivoting them a bit last last turn, they are now able to move their full 10 inches this turn to just be touching that center objective. Between it and the Shadow-hulk, my opponent now wrests control of the center from me, with a higher total Unit Strength. A very good play by my opponent!

Bottom of Round 7: Kingdoms of Men

I want to disengage and charge the Doppelgangers ... but I can't get seem to get there without clipping the giant's titanic base on the charging pivot. So the plucky Shield Wall counter-charges the Shadow-hulk, dealing a surprising 3 damage, but that is nowhere near enough to make any difference in the outcome of this game.

A marvelous final play from my opponent!

The extra turn has done me in, and the Nightstalkers manifest a 3-0 win!

Game Conclusion

Oof, I did myself no favors this game! With this being an introductory game though, the goal wasn't to win, but rather to get the new player exposed to the game. So, mission accomplished! I had a great time and so did my opponent. Still, we can dissect my own list and play...

It was a neat list to test. All the doubled unit make for a good and transparent list for an introductory game, and I am thinking I might build off this list for future intro games. But this was a pretty bad choice to run against a generic Nightstalkers list, let alone one on the stronger side of things. I think I did 4 ranged damage the entire game, with three of it coming in hot at the bottom of Round 6? That's not a great use of 1/3 of my army.

My deployment was pretty bad too, and definitely suffered from me just plopping stuff down for the introductory game. I don't think I even registered that that was a forest in front of the Ballista while we were setting up, so I should have taken a minute to think through some stuff. I think I just defaulted to "stick the war machine near the corner", but having the Ballista front and center should be my mantra the next few games with it I think. Infantry near the war machines seems like it's running me into some problems. Sticking it in the corner on a faster flank might be a good alternative deployment idea though, as the fast elements should clear out and open up the field of view.

While I took some loose list inspiration from TVI, I should have taken it all further, and deployed in groups to mess around with that. Scouts - Shield - Fanatics - Fanatics - Shield - Scouts might have been a neat deployment to play around with as a main battle line. I gave no real thought to deployment ahead of time, and it was a very busy week for me leading up to the game, so I wasted the opportunity here a bit I think.

The Mounted Scouts were some good distractions early on, but I threw them away. The Doppelgangers have very unusual stats and I thought they had a far squishier Nerve than they actually do. They are on the elite side of an infantry regiment as it turns out, with 15/17. Again, even with hot dice, there should be no real way that double-charge from Scouts would break that unit, and that is just a pair of errors from me to toss those away for nothing. And given their good speed, splitting them up would have been the right deployment call.

For a first game, my opponent brought a frighteningly competent list and played an amazing game. On their turn for Round 6, I knew the Doppelgangers were still out of charge range to the Shield Wall, so didn't think anything of them moving a bit. However that proved to be quite the sneaky play to seal the win for them, so kudos to them for seeing that!

Testing Conclusion

  • Ballista. As mentioned repeatedly, my deployment was quite poor and could have been improved in so many ways. Against the Nightstalkers it wasn't terrible, as going from 4's to 5's to hit feels better than from 5's to 6's or even 7's like the poor advancing Bowmen, and if I had set up a better lane of fire it could have done more; it didn't have a shot during some of the middle turns. Just think if I had stuck it directly opposite that Scarecrow horde! The Ballista worked better than all the small arms fire, but that is not saying much. Lessons hopefully learned here about deployment of it though, and we'll see how I do the next time I run it.
  • Shield Wall / Fanatic checkerboard. Not my favorite combination, and probably not one I'd run again in more normal circumstances. Both are just really squishy. But they both seemed great for an introductory game, and were nice and easy to grasp. 
  • Talisman of Silence. I did attempt the spell every turn, and on most turns it did hit. My turn of Round 5 was the only success the spell had though, finally getting the waver against the wounded Reapers. Most of his units were large and with good nerve, so nothing was really in danger of routing and I was constantly fishing for boxcars just to get the lucky waver with this. This was neat to have, and might play well with all the bow-fire I brought... if I were against a different army. I don't think I would take this over the Lute in most instances though, so there might be a hierarchy of kit options for me. 
  • Mounted Scouts. Obviously knowing the correct stats now, I should not have charged the Doppelgangers. I thought the Doppelgangers had a very low Nerve, and they most certainly do not. While they commanded some attention for a few turns, ultimately, the Scouts were not used well at all, and I should have split them in deployment to make better use of their higher speed on both flanks or to better support both my Fanatic units, which needed to do the heavy-lifting for damage-dealing this game. Lessons learned.
  • Mounted Hero with IW. I took a gamble not popping IW when the Hero went up against the Scarecrows. Keeping it available to cancel a waver did seem like the right call though, so I am happy with how I used it.
  • Nightstalkers Generally. This was my first encounter with the Nightstalkers on the table, and they seem like a pretty strong army. Without needing to bring Inspiring units, they can kinda bring an "all gas" list with a lot of serious threats. Stealthy did wonders for them this game, but I should do a little better in larger games as this is close to all the shooting I would want to bring. I am very excited to see how my opponent hobbies up this army and expands it in the future! Many thanks to them for the game, and I am looking forward to seeing them across the table again very soon!

Thursday, July 21, 2022

Hobby Update: Ogre Warlocks, Boomers and Siege Breakers

The Stormcast Ogres are really coming along quickly now, but need some leadership. I got one caster mini (a Knight Incantor, I think?) from a magazine, and this was my test model for the army. I picked up bodies and bits for two more on ebay, They were missing heads and pauldrons so were pretty cheap. Having bought the Shooters new, I fortunately had some spare bits to make use of the bodies, and will run all of them all as Ogre Warlocks. 

Not the best picture, with we have some warlocks with staves.

These heroes are based on rounds, just placed atop some 40mm square MDF bases. The MDF square got most of the same treatment a tray would: a bit of paste, brown base coat, then some greys for dry brushing. I figured I would leave the tufts off them. I feel like they would just get banged up. 

The Warlocks are pretty neat in 3rd Edition. They are spellcasters with Inspiring and Lightning Bolt 3 as a base. They also have 2 attacks, CS1 and Brutal, so may be able to contribute more than usual if they are disordered by something. I wouldn't aim to get them into combat, but it's neat to see that as a potential option I suppose.

Next up the the Boomers, who should be at home just about anywhere. They have 4+ to hit with melee or ranged attacks, and Steady Aim too! They also have CS1 and Piercing, so should put out some reliable damage where ever they are. With only 12" range on the Boomsticks though, they will likely see a mix of action each game. 

Castigators as Boomers. The magic grenade things don't look too aerodynamic.

One unit is just the Easy Build box, the others were picked up already assembled on ebay, as I found them for cheap and went "why not?" All the Easy Builds have pretty complex bases, but I think things are working together overall. 

My last regiment of Boomers are some Easy Build Farstriders, picked up a long while ago, with the aim to trade a few games of Warhammer Underworlds for small games of Kings of War. They aren't great matches but looked similar enough to the Castigators with something that shoots and had more vertical bow limbs that I figured I would use them as "fancy Boomers", with a magic item like Sir Jesse's Boots of Striding or something. Everything about them is a bit "extra" and I dig that.

Farstriders, as fancy Boomers. 

And then lastly for today we have these... Annihilators, I think they are called? They looked like pretty ideal Siege Breakers, so picked them up despite the $30 new-on-sprue price. 
 
Big shields!

Siege Breakers have been a pretty highly regarded unit, with their great stats and good abilities. A regiment is not the best way to run them, but that's what I got. I don't feel like buying any more right now, so this will have to do.

My weird assortment of units should now be a bit over 2k? That's not bad for a loaner army and a side-project over the last few months. The easy painting scheme has definitely helped speed things along, and we are most of the way through everything. Just a little more to go!

Wednesday, July 20, 2022

Hobby Update: Stormcast Ogre Warriors

And with another bout of hobbying, I was able to finish off some more fancy Stormcast Ogres!

One exceptionally fancy-looking horde.

First up are the Retributors, which I am going to run as some kind of Warriors. Normal Warriors with the Brew of Strength? Warriors with the weapon vs armor swap? Warriors with some kind of magic item? I am not sure yet. The first seems most likely? This is an unlocking horde though, so will be good to have around, whatever it ends up being.

These were originally just the duo of Easy Build Retributors, which I had picked up for D&D. They were originally going to be a duo of adversarial Goliath Paladins (brothers) serving a zealous religious order. The hobbying plan was to have wispy cotton ball bits coming out of the hammers, like smoke from a censer. The gaming plan was to have then hunt the party, to well, "censor" them. I had hoped to stealthily light some incense or something for each encounter, and whenever someone smelled it and commented on it, ta-da the encounter would be on. It was a good plan, and would have topped my previous best campaign pun, when the party went to seek out a black market arms dealer and ended up meeting with a small-time necromancer. Good times. 

Anywho, I was going to use the duo as Sergeants or Warlords, but found a trio online for around $15, and figured I'd bump these up to a fancy horde instead. The minis are repeated a bit (2x2x1), but with angling and such this shouldn't be too noticeable on the table.

...and then 5 regiments of Warriors. Or, 3 Hordes run 5 models strong.

The rest are oodles of Liberators, to be run as normal Warriors. They certainly look the part with armor, shield, and comically large hammer. That looks like Def5 and CS1 to me! I had picked up a trio of minis from the Easy Build box, and then when I went to start this project, I found that they are not a loved or competitive choice and picked up a bunch more on ebay for pretty cheap. I think I got the remaining 12 for under $50? Most came assembled, but that is fine by me. This is probably way more than I will want or need, but it's nice to have I suppose. 

More Ogres to come soon!

Tuesday, July 19, 2022

Thoughts on TVI Lists

I had some pushback from a reader of my battle reports for describing a game list of mine as "TVI Style". Normally I would not care too much; I don't particularly like these kind of discussions and usually don't find them very helpful. I will rarely run the same list twice here, so when I describe a list, I am not trying to be authoritative; rather I am trying to quickly convey something about my thinking for that list: what ideas I am looking to test; how I think it will play, etc. 

However, the pushback on this list came from one Randy Atchley, so I took it seriously. He played Tim Walker aka The Village Idiot (TVI) back in the day, and adopted the style himself for a time, and even went to the trouble to write the old original TVI Tactica that I reposted to this very blog. He would be what historians call a primary source - someone or something directly related to the topic by proximity and participation. With all of those credentials, I figured that it would be worth a post here to look at the criticism of what I called "TVI Style" and compare some lists.

Please note that the pictures are a bit abstract, generally zooming in on part of the deployment, and not covering the whole table, or even our whole side. I just want showcase the general line of battle for each list and explore very basically how it wants to operate. Also, these are meant to be from our perspective / side of the table, with our opponent's side upwards and out of frame, if that wasn't readily apparent.

TVI's Original List

The original TVI deployment, taken from the Tactica.

The list list that won the GT can be found here, and again this is from 2003 for a different game. The list has an infantry-focus. The larger, defensive Swordsmen blocks (Blue) would take the charge, and small infantry (Yellow) and cavalry (Red) units would retaliate, with the latter also screening as necessary. Heroes are accompanying the Blue units to provide buffs of all kinds, and the war machines would hit things from afar. In short, this list uses a combined arms approach to win fights and games.

My Test List

My TVI-style list with regiments.

I played one game in with the list in question, though I've used "TVI style" to describe a few lists now. The left flank in that game embodied what I was trying to do, and was deployed rather roughly like the picture above. The Blue units were regiments of Pikes or Def5 Foot Guard. The Yellow units were regiments of Pole-Arms or CS Foot Guard. The Grey squares were Ballistae, deployed with the line of battle in order to get line of sight. Blue should take the charges, Yellow should counter-attack. The Mounted Scouts in Red attempt to screen and disrupt the enemy advance to protect the main line. I thought this was a pretty TVI approach.

I will definitely concede some things though. Unlike the original, my units have looser roles and many units are interchangeable. I want the Blue units to take the hit, but anything can be sacrificed in a pinch, and with Bane-Chant, most anything can do ok hitting back. Mainly, this list is just a regimental checkerboard, hoping to win through attrition, which isn't much of a grandy strategy.

Nordberg

An example of the Nordberg List.

Sam Nordberg's list list and variations thereof are pretty common for Kingdoms of Men. Randy puts this forth as the closest thing to a TVI list "as it is designed to be charged." The Red blocks are the flying Generals, spread throughout the line early on to Inspire, and later to get behind enemy lines. The Pike regiments are Blue, as they are the things we'd want to be charged. The small Yellow units are Fanatics, ready to counter-attack against small threats, and the larger Yellow units being hordes of CS Foot Guard, ready and in reserve to attack larger threats, though they might also be deployed in the line too. 

The infantry focus, more dedicated unit roles, and counter-attacking aspects are definitely here, but this looks a bit odd. The smallest units are still Yellow, being supporting counter-attackers, but so are the largest units now. Many think of Kings of War as a "piece-trading" game, like chess or checkers, and the unit sizes used here embrace that thinking, with the units looking to do the most damage being biggest.

So, sure the Pikes can take a hit. But counter-attacking with hordes or Winged Beasts doesn't really fit the "combined arms" feel the original list has. Where is the cavalry? The war engines? While this is a powerful list for sure, merely having things "designed to the charged" doesn't seem good enough to call something a TVI list. TVI doesn't own the "hammer and anvil" concept.

Randy's Theoretical KoW TVI

Theoretical TVI list by Randy. Well, about 2/3rds of it.

Fortunately for the discussion, Randy did offer up his take on a more traditional TVI list for Kings of War: 3 Hordes of Pikemen (Blue); 3 Cannons (Grey); 3 Troops of Knights (red); 3 troops of Fanatics (Yellow); Captain on Horse; ASB on Horse with Lute; Wizard on Horse with Inspiring Talisman and Lightning Bolt 3. It's got 15 Drops, but only 18 US. However the bulk of the US are the three hordes of Pikemen, which are regarded as pretty formidable. Overall, I had to agree; I did like this better as a TVI-inspired list, in many respects. 

Against my test-list, having distinct battle groups felt better. It knows it wants to contest a few major things, and seeks to do that. With running Roman/Byzantine inspired stuff, I had not looked at Cannons much but sheesh, three should do some work against tall, scary monsters I think, and they are the better war machine here. This list looks far more focused than the one I tested out. 

Against the Nordberg, this feels like more of an Old World combined arms TVI list. The the monster fliers and punchy hordes have been dropped in favor of the old trifecta of cannon, cavalry, and infantry. The Blue defenders are buffed into Hordes now, for the sake of survivability, but overall, this definitely looks more similar to the original TVI list.

Against itself, this certainly looks more reminiscent of the old list, but I'm guessing there is a reason Randy isn't running it already! There is definitely some streamlining that can be done, and it seems a bit light on the counter-attack for the needs of this new game. But this is armchair quarterbacking - this does seem like a good jumping off point for faithfully recreating the original list.


I still don't like getting snared down in these kind of list discussions, but I think this one at least was at least a little more constructive than they usually are. I don't think any of these can realistically claim to be "TVI for KoW," though that was never my goal.

To quickly revisit some of my thoughts on TVI, the original list and approach was for an entirely different game, and relied on some odd special rules in order to work and breaking several aspects of the game at the time. We just can't duplicate that effectively in Kings of War.

Each of the three "successor" lists draws on an aspect of TVI's old list; be it the combined arms approach; the defensive mindset; or even just being a more earnest copy of the old list in this new game. These sorts of takeaways are what I am after for my testing though, and it was neat to explore some possible lessons here, especially those drawn from other folks like Randy. This was neat, but I will try to be a bit more precise with my list descriptions in my future battle reports!

Monday, July 18, 2022

Hobby Update: Stormcast Ogre Shooters

I was able to put in a little more work on my small Stormcast Ogres army, and I'll declare a few units done. Unfortunately, both of the finished units are irregular Shooter Hordes. I'll need to do a bit more hobbying in order to unlock them!

The First Horde.

I am working with Stormcast minis, and these are all Judicators with whatever trademarkable name their weapons are. They are big cool crossbows. These were one of the few NIB purchases I made, as I honestly liked the look of the minis since AOS launched. Maybe I should have played Custodes at some point, but the big crossbow + armor was the right amount of overkill that appealed to me. I dig 'em.

The Second Horde.

In 2nd, Ogre Shooter Allies were everywhere for a while. I did not get on that train, but do know they caused a lot of hullabaloo and rules changes. In 3rd, they are irregular, and so cannot be allied in. They seem like a pretty strong shooting platform with 30" range and Piercing 2, but this is mitigated by hitting on 5's and having Pot Shot. They are not terribly mobile shooters. But they are still Speed 6, Def 4, have Melee 4+, CS1 and Brutal, so the Shooters can always resort to just being Ogres if they happen to be threatened. They definitely seem like a potent threat on the table!

I decided to keep this army really simple for color schemes. We've got the base gold, some silver, and then yellow trim and blacks and greys for the armor inserts. The bases are brown with dark grey and light grey dry brushing, and some shrubs for a little extra pop. 

More thoughts still to come in a separate post on trays and converting, but I think I'm getting better at the tray approach too.  Here, they got some very thinly applied basing paste and the same basing colors, topped off with a few matching shrubs. Since I'm using round bases, the shrubs are easy to sneak in and really add a lot I think. This seems like a good way to go when using round bases + trays, no naked MDF, and the unit looks more uniform, full and complete. The only thing I think I need to do is figure out what to do with the edge/trim/lip of the tray. The interior edges look good with the burned effect, but since I got stuff up on the top-side of the edge, I think that needs a color now too...

So the Shooters here are done, and I'm working on a handful of other units now. The original goal was to have 1000 points or so on hand for learner games, but I a) overdid it with my purchases, and should have about 2.5k in Stormcast Ogres, and b) am finally making some progress with local games, so I'm not sure if these will really be needed. So, not sure when any of this will hit the table, but I should have a playable Stormcast Ogre army very soon!

Wednesday, July 13, 2022

Kings of War 3rd Edition: #008: KOM vs Salamanders [Loot]

After finishing up the previous battle, we still had some time, and my opponent and I started setting up for an immediate rematch!

Lists and Scenario

We kept the terrain pieces but moved them around on the table for a new configuration, and we rolled up Loot for our scenario. All three tokens ended up being quite central. We then each produced a new list. The Salamanders continue to look like a really neat army, and my opponent brought the following:


The Rhinosaur Cav is now together as a singular scary horde, the Ceremonial Guard Horde remains, as does the Pale Rider, Clan Lord on Fire Drake and Phoenix. Yikes! The Priest has been dropped, replaced with some Ghekkotah Warriors, which look like nice chaff. My opponent opted for a formation this time, taking the Whispering Scales. They are Prime regiments, and are still Def5 with CS, but gain both Scout and Stealthy, making them pretty darn terrifying. They seem like they can close rather quickly, cause a lot of havoc, and be hard to remove. 

Overall, the Salamanders seem pretty sturdy again, though the list is just 10 drops and 20 Unit Strength. The fliers and monsters are likely going to be an issue again, as will the formation now, but if I can take some good fights, I might be able to remove the big units, and depending on the scenario, win with my humans.


I brought the list above. This list was written up in May, after Battle 004. In that game, I focused almost exclusively on infantry regiments, which were just shredded by the Ice Elementals my opponent brought. While I definitely played poorly, the list itself was pretty flawed as well, as my infantry did not have the tools to protect themselves. There was no way to help dictate fights or trade units. I really needed more reach to more proactively deal with scary things. So up to test here are:
  • Triple Knight Regiments. These should provide some combat reach, letting me hit something before it can harm my infantry. I don't think I have used my Knights all that well in previous games, and they tend to get bogged down. Maybe three regiments will let me do something worthwhile with one of them?
  • Mounted Scout Regiment. I have liked the troops, but wanted to test out the regiment again, to see if I can get a better feel for using it.
  • Siege Artillery. This is now the middle-costing war machine option. Is it worth it?
  • Lots of Foot Guard. Would they be good? Will the extra armor help, or would a mix of infantry units like Pike, Poles or Fanatics be better?
  • Mounted Hero with no IW. I was still brainstorming while writing this. Would one hero without IW be worth taking, or is IW basically mandatory?
My list has got a decent number of drops, pretty high unit strength, but I regarded this as a pretty weak list with some serious shortcomings. It lacks good inspiring coverage for the number of units it wants to bring, and lacks any Indomitable Will to help mitigate that bad coverage. I've got a bunch of units, but not a lot of focus in the list. Despite this, the list was something I wanted to try out. Maybe the more elite Knights and Foot Guard could bully out a win with some air support from my General on Winged Beast.

I had won the roll off and elected to have my opponent go first, as I didn't have any good shots, and wanted to see what his fliers would be doing in the early game.

Top of Round 1: Salamanders

I out dropped my opponent slightly again, and while finishing all that set up without a big plan, I forgot to take final pictures of deployment, so we'll cover that now as we get into Round 1.

Post-scouting moves, and into my opponent's turn 1, in the middle of moving the formation. 

My opponent again deployed rather compactly. The Phoenix and Clan Lord arrived last, and ended up on my far left. The Rhinosaur Horde with Potion of the Catepillar set up just in the desert woods. The Ghekkotah Warriors screened the Ceremonial Guard. The formation were accompanied by their formation's legendary leader and helped screen the Pale Rider and Tyrants. The formation Scouted ahead prior to turn one, but neither went as far as I was expecting.

End of movement for the Salamanders. 

On their turn, the Whispering Scales formation moved up, with one taking the hill. Everything else just moved up. We were playing the little mesas as Height 9 Blocking Terrain, and the Rhinosaur horde moved to threaten the objective to my left. The Phoenix and Clan Lord moved at the double to block off that channel on my far left, aiming to run up and get behind my lines. 

Bottom of Round 1: Kingdoms of Men

With a few exceptions on the flanks, I had deployed quite far back. The scenario scores at the end, so I wanted to put a lot of distance between myself and any the scouting lizards. With the Knights, I figured I might be able to pick something off if my opponent got too aggressive with say, the formation units. Otherwise, I might just get good tests out with the war machines. Either way back and defensive was the way to go with the Kingdoms of Men.

Strong movement forward from the Salamanders with a pretty tepid response.

To combat his fliers, I had added the Mounted Scouts and a unit of Knights to my far left very late. The Clan Lord is strong, but my Pole-Arms survived two turns against it last game, so the armored knights might be able to occupy the flying Clan Lord's attention for a while as well. The knights with shields on their backs had the Pipes of Terror, and were angled at the left token and deployed early on. Everything I had advanced at least a bit on my turn.

The Scouts could move 18, out of the charge arc of my opponent's Clan Lord, but would give their flank to the Phoenix. I didn't like my chances there, and feel like I'd be giving them and a knights unit for free, so on my turn the Scouts move in tandem with the Knights, to screen and protect them. Near the building was a Siege Artillery. I figured deploying  near the blocking building would make it difficult for my opponent to engage it and just move on, so I am hoping to force a choice from my opponent on whether to engage the siege engine or not. In reality, I just had a limited field of fire. This should have been deployed somewhere back and with a better field of view. Siege Artillery seem more like mortars than I was expecting, and feel best just dropping shots from afar at tall units. The central hill kinda messed with lines of sight though, and I tried to get cheeky with the deployment. Anyways, both fire, but both miss this turn. 

The forest screens the speedy advance on the right.

On the other side of the tower was an intrepid Mounted Hero, this time with no Indomitable Will, just to test things out. Near the center was a regiment of Bowmen and a unit of CS Foot Guard. Both advanced cautiously from near my back line. I did not have high hopes for the Bowmen this game. This one was going to be chaff to hopefully set up a good trade for me.

The other Siege Artillery was near the middle, hoping to unleash some hell in the middle, though with the hill, this was a bit of dubious approach. On my right, we have two Def5 Foot Guard with the CS Foot Guard supporting. Near them is the ASB with Lute. The Def5 Guards should hopefully pin something down, and allow for a good trade.

My opponent had nothing on my far right. The palm trees should block line of sight to most things, creating a bit of a corridor, so late in deployment I dropped the General and a unit of Knights here. I did not fancy my General's chances against a superior flier with a breath attack, so the goal was to swing wide here and hopefully envelop my opponent's line before he could do the same to me.

My final unit to discuss was a unit of Bowmen out on my far right near the corner. I deployed these somewhere in the middle of the drop order, and pretty far back. I did not think I would get any meaningful shots off with these, so decided they would sit back, scoot forward slowly each turn, and just look to score the right objective late-game. 

Top of Round 2: Salamanders

Unable to charge the knights, the Phoenix and Clan Lord charge the Mounted Scouts, obliterating them. My opponent opted to move the Phoenix forward, to screen for his Clan Lord. His thinking was that if the Phoenix holds, it could regenerate, and he did not want the Clan Lord damaged this early in the game. However, as the dice turned out for the victorious reforms, I should be able to charge either. 

The angry Phoenix head moves up to try and take the hit for the mounted Clan Lord. The model was really neat, some Endless Spell mini painted up nicely with mostly Contrast paints. The result was a really nice and clean fire effect. Looked great on the table.

The 
Ghekkotahs moved up to screen out my brutal Knights from bothering the midfield just yet while the hordes of Rhinosaurs and Ceremonial Guards lurked nearby. A regiment of the Whispering Scales took the hill, supported by the Pale Rider. 

Good layering by my opponent. The Whispering Scales make for very strong screens. The tables were just 6x4 so apologies all the books and game aids are photo-bombing. 

The Tyrants rolled max for their Wild Charge, and we discover that they could indeed hit a Foot Guard unit, but my opponent elects not to make that long, hindered charge through the desert trees. Instead, the Tyrants move up to threaten anything that might threaten the hill-claiming Whispering Scales, while the second regiment moves to protect the flank of the line from the knights and General. This was a great move, as the regiment is just far enough back that my knights will be hindered if they take that action, just barely clipping the trees if they were to charge in. They'd end up in the front of the regiment too, so yeah, great positioning from my opponent there.

Bottom of Round 2: Kingdoms of Men

On the right, my knights do still decide to spring that trap. I have move units that my opponent, so if I can tie these up 1:1 I feel like that should help me out elsewhere. Though hindered, the Knights do slip a few damage in.

I didn't think my General could break that fight if he committed, so just flew him up and over 10" to threaten other things. 

A unit of Def5 Foot Guard had moved up to take the hit from the Whispering Scales on the hill, but in the center, my siege artillery roll hot, hitting on 6's against the stealthy regiment on the hill, rolling up 8 hits, and wounding 7 times. The unit is routed with some more hot Nerve checks. This was something  quite unexpected, but a very welcome statistical oddity in my favor!

My opponent had apparently just recently painted up his Phoenix model too.
These games were not good tests for it.

On my left, my Knights decide to hit the Phoenix and are able to pop it. This is also a bit of a surprise, but unhindered, against Def3, I dealt 10+ damage to it and as it turns out, didn't need a particularly high check, even with it Inspired, as it turns out. 

My hero runs out from the far side of the building and up to gum up the Rhinosaurs. They can't charge around him, and going through should be a bit of a headache. The Knights meanwhile take the Ghekkotah Warriors for free, devastating them on the charge and seeing them off easily.

Top of Round 3: Salamanders

The Salamanders retaliate. The remaining Whispering Scales unit slugs back against the Knights, dealing two wounds and disordering them. The formation's leader, First Mate Zenthar, takes advantage of being an Individual to turn and charge and slice at my flying General, dealing a wound or two and grounding him. My opponent did have a nice model for this unit, but I didn't pay it much mind, unfortunately. I don't think it was back far enough for me to charge it last turn either, so this is just a good play from my opponent to stymie my General up. Thankfully it is akin to one of my heroes, so not too big of a threat on its own.

Another vicious fight begins in the center for our second game of the day.

The Tyrants and Pale Rider attack the brave Def5 Foot Guard that had moved up to take the hit, and this leads to all sorts of feels bad moments. My opponent tries to quick play this combat the Pale Rider does 9 damage to the Foot Guard. He offers to save time and do the Nerve check now, instead of going through the 30 attacks of the Tyrants. While it is just barely Inspired, I do not expect this unit to stick around, and so I decide that I am ok with that, and agree it'll likely be snake eyes to stick around, so that's what I'll need. However, my opponent had also been shortcutting some Nerve checks, rolling 1 dice twice for when we get down to an inspired but snake eyes situation, which was an approach I was opposed to. That's simply not a Nerve check. He rolls a 1 twice, and then we're at a bit of a dilemma, as he was wanting to do one dice per check. Well, what do we do now then? With two dice being rolled, and both being 1's, that is a Nerve check in total, so we give it Insane Courage, and then backtrack to add the Tyrant's attacks in, who then flub their rolls, adding only 5 damage from 30 attacks. This situation just felt bad all around. We weren't on a time crunch, so should have rolled the Tyrants normally. We also should have just rolled normal Nerve checks; there is no reason to try and shortcut around rolling just two dice. Lessons learned, I think.

Gone? The dang Pole-Arms lasted longer last game. My Knights have let me down here.

On the left, things go better for my opponent. On 3's and 3's the Clan Lord hacks his way through the entire regiment of Knights into double-digit damage and a high nerve check, and the knights are eliminated. That is amazingly disappointing for me; I wanted them to hold out one more turn, but it was some hot rolling for my opponent. In victory, the Clan Lord turns to face the center of the field, way sooner than I wanted it to.

The Rhinosaur Cavalry trample my hero, and decide to overrun, trying to screen out my knights from the flank of the Ceremonial Guard. Unfortunately, they don't roll too high, any while my opponent's goal was to block my Knights out, I still have a good inch or two of their flank that my Knights can most definitely see and easily reach. 

Bottom of Round 3: Kingdoms of Men

While grounded, my General can also see a flank, and I decide to go for a big play this turn, charging the Knights into one flank of the Ceremonial Guard, and the disordered General into the other one. 

A big, kinda risky charge into the Ceremonial Guard. At least I am smart enough not to be attacking them in the front!

In the center, the insane Foot Guard charge the Tyrants, joined by a CS unit of Foot Guard. The other CS unit takes on the Pale Rider, and the last Def5 unit enters the forest to get line of sight to the surviving regiment of the Whispering Scales. Even without CS, I am hoping the good number of attacks can break through that fight next turn, freeing up my knights there.

The big play workd!

The Siege Artillery to the left of the building looks to have scored some damage against the Rhinosaur Cavalry, which is great, as damage is damage here. More importantly though, my big plays pay off! The pincer against the Ceremonial Guard works wonders, and the unit is routed. The General changes facing, and should be able to get the Rhinosaur Cavalry or the rear of the Pale Rider next turn.

Additionally, the Tyrants are cut down, with one victorious unit backing up and one reforming to face the Pale Rider, who did take a wound or two as well. Lastly, the Knights continued their fight against the last regiment of the Whispering Scales, and waver them. My Knights have more attacks, and are starting to win the engagement on their own it seems! This was a very solid turn for me.

Top of Round 4: Salamanders

Unfortunately, my Knights on my far-left had failed to hold up the nasty flying Clan Lord at all, who had victoriously repositioned to face the center field on my opponent's last turn. The Clan Lord is an unbloodied flier, and a rather significant threat. I was really hoping the Knights could hold him up for at least a turn.

This is the fate that awaits those daring knights. My opponent will be happy to take those charges.

On this turn, the Clan Lord and the Rhinosaurs slam into the Knights (both in the front at least), eliminating them with ease. Both elect to back up as I recall, to avoid a possible flank charge by my own flying General on Winged Beast.

End the turn for the Salamanders.

The Pale Rider counter-charges the Foot Guard that had hit them, and waver the human unit, but it is out numbered on the field.

Bottom of Round 4: Kingdoms of Men

I don't want to commit my General against the Pale Rider. Sure, I could maybe break it, but I feel like my General will be taking a charge himself next turn. So, instead I have him nimbly pivot, move 10" and pivot again, to stare down the flanks of the Rhinosaurs and Clan Lord, trying to turn the tables with some pressure.

My general opts to live, hoping the infantry can drag the monstrosity down.

Wavered, the one unit of Foot Guard cannot retaliate unfortunately. Their unbloodied comrades try and take the beast in its flank. Alone though, they only hurt it. The Def5 ones do make it into the flank of the Whispering Scales unit this turn, and they and the Knights are able to finally win that fight. Both will turn to face the center of the field.

My Bowmen sidestep to get out of the charge arc of the Clan Lord and Rhinosaurs. I am keeping them close though to try and snag an objective at the end here. Both Siege Artillery fire at the Rhinosaurs, as to the side-stepping Bowmen, but nothing connects. 

Top of Round 5: Salamanders

The flying Clan Lord and Pale Rider charge the frightened Foot Guard, scattering them. The Rhinosaurs take the flank of the unbloodied unit of Foot Guard that had come to help their comrades on my previous turn and break them as well.

The Clan Lord turns to get my General in his front arc. We don't think there is a way to get both the Bowmen and my General in the front, so the lord gives the wimpy human Bowmen the flank. 

The leader of the Whispering Scales seeks revenge against my last unit of Knights, dealing 1 wound to them, and disorders them. My opponent has used that unit very well this game to disrupt me.

Bottom of Round 5: Kingdoms of Men

We are both starting to run low on units. I have far more Unit Strength on the field though, and think I can still win this if I am smart about it.

My sneaky Bowmen (remember them, on my right?) have not shot at all this game. But after much creeping about, have made it to the objective on the right, as planned. Unfortunately, the Knights are stuck here, so my foresight and their arrival isn't as impressive as it might have been.

The Siege Artillery shoots against the Pale Rider, and my dice go hot again. Both attacks hit, blasts rolls are high as is the damage and the monstrosity goes down! Writing up the report now though, I don't think we checked for the 12" safe-zone from Indirect Fire. The building did stick out a ways, so it is not the best indicator, and this would have been very, very close. I should have remembered to check that, so double apologies to my opponent for the hot rolls to a potentially illegal shot. 

At the end of the turn, my opponent is down to just their Clan Lord with 1 Unit Strength, and the Whispering Scales leader, who has 0, being an individual.

My big play this turn is to remove the Rhinosaurs. My General hits their rear while both my remaining Foot Guard attack their front. My Knights countercharge the Whispering Scale Leader, as they are going to have a tough time extricating themselves from him, and with all my attacks, figure it might be the better play to try and just run him over. Alas, the Knights fail to rout the leader this turn, and will be stuck in another slog. My play against the Rhinosaurs here pays off, and they are seen off the field. I forget to reform anything, but am just out of the charge arc of the Clan Lord, which I was aware of.

Top of Round 6: Salamanders

The Clan Lord is my opponent's last remaining scoring unit, and flies to secure objective on my left. The distance isn't that far, and to use its two nimble pivots to face the center objective and roast my wounded, insane Foot Guard. They need double 1's to hold, don't get them this time, and flee.

Bottom of Round 6: Kingdoms of Men

My Bowmen (and Knights) secure the right objective, with the Knights counter-charging against the Whispering Scales leader, wavering it this time. Again, this was just a very good use of the hero unit by my opponent these last few turns. Things fell apart around him, but the scaly leader was used very well.

Down to the wire...

My Foot Guard hold the center objective, and my General flies to contest the left objective. the Bowmen turn to face the left objective. They and both my Siege Artillery fire into the Clan Lord, but nothing hits. The Clan Lord survives entirely unscathed, but nearly the entirety of its clan has been obliterated by the more numerous humans.

A 2-0 Victory to the Kingdoms of Men!

Game Conclusion

It was another very close game! I very much enjoyed meeting my opponent in person and getting a few games in against a brand new army. I am very excited to see what they bring next time around!

With two games in now against the Salamanders, I think we can critique my opponent's list a bit? They seem like a cool army with some neat options and a lot of hobbying potential. 

The Whispering Scales are terrifying to me and those worked well. The Rhinosaurs seem fun, and I personally liked the two regiment set up. Running all these together, they seem like they could give some fun disruption options for the army, drawing fire and messing with enemy lines and enabling hammer units to get into position. 

I don't think the Phoenix was used well either game. I don't think you ever want that in combat, and I think it taking the hit in lieu of the Clan Lord this game was a mistake. I think you want that flying around to heal and support. I think a couple more units of chaff would also do my opponent well, and the Salamanders look to have quite the variety of it. We'll see what changes they make next time!

I was pleasantly surprised by my list. Most of my units were hitting on 3+, which felt great. I was surprised the first unit of Knights fell so quickly to the Clan Lord, but those were the dice. 

Turn 5 I should have remembered to check the indirect fire range, but it looked far enough away on that day that I never considered measuring, so apologies to my opponent there. I did have other legal options, namely artillery into the Rhinos and stuff into the Pale Rider, so this was a game error on my part for sure, but thankfully, I don't think the error was determinative for the game. The hot dice were still a bit rough though for sure.

Knowing the shortcomings of my list, I thought I had an ok plan going into this, and felt we both played a good game. I had a great time! Many thanks to my opponent for the good games and a wonderful afternoon!

Testing Conclusion
  • Triple Knight Regiments. For a human-centric list, knights seem almost mandatory, unless you are bringing hordes of stuff with CS. Something needs to do the damage, after all. Three regiments gave me some options, and while they were not used great, I did get a few decent moves in with them and felt like I got some good experience with them.
  • Mounted Scout Regiment. I mean, they did screen ok? I think I play better with troops though and those will be my default going forward. I just can't wrap my head around running the regiment it seems.
  • Siege Artillery. Each had one massive volleys during the game, which were definitely statistical outliers, and one may have potentially been an illegal shot. Regardless of the statistics, I don't think I used these well. It seems like Siege Artillery is best for hiding behind your large infantry lines and taking shots at tall monsters and such. I am not sold on these.
  • Lots of Foot Guard. The Foot Guard worked pretty well! Having a bunch of units hitting on 3's is nice, though the ASB Lute around is seeming like a must-take for me though, to let the tankier choices contribute more meaningfully to combats. I liked the Foot Guard and liked both variations of them. I managed ok without the Pikes, but feel like a mix of units should probably be the general approach for Kingdoms of Men, so I will probably run more of a mix next time.
  • Mounted Hero with no IW. No IW worked ok, but these heroes have so much utility that I think I will try to fit in two with IW in most of my future lists.