Showing posts with label Cok2019. Show all posts

Monday, December 30, 2024

Kings of War 3rd Edition: #106 Undead vs Northern Alliance in Protect and Raze


Intro and Lists

It's a packed holiday season, but schedules aligned briefly one rainy and foggy evening for a quick game against Trevor of Data and Dice. He was graciously hosting us, and brought out his Northern Alliance for our game:

Trevor's Northern Alliance have been frequent opponents for me throughout 3rd Edition, and it's been neat to see the lists develop alongside our tastes and skills. Here, we have the Dwarf Warriors and Naiads to hold the line, as has been the standard recently. The Snow Troll Hordes have been replaced with the more smashy Hearthguard units. A Frostclaw horde returns to harass, and some Snow Foxes are around to interdict. A Cavern Dweller returns to smash things, and the very effective Snow Troll Prime returns as a triple take. The oddities he is playing around with these days is the flying Ice Blade, and Healing Ice Queen. As-ever, it is a sturdy list, with some extra killiness now, thanks to the potent Hearthguard.


I bounced back over to the Undead to continue exploring some things. Up to test are:

  • Skeleton Warriors with Two Handers. Trevor's Penitents Inspired these, so I have enjoyed running them against him and getting feedback. We'll see how they hold up this game.
  • Wraiths. We tried regiments last time, but I think cheaper troops are probably a better default size. The Def6 should help them hold things up a little longer, particularly in a chaff fight, and I think Strider and Shambling are very beneficial, and should get moreimpactful the more experience I get with the unit.
  • Soul Reavers x1. I still need hammers, and want to try a 1:2 split between the Soul Reavers and flying Wights. The Reavers are cheaper, even with an item, and hit just a little harder with the extra attacks. 
  • Wights x2. They other part of the hammer assortment. Flying is nice, but they lack Nimble. Shambling can either be a benefit or a drag depending on the rest of your list and how many Surge sources you run. I think a split is probably better than all in on Wights or Soul Reavers, but how (and if) you split is dependent on the rest of your list. We'll see how this arrangement feels.
  • Liche King with Heal. We tried Drain Life and goofed it before, using the Order instead of the better spell I paid for! Having the situational Order around means that I don't think I want the situational spell, so we'll take the easier Heal, and Surge for the Wights.
  • Undead ASBs. I still like these as they are one of the few sources of Very Inspiring for the ranks of the Undead, and they play very nicely with Wyrms and Skeletons. The Heal ASB has been great. Having a Surge caster seemed like it would be good too, but I haven't really gotten as much use out of the item as I would have thought.
  • Zuinok. He's not popular, but I want to like the outcast lizard. His Nerve is ok, Fearless is good, and the array of spells is interesting for a supporting spellcaster. I haven't quite gotten him to work though, so we'll try him again and keep at it.
  • Burrowing Wyrms. I like how they look, and I like them on the table, especially with the ASB interactions going on. We're taking these for sure, and we'll see what other uses and insight I can glean for them!
  • Command Orders. The Undead have some neat Command Orders, and I want to make use of them, so I'm buying a few extra Dice. We'll see how that all shakes out this game.

Table and Terrain

Trevor was kind enough to host us, and we were using his table and terrain. We were using our typical terrain rules, running the building and bones as Height 9 blocking terrain, the forests as Height 6 Difficult Terrain, stone fences as Height 2 Obstacles, and Hills as Height 3, and the ponds and field as Height 0. 

Neither of us had strong feelings about the scenario, and ended up with Protect and Raze, to try out one of the newer offerings. There is a central objective token, and then we each place 3 more objective tokens on the opponent’s side of the board, 6” from the center line. If we control one of the tokens that we placed, we can burn them for a point, and then that token goes away, so we should be whittling down the points of interest on the battlefield down to a final clash in the center. The new twist here is that we can control but not burn the tokens our opponent placed, and we can score them if we happen to hold them at the end of the game, providing for a little more interplay.

I deployed second, and placed my tokens heading outward, so I could play for either side. I eventually decided to mirror my opponent and double-up on the left, hoping for a bloody fight that might favor the Lifeleeching Undead. I won the roll for sides, and was lazy.

Overview of the table. My third white token is in the forest on the right.

Left-to-right, the Northern Alliance have undercover Heatrhguard with Foxes in tow, the Cavern Dweller and Prime leaning on the obstacle, Dwarf Clansmen, Naiads, and more Warriors with another Prime and Ice Queen supporting, then the other Hearthguard with more Foxes, the Hexing Prime, and then the Frostclaws and last unit of foxes out on the far right.

View from the left.

Deploying a new list each time can be difficult. My only goal way to spread out the regiments of Skeleton Warriors so they weren't shoulder-to-shoulder. Left-to right for the Undead are Skeletons, Soul Reavers, Skeletons with the Surging ASB, both Revenant Wyrms, Wraiths screening for Wights, then more Skeleotns with Zuinok, Wights, Skeletons with the Liche, Wights with the Healing ASB, and then Skeletons isolated on the other side of the building. 

View of the center.

Overall, I am ok with my,deployment. The isolated Skeletons are still inspired by the Very Inspiring ASB, so it's not as bad as it might look. I could probably consider splitting the Wyrms up, any maybe using the Wraiths to block for the other unit of Wights, but overall, I felt like this was a decent deployment for me. While I am not really opposing the Frostclaws, between them and their Snow Fox escort, I was not going to be getting a good charge or anything against them, so it seemed best to ignore and push hard elsewhere in the early turns.

I ended up winning the roll for turn order, and happily chose to go first.

Top of Round 1: Undead

I roll up 6 Swords on the Command Dice. 

On the left, the Skeletons Shamble forth. One guards the gap between the hill and table edge, while the other is able to get its leader point onto the hill.

Moving on up.

The Soul Reavers move up, are blocked by the hill, so keep going. I can get a majority of their base onto the hill without threat of being charged, so do so. A little Thunderous Charge never hurt to have!

The Burrowing Wyrms start in the terrain, so should be slowed. They don't go crazy aggressive on their move forward, but they do look to have gone a little too far. Sorry! I was excited to go first.

The Wraiths make good use of the Order and the building.

Centrally, the Wraiths shamble up, with the stronger Wights behind. The line of Skeletons and Wights moved ahead, but did not keep a neat line.

I spend 4 Command Dice on "By The Master's Will" to remove Shambling from the Wraiths on the right, and march them up and Nimbly pivot to threaten a few more things next turn.

The ASB with Heal hops up behind the Wraiths, and has the inches to be Very Inspiring to the Skeletons out on the right, who move up and try to threaten the token my opponent placed. They'll just slow down whatever they can.

A suitable disheveled battle line, pressing forward.

Zuinok tries surging the unit in front of him up, getting 1/8 successes. The Liche does the same, getting 5/10, but the Skeletons are stopped by the Wraiths. Normally I don't like these blind forward Surges, but with nothing even close to being able to charge, Surging forward for a few extra inches seems worth it.

Bottom of Round 1: Northern Alliance

My opponent rolls up 5 Swords for his Command Dice.

On the right, the Snow hop up to screen. The Foxes should be just over 12 inches away, denying me a charge into them. The towering Frostclaws pull up behind the Foxes, and land 7 damage into the Skeletons from afar, but they are Inspired and hold. Fearless 15 is hard to spook.

The distracting Skeletons hold for now.

The Ice Blade doesn't want to charge a unit. He wants to assassinate individuals, and flies ahead a bit, hiding behind the central building.

The woods slows the Northern Alliance, but their sturdy line marches up in the center, with Foxes screening for the expensive Hearthguard.

The Northern Alliance keeps it orderly as they move up, denying any flank charges from the Wraiths.

On the left, the Dwarf Clansmen move up, preventing multi-charges into the Cavern Dweller. The Snow Foxes move up to screen for the other unit of undercover Hearthguard.

Hex is attempted and fails, and I think just the Frostclaws got a reroll with the Command Dice. I think some Swords go to waste this turn. 

Top of Round 2: Undead

I roll up 5 Swords for my Command Dice. 

It takes a while and some extra bases, but I eventually figure out all my charges. A lot moves out this turn!

On the left, the Skeleton Warriors are just in front arc of the Foxes, and charge in to fight them. The Foxes are back enough that the Hearthguard should have some complicated movement next turn if I don't pick them up. The Skeletons land 3 and the Foxes are wavered.

Lots and lots of charges from the surprisingly speedy Undead.

From experience on both sides of the table, I know one normally gets just one shot at removing a Cavern Dweller. The Soul Reavers are on the hill and will be wounding on 2's... this is that shot, and I go a-charging down the hill. They land 12 damage (essentially as-expected), but the check doesn't go my way, and the monster is just wavered.

Still, the Dweller doesn't have Fury, and with the wavered Foxes where they are, the Hearthguard are hopefully going to be stuck for a turn.

Several wavers and one victory for the Undead.

The pair of Burrowing Wyms hit the Dwarf Clansmen, take them to 11 damage, and will get the rout. The left one backs up and and the other one sidesteps.

More charges from the Undead.

Even hindered, I don't want the Naiads charging anything. I don't have the success to block them, so the Wraiths need to charge them. A flying unit charging into terrain, Phalanx and Ensnare isn't pretty, but they do do 1 damage, and will be in the way.

The Skeletons look to line up a Surge charge. They'll pivot just a little more to do so.

We're looking to occupy the Hearthguard units for a turn. Nearby, Wights so into the Dwarf Clansmen, dealing 9 damage, and will waver but not break them. The Skeletons and Wraiths go into the Snow Foxes, will best them, and will both overrun.

Another waver, another small victory, and some overruns.

With no normal charges this turn, the Skeletons don't have great options, and I go for a risky play with them. They move and pivot, to face the flying Ice Blade. I use 4 Swords on Drain Life from them into the individual, landing 2, and taking them from 7 down to 5. The Healing ASB brings them down to 3, and then the Lich tries Surging them in, needing 4 successes on 6 dice and.... I get it! 

The Skeletons best the Ice Blade, and reform.

The flying hero is weak if you can catch him, so I'm wounding on 2's, and apparently these Skeletons brought their A game, because they do 7 damage to take the Ice Blade to 9 and best him. This was a weird Rube Goldberg-like series of moves. It shouldn't have happened, but I lucked out. The Skeletons reform, daring the Birds to make a hindered charge.

Bottom of Round 2: Northern Alliance

The Northern Alliance rolls up 7 Swords for their Command Dice, and try to put them to good use.

On the right, the Foxes run up and will burn their token. Kicking off the scenario play and making it 1:0 in favor of the Northern Alliance.

The speedy elements of the Northern Alliance get stuff done.

The plucky Skeletons needed to give a flank to something, and gave it to the Prime, who charges in alongside the hindered Frostclaws. The Skeletons started at 3 damage, end at 15, and do fall, but did a heckuva job. Both the Prime and the faller Frostclaws will pivot to stare down the flanks of the Undead.

The Northern Alliance push back.

The Skeletons are in front, but the Hearthguard can pivot towards the Skeletons and hit the Wraiths first for a tricky charge. They do so, but roll a little low, landing just 5 damage. With the Overrun they were not Inspired, so I luck out.

Reforms for the victorious Frostclaws and Prime.

The Clansmen shake it off and counter-charge the Wights, but also roll low, landing just 1 damage, and then the Wights are found to be Insane. It doesn't matter, and this still does ground the flying unit. The Ice Queen heals the Dwarfs for 3.

The Naiads counter-charge the Wraiths, but also roll low, and also land just 1 damage. Expected damage is 2-3 in each of these fights, so it's not massive failures, but still concerning at how little damage is actually landing.

Charges on the left.

On the very important left, my opponent spends 5 Swords to remove Wavering from the Foxes so they can sidestep out of the way. The wavering Cavern Dweller disengages and withdraws in case things go poorly, and the Hearthguard and Prime charge the Soul Reavers, taking them to 11 and routing them. Everything holds, trying to protect the cavern Dweller.

Top of Round 3: Undead

I roll up 5 Swords for my Command Dice.

The Cavern Dweller is still sitting at 12 Damage, so I feel like I must try and pick him up. 

Some Skeletons make a flank-charge into the formerly wavering Foxes, Wights will charge the Snow Troll Prime, and more Skeletons are brought forth, pivoting at the end to get line of sight into the Cavern Dweller for another Drain Life attempt.

Charges for the Undead.

It's 4's and 4's, but nothing lands with Drain Life, and the Cavern Dweller skips the Nerve Check and a second try at besting it.

The flanking Skeletons pick up the Foxes though, and surprisingly, the Wights land 7 and pop the Prime, getting a pair of definitive 11's on the check. With the Cavern Dweller free, they turn to face, and hopefully flanking Skeletons can help something next turn.

With the Naiad horde gone though, I will eventually burn the token here and tie things up for the scenario.

Another flurry of charges in the midfield from the Undead.

Centrally, the Wraiths counter-charge back into the Naiads. They are still a flier and against Phalanx and Ensnare, so they don't do much, but both Wyrms pounce on the horde as well, with one in the flank. The flanking Wyrm goes bananas, landing 15 damage on it's own (10 expected), and the horde is picked up. The Wraiths overrun, the flanking Wyrm sidesteps towards my opponent's deployment zone, and the other Wyrm backs up. In retrospect, I should have overrun, or just held, and tried to box the Prime in.

Reforms for the Undead.

The Skeletons have flank charges into either the Dwarf Warriors or the Hearthguard. I choose the Dwarfs just to make sure they get bested. The Wights devastate the unit on their own though, and both reform. 

The Wraiths go into the the Hearthguard again, landing 3, with both the Liche and the Healing ASB trying to help. The ASB hits for 1, the Liche for 2, and their own Lifeleech will eventually bring them down to 1.

The Skeleton Warriors get Surged into a cheeky position.

To try and block up the Prime and Frostclaws for a turn, one unit of Skeletons moves up, and Zuinok surges them forward 5 inches, greatly complicating any charges for the fliers.

Bottom of Round 3: Northern Alliance

My opponent rolls up 5 Swords for his Command Dice.

The Snow Foxes swing around the building, threatening my characters. The Prime Charges the Skeletons, and the Hearthguard and Frostclaws go into the Wraiths, with the fliers in the flank and being a millimeter out of the forest for a clear charge.

Movement and charges from the Northern Alliance.

The Prime lands 4 damage into the Skeletons who hold, and the Hearthguard and Frostclaws will devastate and then pick up the Wraiths, though it is close thanks for Def6. Both will reform to look across the battlefield and continue this push.

Reforms for the Northern Alliance.

There is no real center left for the Northern Alliance, but the Prime can just spy the back corner of the Wights for a Nimble rear charge. The Cavern Dweller maxes his attacks but only lands 7, and the hindered Prime contributes 5 to take them to 12, and the -/17 Wights are bested. The Cavern Dweller Lifeleeches 3 back, getting down to 9 damage.

Charges on the left.

The Hearthguard crack through the wimpy Skeletons, dealing 14 damage and then reform.

Reforms on the left.

It was a strong opening for the Undead, but the Northern Alliance hammers are coming online and striking back!

Top of Round 4: Undead

I roll up 6 Swords for my Command Dice.

A third attempt at the Cavern Dweller, because it is injured.

On the left, the Cavern Dweller is the most damaged, so that's what I need to try and focus on. The ASB gets safe, while the Skeleton Warriors charge the monster. I spend 4 Swords on Drain Life from the ASB, landing 2 damage to take it to 11, but no check is done since the monster is on a melee combat. The Skeletons then miss all their attacks, and the Dweller takes no check again.

Wraiths pivot and move, and Zuinok will surge them into the flank of the escapee Snow Troll Prime. They'll deal 5 damage, and the Prime will survive, unbothered.

Trying to block out any charges to get behind my lines, a Burrowing Wyrm will face the Frostclaws.

The Undead try to blunt the push of the Northern Alliance, but are coming up short.

The other Wyrm can see the Ice Queen and he'll charge. The goal is to best her, and then overrun into the Hearthguard combat. 

The Wyrm does ok, landing 5 or so damage, and gets the rout on the spellcaster. I need a 3" overrun, but get just 2. The Skeletons swing at the Hearthguard, but land no damage.

The Liche pulls in behind the building to try and Inspire things, healing the Skeletons that were fighting the Prime. They disengage, withdraw, and back up, and get healed from 4 down to 1 damage. The back up lets the Wights get into a combat against the Prime. They'll land 5 and not budge him.

The Healing ASB makes a desperate charge into the Snow Foxes. Since they are just Def2, I try a reroll to hit, get it on the first try, and then fail to damage them. 

Bottom of Round 4: Northern Alliance

My opponent rolls up 4 Swords for his Command Dice. 

The Frostclaws can see the Burrowing Wyrm that failed to overrun, will charge him, bring him to 10 damage, and get the rout. Since I wanted the Liche to cast, and there wasn't an easy way over there given the combats, the Wyrm was unfortunately uninspired. The Frostclaws will reform to threaten the last of my units out here.

The Northern Alliance pick up more units.

The Hearthguard thump the Skeletons, landing just 11 damage but will get the rout, and then back up, setting up a nice trap with the Frostclaws. Whatever I charge, I'll need to best or be flanked.

The Wights Prime goes back into the Wights, landing 2 damage, but they hold. 

On the left, my opponent makes big plays for the scenario. Since the ASB failed, the Foxes have a free paw, and they have the nimble inches to grab and burn a token.

The last two tokens are claimed and burned...

Since the Wraiths didn't get lucky with their flank charge, the Prime disengages, moves forward towards my deployment zone, and then Nimble pivots to get onto the remaining token and burn it, making this 3:1 in favor of the Northern Alliance.

...and then the hammers come crashing in.

With the Prime departing, the Cavern Dweller can get into the Wraiths, rolling up max hits again but flubbing the damage roll a bit. The Dweller takes them to 6, but they hold. Unfortunately, the Dweller is now down to 8 damage.

The Hearthguard thump and best the Skeletons way out here on the left, and then reform, looking to help pickup the Wraiths.

Top of Round 5: Undead

I roll up 5 Swords for my Command Dice. I think the game is lost, but we'll see what can be done.

On the left, the Wraiths go in against the Dweller. The ASB steps closer to keep them Inspired. My notes say they did no damage, if so, they should be on 6. Not sure how they went from 6 to 5 unless they did score one.

Lining up some magic while the last desperate charges are made.

Still experimenting, Zuinok sets up to Inspire the Wraiths, and be within 12 inches of both the Foxes and the Skeletons, and he goes for Fireball against the Stealthy Foxes. I land 2 damage, heal the Skeletons with Necrofire, and get them from 1 down to 0. A hot check routs the uninspired Foxes.

The Liche had moved to cast Mindfog into the Foxes... but in the Ranged Phase I realize that Fireball already has Shattering. Having already moved, he goes to try and stun the Snow Troll Prime on the hill, but doesn't shake them.

We pick up the Foxes, and somehow, the Wraiths heal.

The Revenant Wyrm goes into the Frostclaws. They have lower Nerve than the Hearthguard, but the Hearthguard were damaged, healed and are on 2. What should be charged is debatable. The Wyrm lands 5 and gets a Waver.

The Skeletons are stuck, but technically holding the center. The Wights charge the Prime again, does another 5 to bring them to 8, and I get a Waver here. Between Lifeleech and the Healing ASB, Wights are brought down to 0 damage.

Bottom of Round 5: Northern Alliance

My opponent rolls up 3 Command Dice, spending them on rerolls, I think.

The Hearthguard and Cavern Dweller does into the delaying Wraiths and picks them up, with the Hearthguard overrunning and the Dweller changing facing to get s straight shot towards the center.

The Northern Alliance trudge towards the center.

The Frostclaws and other Hearthguard trip their trap, hitting the Wyrm in the flank and front and taking it to 19. 

The wavering Prime regenerates 2 to go down to 6 damage.

The other Prime, out on the hill on the left was definitely facing my deployment zone. He is Nimble, but that looks like a big move. He will also Regenerate 2 and end at 3 damage.

Top of Round 6: Undead

I roll up 5 Command Dice. 

The Liche does into the speedy Prime. If I can trip him up, this should prevent both the Prime and the Cavern Dweller from reaching the middle token. I spend a Sword to reroll the hit, and we do disorder him!

I forget that the undercover Hearthguard are there, and Zuinok tries another Fireball into the Frostclaws, landing 3 to take them to 8 damage. I believe I get lucky and waver them again.

Zuinok gets way to close to the Frostclaws.

The Wights could fly away to grab a token, but that's not going to win me the game, even if we go to a Round 7. So I opt to just fight for fun. The Healing ASB casts Drain Life into the Prime for more damage getting 1, and the Wights hit the Prime, dealing 8 to take him to 15 and see him off and then overrun.

The Skeletons are still gummed up and I opt to just hold them. I figured the Wights were going to lose, and the plan was to charge them up and hopefully box out the Northern Alliance units on my turn.

Bottom of Round 6: Northern Alliance

The undercover Hearthguard crush Zuinok, and the Prime plus the Cavern Dweller pick up the Liche.

The Northern Alliance pick up some characters, and the push towards the center stalls out.

The Hearthguard crash into the Wights, landing 8, but the phantasms hold. 

The Northern Alliance have secured all their tokens for 3, and aren't holding any of mine for additional Points. The Undead have burned 1, and control the center, making this a 3:2 victory to the Northern Alliance!

Game Conclusions

I think my reforms for the Wyrms in Round 3 cost me the flank (and thus the game). Had I boxed the Snow Troll Prime in properly, I think I stand a better chance of grinding like a more normal Undead player and securing the win thrrough attrition of units. Letting the Prime slip away for a rear charge was a pivotal turning point for the game.

The Undead started off very strong, but I wasn't able to remove any of the hammer units opposing me. Kings of War is driven by the scenario, and Trevor was able to focus on that and cleverly claw his way back to a victory, so very well played to him!

Testing Conclusions

  • Skeleton Warriors with Two Handers. They are cheaper than the instigating troops that I have been using, so it is a bit of a weird dynamic, I think they are working out alright! I am still struggling to get the most use out of them, but am getting better. 
  • Wraith Troops. These were nice, and surprisingly sticky, even enduring a counter charge from the Hearthguard.
  • Soul Reavers x1. They had their shot but couldn't quite seal the deal against the Cavern Dweller. I think that was a risk worth taking, but it just didn't pan out.
  • Wights x2. Trevor is more experienced playing with and against fliers, so they didn't have as good a showing as their last outing. Still they did fine.
  • Liche King with Heal. He also did fine. The Heal rolls were a bit low statistically, but things were topped off nicely throughout the game. Surge is nice, but depending on the list, might not be mandatory.q
  • Undead ASBs. Still great if you are running Skeletons of any kind! I have not really used Surge in the recent games though, so might explore other items. The Soul Reavers and Wights top out at CS2, so 
  • Zuinok. I still want to like him. The spells are decent for the army, but he is a little too quirky to be useful. I keep forgetting about the reroll with Fireball though, and have never had great targets for the spell. While I did finally get the Fireball + heal interaction working... it is just Heal 1, and not that impactful. I still want to like him, but think I need to look at something else.
  • Burrowing Wyrms. I've been trying to run them to clear out units hiding in terrain, and they did good in that regard, charging in Round 2 and nearly making their points back by Round 3. Good results as usual from them, though not utilized to their utmost. Giving the Prime a way out, and with a rear charge caused that flank to fall apart. They are not Nimble, so need to consider my reforms more carefully.
  • Command Orders. I still like the Command Orders for the Undead. I got into a good position with the Wraiths, and while Drain Life wasn't effective this game, that was more the dice being troublesome. Buying two reds, I had access to most of my orders most of the time. If one is shooting for multiple big orders, I can see bigger Dice being bought, but shooting for 4-6 Swords a turn, I think two reds seems just fine.
It is always a pleasure to play against Trevor, and as-ever, it was a very insightful and enjoyable game and a pleasure to close out 2024 with. Happy Holidays, and I am glad we could fit this in! 

Monday, September 23, 2019

Battle 19: All The Wight Stuff

With a passable gaming table setup, a decent working knowledge of the game, and a handful of armies, I decided to start asking around for more games. It's been a while since the last one... fortunately, two friends were quick to reply and eager to play!

One had played Vampire Counts back in WHFB days, and has played a few KoW games with me before, piloting some Undead; the other was pretty new to wargaming, but a big ol' nerd and a quick study. Since I was going to be doing the heavy rules lifting... one of them needed to run the big 2k list, and me and the other friend would run two 1k lists.

I had a handful of generic lists ready. I think they were all current with CoK2019... For 2k, I offered up Herd, Abyssal and Undead lists. While I was hoping the Abyssals would win out, as they have never hit my table ever, the Undead prevailed, again. There is something about such a classic fantasy army that is alluring I suppose.

They opted to give the newbie a 2k list, and my ally and I would each have 1k. Since this was a very friendly game, there was a lot of coaching and general discussion throughout. The objective was more to showcase the game, rather than a serious throw-down. The newbie opted for the Undead and a straight "Kill" game, to keep his first game simple.


Wights for the core of the list, with two Regiments and two Hordes and over a third of the points. The Skeleton Warriors and Archers are around for chaff/support/objective holding; Zombie for a tar pit (ideally, for Wight surge-charge shenanigans), Wraiths are there for annoyance and chaff-related duties. Soul Reavers are around to highlight the difference between Shambling units and normal units. The Revenant King is a good all-rounder hero (Inspiring, Surging, and combat in a pinch), and the Necromancer is a classic.

I opted for the Weakness spell over say, the Inspiring Talisman, just to try it out. With their Lifeleech, the Undead are excellent at grindy combats, so I figured that could tip something in their favor.

Overall, the list is a meat grinder. If you are the aggressor, you will likely be crunched pretty hard when the list hits back. It lacks ranged threats though, so if you can pick apart a few things (Wight Regiments or Wraiths) before the main combats begin, you can start to tip the odds in your favor. Furthermore, while it's got some faster elements (Wraiths), a faster list (any cavalry) should be able to combo-charge the bigger elements (Zombies, Wights), and help dictate when the decisive combats occur. In objective games, the list will struggle a bit to cover everything; fortunately for my opponent, he chose Kill to keep things simple...

I decided to go with the Regnum. I was temped towards the Abyssals... but decided I really wanted to see what my Colossal Giant could do. I mean, they've been waiting patiently for six months on my shelf...


The list was mostly around for objective games. Scouts to harass; Crossbows to camp an objective; Shield Wall to meander and reinforce where needed; Militia to screen for the smashy Foot Guard and the Giant, who would do the killing. The goal of the list is to spread out a bit, harass for a few turns, and then commit to a fight.

My ally unexpectedly chose to double-down on Team Human, and picked my Ostermark League to play, which is made up of much of my old Ostermark Empire army. While the blog started out with their repaints, this is their first time on the table (iirc) as the League, which is cool. Unfortunately, the list isn't all that exciting... I have them around as a stock "human" force, to showcase the basics of the game, and provide a very low learning curve.


The Militia and House Guard highlight the normal vs elite gradients in most armies. Crossbows give some ranged options, while the Honor Guard shows off a very elite unit. The Baron is a pretty normal hero; decent attacks and Inspiring. The whole list has CS or Piercing, which I felt would make for a pretty forgiving list for a newcomer choosing humans.

So we had a bunch of humans vs the Undead, which is pretty typical for this blog! While our shooting isn't great, I wanted to try and leverage that for a few turns if possible. I was mostly concerned with the Wraiths, as I didn't have a lot that could easily deal with them (Defense 6 is really hard to overcome without good modifiers... which I lacked). If we could pick off the Wraiths or Wight Regiments, I felt we could win combats with our numbers.

Set-Up

I set up the table and terrain beforehand... as we were playing at my apartment. We didn't follow the rules for set-up, but I was mostly concerned with keeping things going. We started a few hours later than I was expecting, and didn't want to keep them too late...


The groundskeepers would tidy up the crater, and the Undead would soon occupy the chapel grounds.
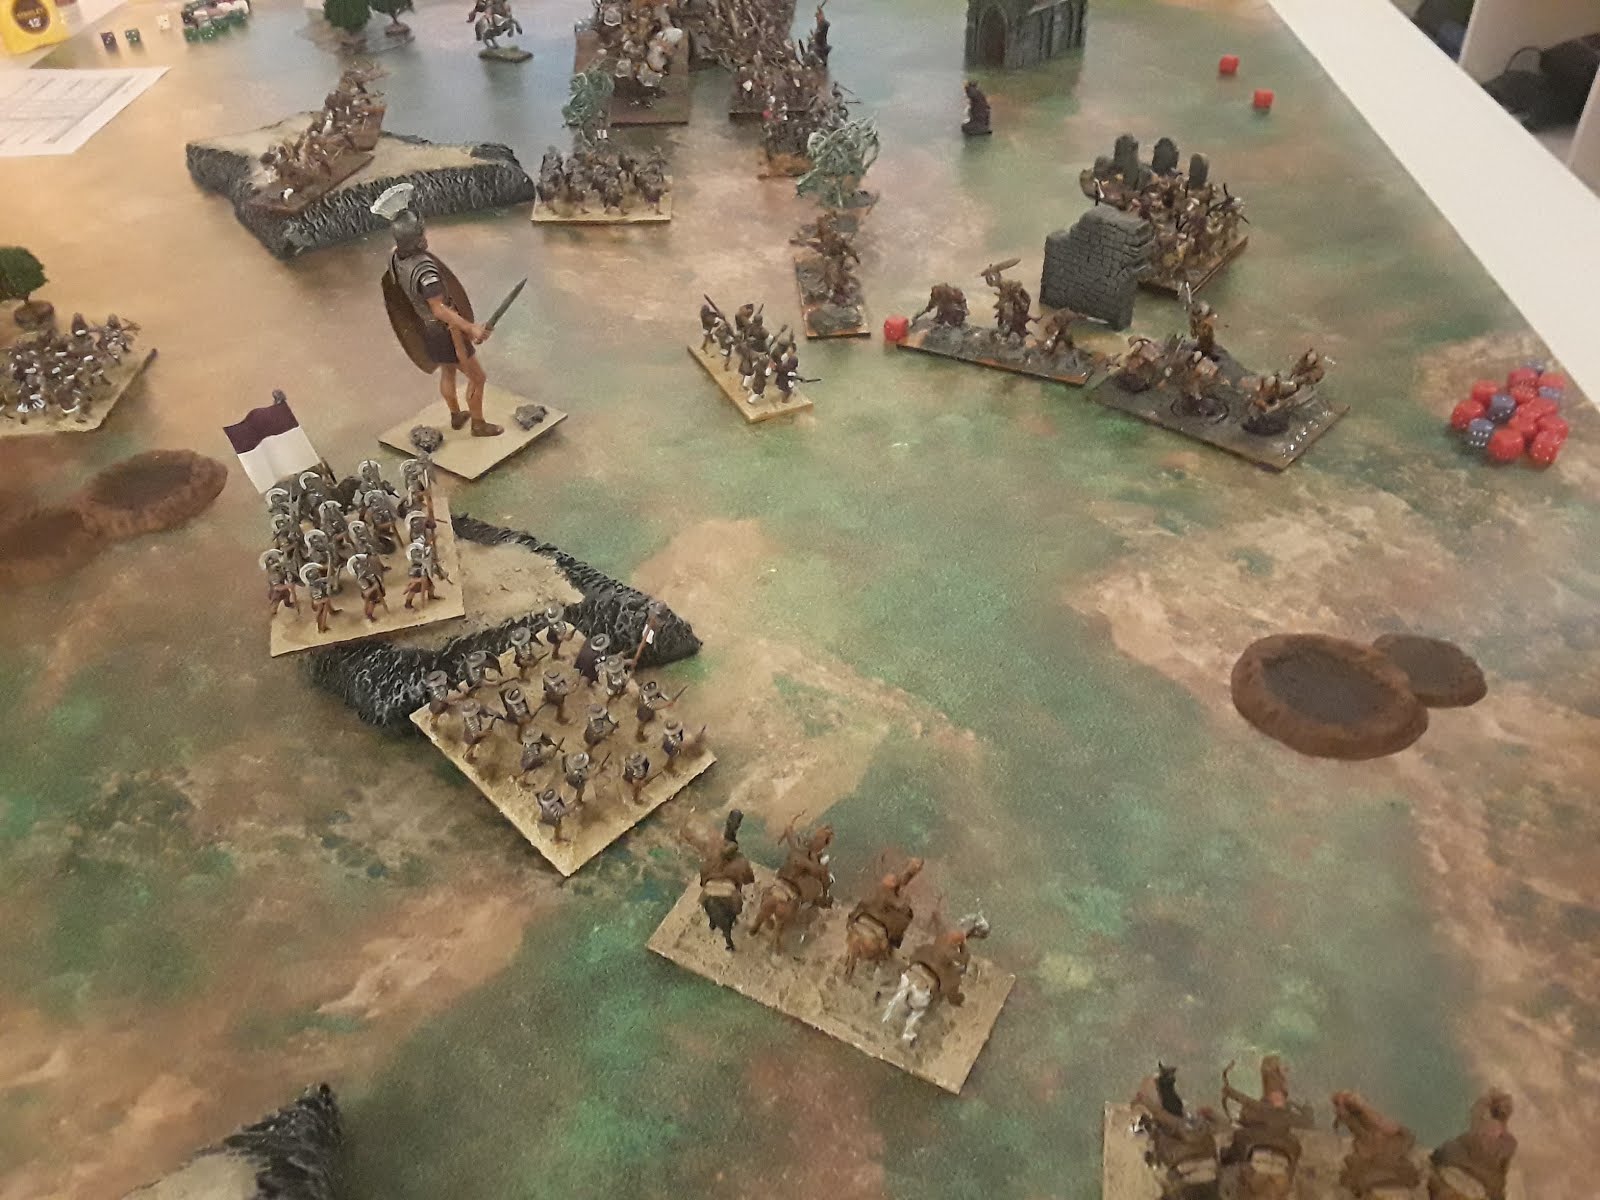
Pretty simple table. Four clusters of Height 6 trees, three Height 2 Hills; some Height 2 stone walls , two graveyards, and some craters for difficult terrain (I think we played both as Height 0.. for better or for worse), and capped off with a spooky chapel. After I took the pic, I decided to remove one of the craters to create a bit more of a field there.

While this was a friendly game, a lot was being asked of the new player, so we didn't follow typical set-up rules. I gave him choice of sides, and he opted with the chapel. Perhaps the Undead were trying to hold it and raise more troops? My ally and I plopped down our units on our side, and I walked through rules with the Undead player as he formulated his plans... 

The visiting Ostermark League!
My ally opted for a nice battle line. A Regiment of the City Militia held the table edge; the House Guard his center, supported by the Baron and Honor Guard. My opponent decided he wanted to try and secure the hill with crossbows, and his list City Militia unit secured his flank.

..and the Regnum, on the right.
I tried to compliment my ally. A regiment of my Shield Wall and my Crossbowmen stood nearby to support his Militia and Crossbows. The Militia screened the Foot Guard and Giant from charges. On my right, my other Shield Wall unit sat by to delay anything the undead may throw on this side, and my Scouts positioned themselves to make use of the more open side here.

The Undead would eventually castle up pretty hard in the corner. My friends decided to roll off for first turn choice then, the Undead player won, and chose to go second. The set up was not by the book, but it worked out. Again, the goal was to introduce the game, so off we went!

Turn 1: Puny Humans

Seeing the Undead castle so hard, the Regnum advanced. The Scouts pushed out pretty far, intending to try to entice my opponent to spread out a bit. The Shield Wall on the right shifted; I intended for them to swing in and look for a flank charge later in the game.


My experience has convinced me not to commit with humans in the early game. The Militia screen set the pace, and the Giant and Foot Guard came in behind. Out of range.. the Crossbows moved up, with the other Shield Wall protecting them. My intent was to pepper the Undead, and in the final turns, hit their flank as my ally tied up the main body.

My ally, meanwhile, intended to make use of his Crushing Strength... Everything moved up... at the double. His crossbowmen took the hill, but couldn't shoot either, silly Reload.

The Baron says "Forward!"
The Undead were castled, and my opponent had advanced pretty far up. My list was pretty shy on hitting-power, so I was letting my screening Militia set the pace; the last thing I wanted was a random Wraith unit pinning my Giant for a turn.

At the end of our first turn... I got a bit concerned. We have nearly 300 points tied up with Crossbows; another 200 in my Mounted Scouts. While not great killing investments.. I felt we really needed to try and leverage our ranged options in order to win this. We didn't make use of them this turn, and it looked like the fights would start on our next turn too.

Turn 2: Undead

The Undead had deployed solidly in the corner against my ally. To our left of the Chapel was the zombie legion, with a Wight Horde behind. The Skeleton Warriors and Characters were around too. The Soul Reavers were protecting the Wraiths, and a Wight Regiment mostly getting in the way of the Skeleton Archers. On his flank facing the Regnum, on the other side of that little ruined wall, were the other Wight Regiment and Horde.

The best pic of the Undead deployment, as it turns out.


The Undead player decided to try and focus on my opponent before I could join the fight. Had the positions been reversed with my ally (me defending, him moving to flank), I would have loved our chances. I didn't move up much; and most of my stuff was tankier than his. All his little hammer units swing in from the flanks would have been quite preferable to what was unfolding currently... alas.

Our opponent opted to start pushing forward to meet my ally. Shambling slowed him down a little, with the skeleton Warriors only scooching up a bit. The Soul Reavers maingain the line, inviting a charge from the House Guard next turn. One unit of Wraiths is sneakily hiding behind the vampires; the other is eyeing up the Regnum to delay, as the Wights change facing to take them head-on. The Skeleton Archers can draw line of sight to one of the House Guard regiments, though they are obscured enough to get cover. Still, a wound slips through.

After some discussion, he opted to try and double Surge the Zombies up. The Revenant King had Surge 6, the Necromancer had Surge 8, and he needed something like 9 out of the 14 possible to make a charge with the City Militia... and freaking made it.

...and my opponent decides he rather likes Kings of War! The Zombies connect...
The Zombies passed through the Graveyard (we nudged it a bit out of the way to make the moving easier), so are hindered, but still are able to get a few hits in.

Turn 3: Puny Humans

My ally is quick to get to strike back. Most of his units take the fights offered. Unfortunately, the dice are not as hot. The City Militia strike at the Wraiths, and only a wound goes through. The House Guard charge the Soul Reavers, and only manage 3 wounds...

They took the hill, for what it's worth. 
The Crossbowmen of the Ostermark League, having taken the hill, shoot at things. Unfortunately, those things are in cover. Still, some damage is done against the front Skeleton Warriors and the Wight Regiment on our far right.

Daring charges... but not great ones. Humans should be combo-charging whenever possible.

On the far left, the dice have treated my ally better. I think going against Defense 3 on the Zombies really helps... the City Militia and House Guard (joined by the Baron as well) strike back against the Zombies. They hits are bit above average, and hitting on 2's... most of the hits go on to wound, and the unit is obliterated.


Taking out sweet sweet time...
Meanwhile, the Regnum is still trudging along. I didn't want to box out my Crossbowmen, and held back a little. They and my two units of Mounted Scouts (one of the League's troops) all fire against the far-right Wight Regiment, collectively doing 5 damage, if memory serves.

Turn 4 Undead

Well, it's the Undead's turn to counter-charge, and they really let lose. As you can probably guess, the undamaged Wight Regiment flank charges the plucky City Militia. Joined by the counter-charging Wraiths, the unit is destroyed. The Soul Reavers show the House Guard how them how to swing swords, and delete that unit. The Wight Horde and a Skeleton Warrior Regiment charge the other House Guard Regiment, wavering them...

Heavy losses for the audacious Ostermark League...
Things are not looking good for the League. Their right has given way, and a plucky unit of Wraiths has really boxed in the Honor Guard...

Turn 5: Puny Humans

The Regnum continue to lollygag. The Wights are solid flank protectors, and between the Horde and Regiment... I am loathe to try and get behind enemy lines with my Scouts. They continue to shoot at the wounded Wight Regiment, though I don't think they do any damage this round... Likewise, the Regnum's crossbows shoot at the undamaged Wight Regiment... but fail to hit. Some damage is scored, but it is courtesy of the League's shooters.

There isn't much to celebrate. Battle was joined too quickly, and the damage done so far has been spread out, and the Undead are quickly gaining it back via Lifeleech.


The Militia advance at the double to try and block the Wights this turn, protecting the Giant from them. The Regnum is simply late to the party. The Shield Wall decide to try a flank charge against the plucky Wraiths, but only manage to get 1 damage through... that Defense 6 is hard to crack.

On the left, the Ostermark League struggles to claw it's way back. The Honor Guard want to charge the Soul Reavers, but are railroaded into a meaningless unit of Skeletons. The City Militia charge against the Wight Horde and do some damage, but they will not prevail. The House Guard, wavered, simply stay put, and the Baron looks for a way out.

The turn has two positives. The first is the victorious Honor Guard, who destroyed the Skeletons, and reform to avoid a flank charge by the Soul Reavers. The second is the Scouts, who manage to pincushion their favorite Wight Regiment, and roll high enough to see them off the table.

Turn 6: Undead

The relentless Undead continue to grind things out.. On the far left, the Wight Horde tears into the City Militia. The Skeleton Warriors attack the House Guard, deal one more point of damage. The Guard will go on to roll up Insane Courage! Those units have done work this game; killing the Zombie horde is our only real achievement so far...


The Skeleton Archers shuffle up, and fire off a shot at the Regnum's Crossbowmen. They manage to sneak a point of damage through. Sheesh. As expected, the Soul Reavers crash into the Honor Guard. That's not ideal. They're sitting on 10+ damage now, and have lost their Thunderous Charge.

Unexpectedly, three units descent upon my Shield Wall. A Wraith Surged into the front; a Wraith in the flank, and a Wight Regiment in the rear. The Militia will be Surge-charged in the flank by the other Wight Horde, courtesy of the Necromancer. My opponent picked up on the fun uses of Surge pretty quickly... The Shield Wall take on... some ridiculous amount of damage. The Wights turn around to face the Giant, the flank-charging Wraiths overrun, and the front-charging ones turn around to face the deployment zone of the humans as best they can.

Now it is the Regnum's turn to get hit.
At the end of Turn 6.. the writing is on the wall. The humans started melee too quickly, and we're being overrun.

The League has their Baron, two untouched Crossbowmen troops, and an Honor Guard and House Guard both with 10+ damage on them. The Regnum lost the Militia troop and a regiment of Shield Wall... but don't have much heavy-hitting to pull this back.

Turn 7: Puny Humans

It's kinda now of never, unfortunately. The Regnum have arrived, but aren't really potent in melee, and there isn't much of the League to try and rescue... The courageous House Guard only manage 5 damage against the Skeletons, and the Honor Guard fail to put much of a dent in the Soul Reavers, I think they managed only a few damage, to put them at a whopping 3 damage.

Seeking a more noble end, the Baron charged the Revenant King, and whiffed all his attacks.

Against the immediate threat of the Wight Horde, the Foot Guard with two-handers and the other Shield Wall regiment charge the front, while one unit of Mounted Scouts hit them in the rear. The other unit of Scouts swoop into the Undead's deployment zone.

One troop of Crossbowmen shoot at the Wraiths. The other shrugs, and joins the Regnum's Crossbowmen in a flank charge against the other Wight Regiment. Statistically... there's not much of a difference I think, but we decided that tossing more dice against the unit might help us out. It didn't. I think we did maybe two damage to it?

A bold move... but a misplay.
I considered sending in the Giant. That would have done it. Not doing that was probably a mistake. Instead of going for a sure kill, I opted to try and solo the Skeleton Archers, hoping to roll good and obliterate them with my big fancy monster.  I rolled up 14 attacks, but flubbed the rest of the rolls quite hard. Only 4 damage made it through. In retrospect, I had the math in front of me. Hitting on a 4+ I should have known I was unlikely to deal enough to see them off in one turn.

The Wight Horde remained quite resolute. The multicharge was a good plan... but Defense 5+ is hard to overcome. Out of the 38 attacks, 5 damage made it through, 4 of it from the Foot Guard.

...And with that... the human have stalled out. This needed to be a big turn, but the dice were not there. Unfortunately, my ally had to leave at this point. We got a late start.

Turn 8: Undead

The Revenant King thankfully flubbed his attacks back against the Baron. That was about the only good thing.

Against the courageous House Guard, the Skeletons fought back, joined by a flanking Wight Horde. The Guard, already on 13 damage, broke.

The Soul Reavers finished off the Honor Guard.

The Wraiths descend upon the Crossbowmen troops, routing both and then eagerly eye up the Giant. The Wounded Wights smash into the Crossbowmen regiment, wavering them.

The Skeleton Archers manage to get a point of damage against the Giant, despite needing 6's and 5's.

Those pesky Wraiths.. still around and have healed all the damage dealt to them so far. This... is not how one fights the Undead.
Tied up, the Wight Horde fighting the Regnum struck back, wavering the Shield Wall Regiment. (Arguably, the Foot Guard may have been the better choice to remove my ability to hurt him back... but my opponent was asking about Nerve values, and opted to try and kill the lower Nerved unit.)

Turn 9: Puny Humans

In a moral victory, the Baron switched targets to the Necromancer, who had come closer last turn... probably something to do with a surge spell, but I forget. All the sword strokes found flesh, and all wounded. Two convincing Nerve checks saw the Necromancer felled! Though the Baron now turned to face down the Revenant King and remaining Wight Horde and Skeleton Regiment...

There are no good options for the Regnum. Again, probably should have gone for the "guaranteed" kill against the Wights on the previous turn. Alas. Lesson learned.. I need to support my Giants, like I do my Beasts of War.


Movement-wise, I run the ASB up to try and roadblock the Soul Reavers. It's all damage control at this point... and there is not much I can really do. I don't have the pivots and range to protect the Giant from the oncoming Wraith charges. I can either flank charge the Skeletons (around/behind the stone wall), or try and shoot the Wight regiment, and I opt for the latter. Nothing even hits.

This turn, the Giant will deal another 4 damage to the Skeletons, bringing them to 7, since they Lifeleeched one point back last turn. I will roll for Nerve, get a 15 and sigh. The Foot Guard will deal another 4 to the Wight Horde; no help coming from the Scouts and their 14 attacks in the flank.

Failing to move anything, the game is essentially over, and I concede. But we play it out, as my opponent is ever the fan of "what ifs."

Middle of Turn 10... right before I remembered Brutal.
On Turn 10, the Giant will get rear charged by two Wraiths, we'll utilize a dice app for those 60 attacks. He'll take 32 hits that translate into 25 damage... and then I'll remember he had the Brutal special rule, so the 15 Nerve Test should have been a 16.. the Skeletons should have Routed, and these should be frontal charges. 


The Wight regiment will kill the Crossbowmen on Turn 10, and the Wight horde will do the same to the Shield Wall on Turn 10. The free unit of Scouts will rear-charge, and by weight of the dice, some damage will go through. I think he ends up at 14 damage? But rolls double 1's for his Turn 11 Nerve Check.

The final turn sees the Wraith and Soul Reavers take down the Giant. The Wight Regiment brutalizes the flank of the Foot Guard and destroys them; and the Horde counter-charges the Scouts previously in their rear. At the end of Turn 12, all I have are one last unit of Scouts. So... not tabled! Better luck next time!

....Victory for the Undead!

=======================================================================


Despite the brutal and near total defeat, this was a really great game. Both players are good friends, so it was nice to catch up and push some minis around at the same time. The newbie had a really good time, and really liked the game. The clean rule set in particular seemed to catch his interest. He's got a kid on the way, but hopefully I'll have him back soon.

The Undead list performed as expected; grinding up everything that came near it. Likewise, the League list performed well; it killed things and was easy to use.

The KoM list seemed way more geared for an objective game than straight Kill, and as such, didn't really perform as well as I would have liked when it eventually got into combat. That said, I did get a better feel for Giants, which was goal. In short, they need to be supported! Crushing Strength 4 is great, but your attacks need to connect, and they are unlikely to shift much on their own. Overall, I'd say I prefer the Beast of War (Ballista shots!!), but we'll see how I feel after another game or two with the Giant. With something like Berserkers I think the Giant could grind/push better; or with heavy cavalry, they could be a very swift striking force. 

========================================================================

Game-wise, the humans lost because we were too aggressive. All my experience has told me that humans need to delay combat. We don't last long in any slugfest, so we really need to bide our time.

In this game, that meant trying to leverage our shooting. We had the right idea, focus-firing the Wight Regiment Turn 3... but we needed to also be avoiding combat until Turn 5 or so. Instead, we got charged Turn 2, and most of the League was chewed up or overwhelmed pretty quickly.

Oh well. It was still a great game, as the new player not only enjoyed himself, but won big. I'll bust out the big tactics and scenarios on him next time!