Friday, September 30, 2022

Hobby Update: Abyssal Fiend, Chroneas, and Well of Souls

And so the hobbying pendulum swings back a ways... my Abyssals started the summer with about 2500 points of stuff, but were a very top-heavy collection, with about 1,000 of the total points tied up in heroes. I didn't even have enough unlocks available to run everything! I've since hobbied up a bunch more things over the last month or so, emphasizing units. I still have some more Lower Abyssal minis to hobby up, but I'm not sure what I want to run them as yet. So, to wrap the army up for now... I decided to hobby up a few "build around me" kind of models, to help me with my list building.

The Abyssal Fiend.

The first up is an Abyssal Fiend. The model is a Minotaur Labyrinth Guardian from the Pathfinder Battles line. It comes on a smaller base, something like a 50mm circle, but I thought the model would look fine on a 75 mm titan base. It mostly does. It's a little stocky, but bigger than everything else in the collection, and fills the dimensions of the base nicely with the cape and sword, so this works for me! 

I am pleased with the sword. I went for the dark blue / light blue that the Abyssal Guard have, and had the cracks emit some of the Citadel "Hexwraith Flame" technical paint. The paint functions a bit like a shade or wash, but a little more viscous. I just went for a plain and simple white dry brush for it, and that works, but I think better painters could really get some good ghostly mileage out of this technical paint. 

The Fiend just looks really versatile for the table. It Inspires, has Fireball, some decent combat stats and is still pretty cheap at 175 points. That seems pretty decent! This should slot in to just about any list,  and are cheap enough I'm considering picking up a second one now... I think we'll see how good it is on the table before I buy another.

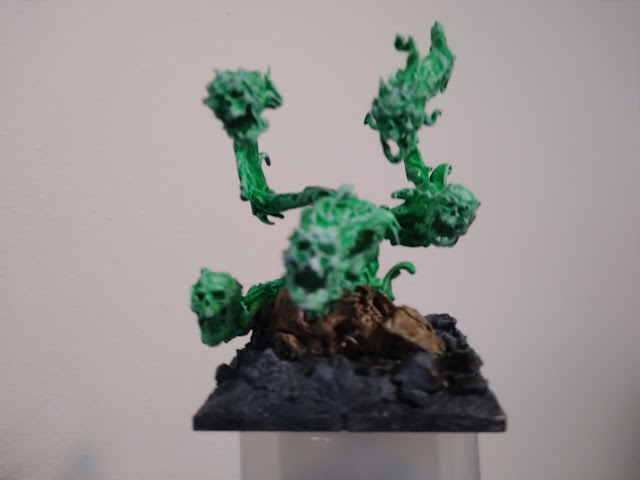
Next up is another exploration with the Hexwraith technical paint, a legendary Well of Souls! I was surprised to find that this was a real-world term and not a fantasy invention. I considered replicating this with a hole in the ground and a bit of a diorama.... but I am not competent enough to make that happen. I know Mantic has a model, but I didn't really like it and was feeling cheap, so I went with an alternative model.

The Well of Souls, from the front. 

This was purchased from Layers of Hell Printing, and comes from Mini Monster Mayhem. There were a lot of flaming and screaming skulls online, and several in this collection. I went with the 50mm centerpiece. It shipped with a solid, circular base, so after rinsing the model, I added some putty to the corners, and then some basing paste and finally some pebbles. I primed it all white. Then painted up the ground and skull, then touched up the spirit bits, and then got to work with the technical paint. Dry time for the rinse, putty, and paste, ate up the most hobby time for this miniature. The painting was very quick.

The more artistic view. It's a neat print for sure.

It took some work and a few brushes to get the viscous technical paint everywhere, but it worked nicely. Again, I think a pro painter could have a lot of fun with the paint, but I finished it off with just a simple white dry brush. I probably could have even gone starker with it.

The Well seems neat on the table, and I'm not quite sure what to make of it yet without having played a game with it. It costs a lot, but is relatively maneuverable. It has the highest Lifeleech value I've ever seen at a staggering 5, and the special rule plays around with moving damage off of nearby units and onto itself. Those seem like some strong interactions, and this seems like a really cool and really unique unit. I think this will play a bit like the Kingdom of Men's General on Winged Beast, but with more intra-army interactions and considerations. I think this unit will have a pretty steep learning curve and take me a few games to figure out how to "properly" use, but seems cool and I am quite looking forward to it!

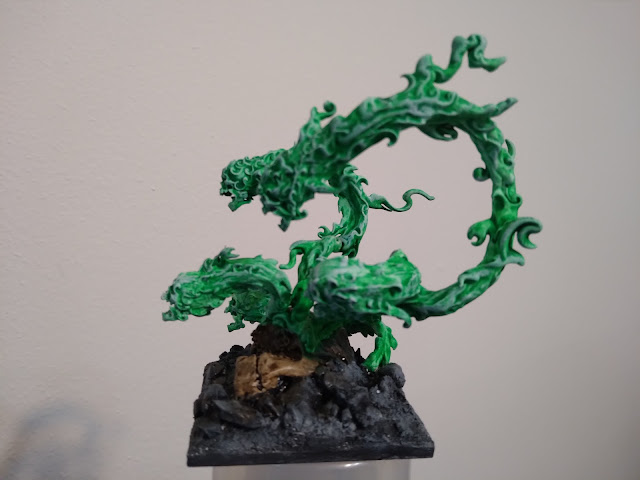
A decently creepy Chroneas. But admittedly feels a bit small.

Last is the Chroneas, a model that has just confused me over the years. Having a small collection of Abyssals, I loosely followed updates to the army, even if I wasn't playing games with them, but the Chroneas broke my brain as it seemed to be overhauled every time I looked at it. I swore the official model was on a 75 mm, but it looks not to be, and currently the creature is just a monster on a normal 50 mm base.

The new Chroneas has the cool Cloak of Death special rule, for some area of effect damage, as well as a Temporal Fissures special rule, allowing for some damage manipulation in the melee phase. This time stuff reminded me a bit of the Shrike from the Hyperion novel by Dan Simmons, and from some old purchases, dug this model out. It lacks the spikes of the Shrike, but still evokes that weirdness I think.

I am still not quite sure how to quickly credit 3d prints. I picked this up via ebay, but this looks to be from the Crippled God Foundry, and was a stretch goal for their Curse of Hollow Hills Kickstarter. Like a lot of what I have worked on recently, he seems a little small, but I like it. Small is good, letting me transport things around.

I painted this one up first by a few weeks. Before I even ordered the Well. I went for some blue and white flames, but after the Hexwraith experiments, I am considering repainting them white and using the technical paint. Unfortunately, I am now considering do this to all the Flamebearers and Efreets too. The technical paint is pretty neat! For better or for worse, that much repainting is way too much effort for the moment, so things will remain as-is for now.

...and with these, I am caught up on my Abyssal hobbying! There are still some odds and ends to do up if I want to, and the Fiend might get a doppelganger if it plays well, but over the last like, two months, I finished up nearly 2000 points for the army, and rounded out the collection by quite a good bit. Like the Kindgoms of Men, my Abyssals should have a pretty deep roster to draw upon now, allowing for a nice variety of builds and things to test. I am looking forward to seeing a bit more of what this army can do!

Wednesday, September 28, 2022

Hobby Update: Smashy Lower Abyssals

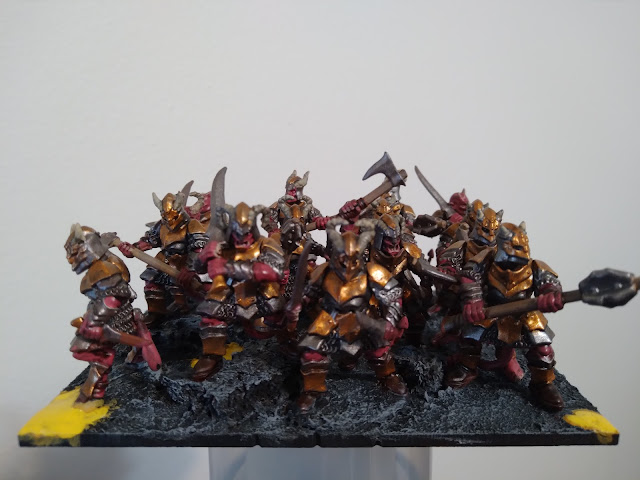
Up next off the hobby perch are some more Lower Abyssal bodies, hobbied up this time as a regiment of Lower Abyssals! As I recall, Lower Abyssal Hordes were common for a while in 2nd Edition, and while I had the models, I just never got around to hobbying any up due to a lack of motivation. This is wrapping up most of those old minis, but I still have a little more than dozen bodies around. We'll see what those end up being down the road. 

So smashy. These are some proper weapons!

In the box, there is one sprue with 5 minis. This sprue repeated over and over to get to the box total for the minis included. This is a bit of a bummer, since you end up with tons and tons of drums and banners, but only one of each weapon option, so you really need multiples of the kit to make a good looking unit. For anyone starting the army, the boney scythe looks like it would do ok for another big weapon, and there is a longer trident thing with similar potential, and the silly looking banner can probably be chopped off and repurposed to make your kits go even further. But since I had the bits after building up so many Flamebearers, I decided to make the unit uniform in its armaments, as I like that look better overall for most of my units.

I think the smashy version here will do ok on the table as a regiment. All in all, they seem like good generalists for melee combat. Having Regeneration, they should endure chip damage a bit better than other similar units in other armies, and should be able to take a decent hit, hold objectives, and hit back ok in a fight. They won't be stellar, but they should be a reliable source of a few damage. I wouldn't recommend spamming them as regiments, as we've been over that math before, but at 115 points, and with decent enough stats, they should be cheap enough to play around with as a one-off for sure.

Sunday, September 25, 2022

Hobby Update: Redone Varangur Horse Raiders

In the midst of finishing up all the Abyssals, I decided to touchup some models for the Varangur as well for an afternoon break this week. That army still needs more supporting chaff! I have (hopefully) three regiments worth of Draugr built and primed, as well as some Night Raiders with Axes ready... but those are significant hobby endeavors, and I need to free up some space before I can tackle those. 

Previously, I had a troop of Horse Raiders, and some old Mounted Skaalds. In the transition to 3rd Edition though, the Skaalds apparently forgot how to ride. Thegns don't have the horse option, and these didn't look imposing enough to be Lords, so I had slated these to be ignored or repurposed, likely added into a small warband for trading games. But... looking at the stats, I realized that I quite liked them, and decided some touchups were in order instead.

Unit 1
I found two marauder horses on ebay, and picked them up, replacing the two horses of the two old Skaalds. I actually have a third Mounted Skaald, but left them as-is for now. If I pick up another box of 5 down the road, he can bump that unit up instead. 

Unit 2

Four horsemen filled the base originally. Three look a little sparse, but should work for now. The new horses needed painting, so I touched everything up while I was at it. The old gold was replaced with with Retributor Armor paint, the purple/grey shields with a dark blue, and the metallic pauldrons and such got a striking light blue. They look very Tzeentch-like now! I was trying to make them bright and unique, like the Varangur units are a variety of clan colors coming together, but this was a neat result.

So, what caught my eye with these Horse Raiders and why did I revisit and retouch them? Well, I like my KoM Scouts! The Scouts are cheap, pretty quick, and well, these are darn similar. They should fill a screening or escort role quite nicely for something like a Frostfang Horde or especially for Varangur knights. However, for 5 points per troop (10 per Regiment), I lose 1 speed but gain TC1 and Def4 while still retaining a ranged attack option. All of this sounds cool to me. My Scouts tend to die against everything, so I thought the additional Defense might be worthwhile; the Thunderous Charge will definitely make them more dangerous in a chaff war or as a flanking unit; and keeping the ranged options is really nice. I opted to not to add anything bits-wise to them to show the ranged attacks, so I could try out both the bows and the axes down the road. There should be nothing else like them on the table, so I think my opponents should be fine with this.

Regiments of these Raiders seem fun too, and I hear that the formation for these horsemen is pretty good, so that might be something to build towards in the future. The added Defense should make them a bit more survivable than the Regiments of Scouts I've tried out previously. Unfortunately, I arranged both troops relatively similarly, so various horse tails are getting in the way of other horse snouts, so these don't really work well in tandem. The bases are a little incongruous too, with one being heavily dry brushed and lighter than the newer one I just did up. I think I'll have to stick with troops for now, but that's fine by me! These Raiders look slick and should provide a little more support to the army until I can hobby up some Draugr and such. We'll hopefully get them on the table sometime soon and see what all they can do!

Friday, September 23, 2022

Hobby Update: Abyssal Oathbreakers

One thing I have really struggled to do in my wargaming career is embrace "legendary" things for myself. They were neat and I appreciated the lore and world-building, but gameplay-wise, I never really "got" them and avoided them. For Warhammer Fantasy, I think it ruined the immersion for me, with every battle in this supposedly massive and uncaring world having the same larger-than-life characters show up every time just felt weird. I wanted my little army to be skirmishing with other little armies and leave the big boys out of it except for rare occasions. This approach hamstrung me a bit, as often times, those legendary choices had a greater amount of survivability or other cool abilities that made them worth taking. In retrospect, the game wanted you to jump into the big clashes and ignore the skirmishes. The game wanted you to take these paragons and build around them and I missed that boat. 

I've gotten a little better, comprehension-wise, when it comes to legendary stuff. Kings of War is building up its own lore still, and there are powerful players to be sure. But a lot of legendary things are more generic, limited more for balance than because there is only one around in the world. There is only one Gnaeus Sallustis for the Basileans, but Kingdoms of Men Captain is unnamed, limited because of their special ability. Formations are another thing: legendary and exceptional elite units to utilize, but elite enough that they can't be spammed no matter the size of the army. I am slowly coming around to utilizing these for myself.

The Oathbreakers.

I made a bit of a speculative purchase over the summer and picked up some Frostave Demon sprues via ebay, seemingly my go-to retailer these days. I decided to turn them into the Oathbreakers, a legendary unit from the Forces of the Abyss. 

The Oathbreakers, from another angle.

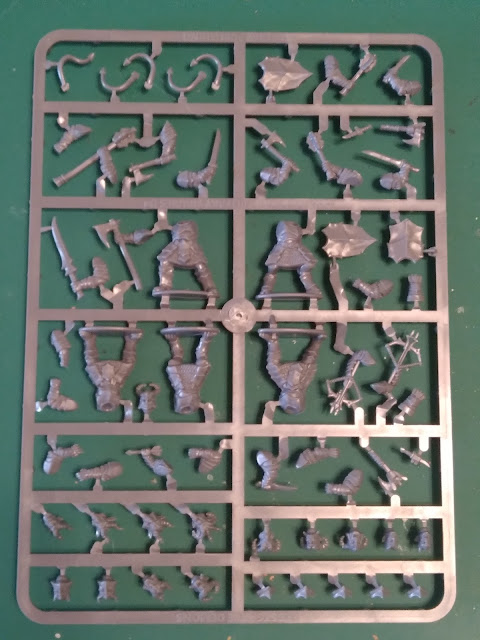
I know virtually nothing about Frostgrave, but I really liked this kit. Each sprue has 5 minis and a small assortment of weapons. The weapons are limited, but for outfitting a skirmishing warband, this has a lot of options. While you can't uniformly outfit a group of 5 from one sprue, each sprue does come with multiple weapon options (two sword sculpts, two crossbow sculpts, etc),  giving you a little more variety than usual so even kitted the same, things won't look too "samey" if you want to build up a uniform unit. Being a warband, the sprues also come with shield options, which are extra-nice as they are distinct and don't have arms already attached. If you are starting up an Abyssals army, consider buying a box or two and using these as your Abyssal Guard!

The sprue.

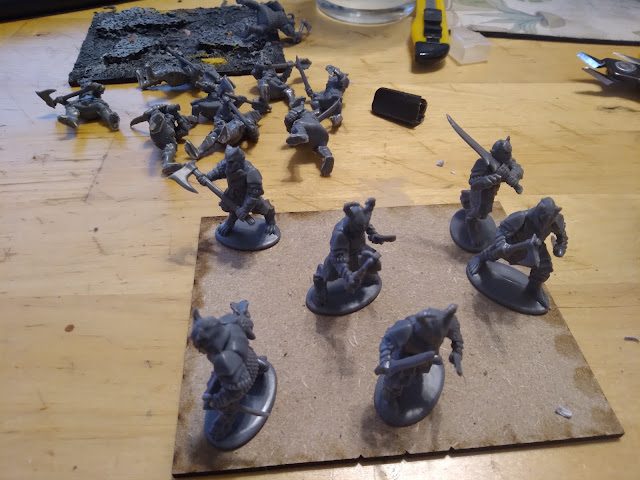
Hobbying them up took some extra effort though. The minis came with stands, which would be great for a skirmishing warband, but were not going to play well as a full unit with my basing scheme of paste and lava pools and cork rocks. Thankfully the stands were thin. I kept a few around to help get the feel of the unit, but clipped it off about 2/3 of the stands from the rest of the unit, going back with a knife to clean it up around the feet. 

WIP shot. I figured having a few with stands would help me organize the rest of the unit.

Game-wise, they are kind of an elite Abyssal Guard unit, but with a fluffy Vicious vs Heroes special rule, and an odd Rallying 1 to other nearby infantry. I could see them supporting some Lower Abyssal Hordes in a wide line or something... but lacking those hordes myself, I'm not quite sure how I will utilize this unit quite yet. I guess I will just have to experiment and see who they play well with! I will try to give these a try in my next Abyssals game.

A little tiny, but he'll do for now. 

As a bit of an afterthought, I also hobbied up a mini for Zaz'u'szu the Betrayer, trying to really embrace these legends. I originally thought it would be an infantry-sized bloke, like, a famed commander of this regiment, and be a more feisty Abyssal Champion. Instead, he looks to be more based off of the Abyssal Warlock, a large infantry spellcaster.

A while back I picked up some 3d printed minis online from a  shop, and figured I'd put one to use. This was Aaron, the knight. It was a little too big for the D&D stuff I had planned on using it for. it seems a little bit small for this. He seems at home on a 32mm base, and does stand head and shoulders above the Lower Abyssals, so I'm ok with this use for now. I added some horns to tie him to the other abyssal units, and a cape to spruce him up, and then a few skulls to the base aesthetically set him apart from everyone else. The big sword might be a bit much since he lacks CS, and nothing about him screams spellcaster, so I feel I am slightly lacking on the wysiwyg front, but he should be the only thing that size on the table, so should do just fine for now. If I see a better model, I can always upgrade I suppose.

On the table, this guy looks like a lot of fun. He inspires, which seems odd for someone known as a betrayer, but is a definite boon for running him. Bane-Chant and Lightning Bolt are desirable spells as well, and being able to boost his Bolts up to LB 8 seems awesome. The betrayed unit won't be able to Regenerate the same turn, but with so many regenerating units in the army overall, I think Zaz should be very fun to run. We'll try to get him on the table sometime soon!

Thursday, September 22, 2022

Hobby Update: Flamebearers

Next up are some more Flamebearers. With Steady Aim and Piercing 1, I've really liked them in the few games I've played. With 18" range they can pummel infantry without fear. I assembled some more over the late summer, though to  replicate my previous Abyssal paint scheme I needed a replacement  paint pot of Carroburg Crimson which was surprisingly hard to pin down. Two different FLGSs were out; one internet order sent the wrong thing; and finally a second order got it for me.

Two troops, as a regiment.

I hobbied up four troops of them, using three old troop bases from the redone Abyssal Guard, and then hobbing up a new one to match. I would need to look at pictures and compare the lava pool positioning, so I am pleased with how that all went. I've also been redoing the lava pools for all my Abyssals and leaning into a more vibrant yellow. I think the brighter yellow looks better than the darker orangy "glow" that I had going on before, though the orangy strokes on the rocks nearby do help to sell the effect I think. I'm liking the army look I've got going. It's very basic and traditional, but I like it.

Two more troops, as another regiment.

I've got them both on movement trays here. This gives me four regiments, and I intend to run them as such for now, but I am also still intrigued on the troop concept. Obviously the troops would be less survivable with the lower Nerve, but going from 10 to 8 attacks would what, do an "expected" 0.5 damage less than the regiment? There might be something to troops and saving yourself 40 points. I think this choice would be very meta or match-up dependent though. If you are expecting no "small-arms fire" at all, the cheaper troops might be a good option. Regiments are still going to be my approach for now though, and with four, they should be able to do some damage on the table. Looking forward to fielding all of these Flamebearers sometime soon!

Tuesday, September 20, 2022

Hobby Update: Redone Abyssal Guard

Back in my Warhammer days, Chaos Undivided and how Chaos was historically treated as a faction intrigued me. I had even picked up a few old faction books from used bookstores for fun. At the time, the factions were split up, so I had a goal of creating at least 2k of Warriors following each god, with each supported by both 1k of Daemons and some Beastmen. I got to play one End Times mega battle with a large contingent of my Chaos Warriors, but the supporting factions didn't make it to the table before 8th literally ended and AoS took over. 

Of the Daemonic contingent, the Tzeentch stuff was first ported into Kings of War and then eventually back onto rounds; the Slaanesh stuff was gifted away; the Nurgle stuff never really got purchased; and Khorne only had a bunch of Bloodletters, which were repurposed into Kings of War Abyssal Guard around 2018 with a regiment and a trio of troops. I don't think they ever hit the table. The minis are so awkwardly ranked I just decided not to deal with pushing them into a melee. 


While browsing ebay this summer, I found a reasonably-priced bundle that would get me up to an even 40 Bloodletter minis, and after hemming-and-hawing for a few weeks, ultimately decided to pounce since the bundle was still available. The minis are broad enough that 10 mostly fill out the regimental base, and I figured 4 regiments of Abyssal Guard could be fun to have down the road. I'm not going to any tournaments, so was fine with using the GW minis and with being below the preferred model count.

First unit.
Second unit.

Third unit.

Fourth unit.

There is nothing really special about the minis. The original kit isn't really customizable much without a ton of effort, so these are mostly just as-is. I did add a number of pauldrons though, to give them a more grounded and terrestrial feeling. I thought about taking the time to add loin cloths, to get them closer aesthetically to something like Mantic's Lower Abyssals, or straps to make the pauldrons look better, but decided it was just not worth the effort to customize 40 minis.

Ranked up about as good as can be. The front-right unit is a bit of a bother. I ran out of minis holding the sword upright, which exacerbates the ranking-up.

For hobbying, I decided to break every mini off the base. I was able to utilize some old regiment bases from the Tzeentch foray, so the bases were ready to go with just a few touchups to disguise where the former minis had been. The original troop bases here will be used with some upcoming Flamebearers. 

All the minis got their minor repaints and touch-ups at once. Then they got roughly sorted into the final regiments, and arranged on the bases. The goal was to try and get things so that the minis could actually reach combat on the table. I tried! Most of the models have a wide stance and haphazard grip on the weapon, pointing it roughly horizontally, so it was hard. I think I will still need some stand in bases on hand for tight quarters just in case, but the end result is so much better than it was! These might actually see the table sometime.

Not quite sure how these will fare on the table when they do. They are roughly akin to the Kingdoms of Men Foot Guard for stats though, and those have served me pretty well overall. With the addition of Regeneration and Fearless to get the -16 Nerve, I think the better call is to probably keep these at Def5 and lean into the tank role, but that wasn't really an option here and I can't bump these up to hordes legally for truly immovable tanks. They've got Me3+, and they've got good offensive stats, so I think their effectiveness will hinge on how good my regen rolls are for them to stick around and continue fighting. Plus using them smartly and all that good stuff. I'll try and get in a good test for them sometime soon, and we'll see how they do!

I'm on a bit of a roll with the new replacement shade paint pot, so more Abyssals to come soon!

Sunday, September 18, 2022

Hobby WIP: All the things

I had a small outpatient surgery performed recently, and was looking forward to having a few recovery days away from work and painting minis. In preparation, the week leading up to the procedure was filled with sprue clipping, mold-line removal, gluing, and priming. I knew I was going a bit overboard, but also knew that these would be waiting for me over the winter as well, so was definitely ok with that. 

This isn't even everything I prepped.

Unfortunately, I didn't factor in the pain during the recovery period. Sitting up for more than a half hour was basically a no-go for the first two days, and I've been moving pretty gingerly since. So I haven't really made any hobby progress on my little break.

Fortunately, like I said, alllllllll this and plenty more is all prepped now! And getting in some semi-regular games has got me motivated. Hobby Updates coming soon for a variety of armies!

Saturday, September 10, 2022

Kings of War 3rd Edition: #015: Varangur vs Brothermark [Plunder]

My most regular opponent was in my town for work, so we organized an evening game. He opted to continue to explore the Brothermark. While the army is still a bit light on chaffy and supporting units, I wanted to try out the Varangur for their first 3rd Edition game. The KoM / Brothermark slap-fight would have to wait for now! My opponent brought the following for the Brothermark:

The more I looked at it, the more I was surprised by the list! The formation, dragon and legendary leaders from Battle 013 were all dropped, freeing up a lot of points. This actually made some sense to me. Legendary stuff usually has an additional cost, and if you're using a legendary spellcaster to just cast one spell and inspire, this is probably a better (cheaper) option around for you. But the rest of the list was unexpected.

My opponent and I had extolled each the virtues of the Penitent hordes, so right off the bat I was quite surprised to see them as regiments here! Forever liking MSU play though, I was intrigued to see how they would perform, as they were some nice cheap drops, and with innate CS, might be able to do some damage. This list has a horde of Paladin Monster Slayers at a sturdy Def5, likely supported by the Bane-Chanting Priest. Joining them is a horde of Villein Bowmen. I have been ok with running a regiment of Bowmen to get an unlock and to camp objectives... so I was interested to see how this would perform. The unit is only Me6, so gets a nice discount while picking up Phalanx, so this seems like a really neat archer unit. The Order of the Abyssal Hunt are the "elite" knights knights specializing in some anti-monster violence, and should have some good targets against me, especially if the Villein Skirmishers screened well. 

My opponent brought the Artillery again, which should fare much better now that I don't have my Abyssals and all my Regeneration. A surprising six heroes rounded out the rest of the list, with priests to heal and inspire, and the Dictator to duel enemy heroes. There was also a buffing Chaplain, and finally two Exemplar Hunters. These last two are peculiar, and I thought would cause me some trouble. They are individuals on foot, but they and the Dictator will be hard to target, let alone speedily remove, and should able to sneak in a fair bit of damage throughout the game.

For their debut in 3rd Edition, I brought the above for the Varangur. I needed to start exploring the army somewhere! I wanted to try the Jabberwocks out, and decided that the Magus Conclaves could be some nice synergy. I think my list hinges on making this 600+ point investment work, so target priority and keeping these alive will be crucial. To unlock all this I opted for the Frostfang Cavalry. I chose them over the Fallen since I figured these will be more grindy and survivable. I have a ton of old Warrior models, so two Clansmen and some Huscarls will provide some additional support while three regiments of Snow Foxes seek to intercept things like the Knights. I needed some Inspiring, so picked the Lord on Frostfang to lead his toothy brethren, and Magnilde of the Fallen was taken originally to intercept an expected dragon. Without one facing me, I figured she's likely going to need to try and go after the war machines. 

This list is very unusual for me. I think it is the most "elite" army I have ever run. I am only using half of a travel bin for my minis! I knew I was going to be pretty significantly out-dropped, so I hoped to take a look at the scenario, terrain, and then hopefully make some good decisions and hope for the best.

Since this is my first time fielding the army, I am testing all the things and will discuss more at the end.

Table and Scenario

We ended up picking the scenario Plunder. We put terrain down loosely tied to an app, with Hills as Height 3,  the Fences as Height 2 Obstacles, the Forests and Height 6 difficult, the Chapel as a Height 9 Blocking building, and the graveyards as Height 2 Difficult terrain. We then set up the tokens in blue. Each of the far tokens ended up as the primaries, gaining a red chip and will be worth 2 points, while the three near the center were secondaries and just worth 1 point. I thought these were Objective Tokens, but part was through the deployment phase, we reread the text, and realized these were Loot tokens, so could be picked up and manipulated. 

I got to pick sides, and picked the one that had the building. I knew I was going to be out deployed, so my original goal was to hide my Magus Conclaves and things around terrain, and figured the building, small as it was, could help, and while the deployment zone was open, this side gave be more terrain to play around with to hide. However, the Penitents started to arrive immediately on my left though, so I decided to commit more to the stuff on my right. 

I finished my part of the deployment happy, but my opponent out deployed me, with the Knights coming down very late. So, a unit of elite knights of from the Order of the Abyssal Hunt ended up on my left, and thedr mounted monster hunters were eagerly eyeing up the Jabberwocks...

Deployment and a scout move as viewed from my left.

For my opponent's deployment, going from left to right, we had the knights from the Order, the four  Penitent regiments supported by the rallying Exemplar Chaplain, the flying Dictator lurking nearby, the Lone Wolf Hunter scouting up into the woods, and the Def5 Paladin Monster Slayers with a healing priest in and siege artillery in tow. The horde of Bowmen took the forest, and the Order of the Hawk Hunter lurked near the hill. On the far right, the mounted Priest worked with two Villein Skirmisher cavalry units, and the second Order of Abyssal Hunt knights. The final two siege artillery pieces hunkered down in the corner of the battlefield. 

The center.

I chose to leave the left with just the Jabberwocks, deploying one early and one late. I liked their chances against the Penitents... before the crusading knights showed up. Feeding Frenzy seems like a really cool rule, so I was hoping that the Magus Conclaves nearby could to maim the Penitents with their bloodbolts and then let the Jabberwocks feast. 

Deployment from the right corner.

For the rest of the army, I didn't have a great plan. This was my first time with the army! The infantry came down early and a little back, which ended up boxing out the Frostfangs and having a bit of a goofy deployment. I think I should have dropped both Frostfang hordes earlier and just telegraphed and embraced aggression. I think putting both on the flank and all the infantry nearer the center, creating a bit of a refused flank, might have been a good call. But I was out-dropped, and even giving the scenario some thought, just did not come up with that plan on the fly until I had already boxed myself out. More familiarity with the army would have helped, but everyone's gotta start somewhere I suppose.

I won the roll off and chose to go first, hoping to apply some pressure before the opposing siege artillery could do too much damage.

Top of Round 1: Varangur

On my left, the Jabberwocks hesitated, and backed up, waiting patiently for the blood to start spilling.  I really wanted to see how their Feeding Frenzy rule worked, so keeping them alive was a priority for me. The knights of the Order had a long charge range, so I held back.

The Magus Conclaves released their blood bolts, and they homed in on the enemy ranks. I think focus-fire would have been a good call, but this is my first game and I deployed a little wonky. So I spread things around trying to gauge how much damage they might do. One Conclave scored some damage against some Villein Skirmishers, but they held. One Conclave hit some opposing Penitents for a few damage, and the third was able to get a nice shot into the order of Knights on my far left flank, though the damage was minimal. That should entice the Jabberwocks in the coming turns! I thought Iron Resolve worked like Regeneration, where it triggers in the movement phase and is just a nice, slow trickle of health back. That's uh... actually not how it works as I found out. I think I was confusing it with Regeneration. We missed a few instances of the ability in-game, but think we eventually caught and adjusted for each of them in time. In any event, each Conclave did about 1-2 damage each. Nothing was really spiky for me.

Still trying to use the dice to help me track turns. Slow going on my left flank.

The rest of my line moved up. The center Frostfangs were a little more aggressive, bringing two Snow Foxes in tow, while most of the stuff on the right respected the greater charge distances of of the block of enemy cavalry. I think one of the Villein Skirmishers had a charge, but it would be hindered and unsupported.

My right and center.

My unfamiliarity with the army and deployment started slowing me down almost immediately, with a unit of Clansmen needing to sidestep to give the nearby Conclave a shot against the Skirmishers. I was wary of having stuff dogpiled by the humans, but I probably could have been more aggressive with the center unit of Frostfangs, and used them more as a distraction carnifex. I had a straight show and a greater charge range and should have used that more. Charging turn two should have been my goal.

Bottom of Round 1: Brothermark

The Brothermark on my right rushed forward, the Skirmishers screening the advance of the heavier cavalry regiment. This was a great use of the Skirmishers by my opponent, as I was in a bit of a bad spot due to my deployment. 

If I brought up my chaff lest turn, his Skirmishers take the Foxes. I then take the Skirmishers with the Frostfangs, and hope I survive the retaliatory strike from Order of the Abyssal Hunt. I did not have a great way to deal with this. I got very much outplayed here.

Aha! The first blurry picture of the battle report appears!

The artillery sang. Several shells hit the center unit of Frostfangs, dealing 6 damage to them. Another engine of war hit the Huscarls, along with a decent volley from the Bowmen hiding in the woods. The damage being put out at range was pretty astonishing.

The Penitents largely advanced, eyeing objectives, but having restraint. The pair of Exemplar Hunters started stalking about the battlefield, and the winged Dictator flew up near the Chapel, eyeing the chanting Conclave. On the far left, the knights from the other Order of the Abyssal Hunt unit took advantage of their speed, getting into charge range of a Jabberwock but remaining outside the charge range of the hungry monster.

Top of Round 2: Varangur: 

The heroes are indeed going to be a problem it seems. Self-preservation takes over, and all three Conclaves fire at the winged Dictator, dealing enough to barely waver him. Magnilde is some 16 inches away, and calls upon her legacy, angrily flying and descending upon the Lone Wolf Hunter, though not dealing enough to cripple him as it turns out. 

The Jabberwocks move back several inches, back out of range of the opposing Knights. I still want to check out this cool ability, and am still tying to preserve them.

The Magus Conclaves move to zap the interloper.

One unit of Snow Foxes nimbly bounds past the fence, snarling at the Paladins and preventing them from charging the Frostfang horde that took the hill. The cavalry should have their choice between the Paladins and the Bowmen on the following turn... if they survive another volley.

Prior to moves at the top of Round 2.... a big dumb traffic jam.

On my right, the Brothermark have secured the small cemetery, all but ensuring a hindered charge. The Lord sees an opening, and is able to move past the cavalry block with a slight nimble pivot. If I did not have to pivot a few degrees to get there, I would have loved to have turned the full 90 degrees and broken up this party. Alas. He is now on war machine duty, which also seems like a good idea given the damage that is coming out.

I hop the Snow Foxes up, and bring the Frostfang Cavalry up behind. The wounded Huscarls then charge a Villein Troop and rout them. Writing up the report, I think this may have been a mistake, but I seem to be second guessing myself a lot on this flank. Keeping the Villein screen in place takes the stronger Knights out of the battle for now, and that delaying tactic might have been a better call, but the Huscarls go into the Skirmishers, and obliterate them, giving the knights of the Order a free charge against the Huscarls.

Bottom of Round 2: Brothermark

The Knights retaliate, and boosted with Bane Chant from the nearby mounted Priest, obliterate the Huscarls, and reform to eye up the Clansmen, who take a mighty volley from the Bowmen while the Knights also pick up one of the primary loot tokens. Yeah, the Order of the Abyssal Hunt should be proud today. The surviving Villein Skirmishers make a hindered charge through an inch of the graveyard and into the Snow Foxes, who are only wavered, meaning my terrifying Frostfangs are kind of trapped out on the flank and unable to contribute.

The Frostfang Cavalry horde in the center is no more.

The Order of the Hawk Exemplar Hunter has a silver crossbow and d3 Slayer ability at range. That's pretty cool! He rolls up a few extra attacks, and deals two damage to the Lord on Frostfang. 

The Paladin Monster Slayers attack the blocking Snow Foxes, and cut the beasts down. Meanwhile, two artillery pieces unload on the central Frostfangs again, dealing 9 damage to it this time, and easily routing it. The pressure on the Brothermark's center is gone with a cacophony of black powder thunder! The third piece fires against the Lord on Frostfang, and deals 4 damage to him. 

Individuals. What a pain to deal with!

The Lone Wolf Exemplar Hunter disengages from Magnilde, and charges the nearby Clansmen instead, rampaging up a few extra attacks, but only getting two damage through.

The various Penitent units advance with a bit of a haggard and staggered arrangement, with one moving at the double. This advance allows the second regiment of knights from the Order of the Abyssal Hunt to pivot, move, and pick up the other primary loot token at the end of the phase. It is a very good day for the Order of the Abyssal Hunt!

Top of Round 3: Varangur

Keeping with the left, the at the double move brings a unit of Penitents into charge range of the Jabberwocks, who decide to multi-charge. I don't want to get them separated and bogged down over a few turns. Since units roll attacks one at a time, damage caused by the first Jabberwock helps out the second, and the Penitents are swiftly torn to shreds. Hey, this ability is pretty neat!

The nearby Clansmen, under attack from the Lone Wolf Exemplar Hunter, opt to disengage and charge some Penitents themselves, and although the latter are Inspired, the Clansmen are able to slip 4 damage in and waver them. The Hunter has Iron Resolve, and we account for that special rule this turn, making adjustments for a few damage dice, like him and for  the knights of the Order nearby.

Magnilde charges the winged Dictator, and thankfully routs them. The Lone Wolf Exemplar Hunter is in position to start attacking my Magus Conclaves next turn. I believe the first one connects pretty well, giving me a 4+ to waver him, which I am ok with. The other two fire into some Penitents, and  slip a few damage in. Fortunately, the end result is boxcars for the Penitents, and the meager damage  is enough to push them into routing territory. Unfortunately, I roll Insane Courage for the Exemplar Hunter, and he'll be hunting my war engine wizards next turn...

Oops! But I mean, just look at him. The pose is stoic and purposeful. Of course he'd survive.

And speaking of that task, the Lord on Frostfang makes it into the first Siege Artillery piece, rolls up a ton of damage, and wouldn't ya know it, but the artillery crew is feeling insanely courageous as well.

Ugh. I'm not even going to take a proper picture.

The remaining Frostfang Cavalry are stuck behind the wavering Snow Foxes,. There is just no way to maneuver things around. The Foxes disengage to provoke another hindered charge. I probably should have backed up a few inches with the Frostfangs to get a better field of view for future charges here, but I do not. The nearby Clansmen have CS though, and I opt to charge them into the Order, and I am rewarded with a solitary point of damage against them. The dice gods are feeling especially capricious this turn it seems, and I roll another boxcars for the Nerve check against the Order.  The one damage isn't enough to amount to anything, but they are wavered! But, they also have Fury, so it's not all that impactful as it turns out.

Bottom of Round 3: Brothermark

The Villein Skirmishers make another hindered charge into the Snow Foxes, routing them this time, and finally freeing up my remaining unit of Frostfang Cavalry. The nearby mounted Priests gets Bane-Chant off on the furious knights of the Order counter-charge, and wipe out the Clansmen. They started on 4 damage, but this was unfortunate for me. The mounted Priest here was a good call. Bane Chant was 2 for 2 for casts, and really kicked the Order's knights up to the next level for damage dealing.

Much to their dismay, the Paladin Monster Slayers again contend with some Snow Foxes that had run up to delay them. I'm not sure if this was the best use of the Foxes, but keeping a sturdy horde away from the loot tokens seemed like a decent enough plan. 

The insane Exemplar Hunter charges one of the Magus Conclaves. They take 8 damage, but amazingly are just wavered when it's time for the Nerve Check.

On my left, the Exemplar Chaplain rushes to help the wavered Penitents. His aura grants Rallying 1 and Fury, and dutifully encouraged and enraged now, the Penitents strike back against the Clansmen. They roll hot, dealing 4 damage and bring them up to 6, and then getting the waver on the Nerve check. The tables have turned here, and I have no such tricks. The final remaining unit charges a Jabberwock, and slips one damage onto the monster, but it holds. 

The knights of the Order lug the loot token forward, but were out of range of a charge against the nearby Clansmen. At least one Jabberwock should be able to charge them next turn in the rear, so the knights decide to drop their loot. I believe they are carrying one primary and were on top of one secondary token right now. Dropping should make it more difficult for me to pick up, should I decide to go and attack them on my turn.

Top of Round 4: Varangur

Having dropped the loot though, my opponent would need to spend time to pick it back up again... so the Jabberwocks decide not to charge the knights, instead try to munch on the nearby Penitents. 

Eager to get to it, I forget to spin the turn tracker.

Again the damage caused by the first one helps the second one out. Feeding Frenzy is pretty cool! Too bad the Conclaves haven't been able to help them out at all. The monsters tear the Penitents to shreds. Fighting shoulder-to-shoulder though, victorious reforms are weird. One backs up, thankfully enough to get out of the way, while the other changes facing. Both can eye up the knights.

Boom. Fixed the turn tracker at the end of my round. I'm taking my victories where I can this game.

Magnilde assaults the insane Exemplar Hunter, and finally ends him. The two other Conclaves fire into the knights of the Order guarding the loot tokens, but flub very hard, dealing I think 3 new damage between them. The knights are steady, and should heal 1 from Iron Resolve, bringing them down to a total of 3 damage.

The Frostfang Cavalry finally do something, and roll well, obliterating the Skirmishers. They change facing to threaten the knights of the Order here, bogged down a bit with loot tokens as they are. Should the knights choose to charge, the shuffle to center should put them partially in the cemetery and hinder their charge.

Hard to set a trap with what is left. I'm at least a turn too late here.

We skip past the fight and just roll Nerve for the insane Siege Artillery, and it routs this time. With the angles, the Lord is then faced with a choice of what to face, either committing to the siege artillery, or threatening the knights as well. He is being hunted, and I opt for the knights as well. 

Bottom of Round 4: Brothermark

The knights of the Order are encumbered with loot, but do have the movement to sneak on by and out of the charge arc of the Frostfang Cavalry. The Frostfangs are pummeled with artillery strikes again, but the barrage only deals 4 damage to them this time. 

The Frostfangs can't have any fun.

Free of the Snow Fox chaff, the Paladins flank charge the wavering Clansmen. The Penitents join in the front, and the rallying Exemplar Chaplain joins in the other flank. The Clansmen are routed. The Penitents back up, allowing the Paladins to reform, and sit on the central loot token, claiming it.

Having no shots, the Bowmen finally leave the forest, and look to claim another objective for the Brothermark as the game concludes.

On the left, the knights of the Order simply turn to face the Jabberwocks and Magnilde, on top of, but not picking up the stash of loot.

Top of Round 5: Varangur

While I control no loot tokens at the moment, the game isn't over, and is still actually competitive. The two Jabberwocks slam into the knights of the Order along with Magnilde. Magnilde is there to enable Feeding Frenzy, rolling her attacks first. The dice aren't great, but it is enough to seal the doom of the knights. Magnilde overruns an inch, ending atop a secondary loot token. One Jabberwock moved back, and the other changes facing. 

The beginning of Round 5.

The trio of Magus Conclaves fire upon the Paladins, but whiff again, dealing around only a few damage between them all.

On the far side of the table, the Lord on Frostfang takes his only charge, into the Exemplar Hunter, who takes 4 damage, and is wavered, but holds. The Lord is still within the safe indirect fire range of one of the siege artillery pieces. 

The Frostfang Cavalry have no charges, but move close to their max to menace the Bowmen and fight for that loot token as the battle starts to conclude. 

Bottom of Round 5: Brothermark

The Paladins charge Magnilde, connecting with a corner. Given the rules for individual, we think she slides down towards their center. My opponent insists that the Paladins are not touching the loot token, and it remains in the open.

Mid-movement I think.

The Penitents will move and pivot, holding down but not picking up the 2-point primary loot token. 

The Chaplain attacks a Jabberwock, but is unable to wound the monster.

The remaining artillery fire, dealing a ton to the Frostfangs while the Bowmen do move up to secure and pick up the loot token. The Frostfangs break.

The knights of the Order on the right simply trot away towards my deployment zone, holding a 2-point primary loot token.

Top of Round 6: Varangur

Disengaging from the Chaplain, both Jabberwocks are able to nimbly charge into the Penitents. The again rip the Penitents to shreds, and with the victorious reforms, each is able to secure a loot token. It is a very good thing that the monsters were team players!

Magnilde disengages from the Paladins, and charges the Chaplain, and slays him. The Magus Conclaves scoot back out of charge range, and again throw everything into the Paladins, but again struggle to get much damage through. 

The Lord on Frostfang disengages from the wavered Exemplar Hunter, and charges into the flank of the Bowmen. Writing up the report, I realized I was only rolling 7 attacks for him in rounds 5 and 6. So that's an error, as it should be 9 attacks as the base. Still, in the flank, with 3's and 2's... he manages something like 6 damage, which is pretty abysmal, even accounting for the erroneous fewer attacks. He ends my turn high atop the hill. 

Bottom of Round 6: Brothermark

The Bowmen disengage and inch forward, ignoring the threat in their flank. With their available pivot, they turn to face the looming Lord on Frostfang atop the hill. The artillery fire again, and with the Exemplar Hunter, deal 10 or so more damage to the Lord on Frostfang, shooting him off the table with another cacophonic roar of black powder. 

Not a great game to be righting a super-cool Frostfang.

The Paladins pivot and move to stare down the Magus Conclaves, and the surviving knights of the Order sit back, safely in my deployment zone, obscured by the woods nearby.

I control a primary and a secondary loot token between the Jabberwocks. The Paladins and Bowmen for the Brothermark each hold a secondary token. And the knights of the Order of the Abyssal Hunt hold a primary loot token, giving the Brothermark a 4-3 edge... as we roll up a round 7!

Top of Round 7: Varangur

Not much is really contestable for a Round 7 as it turns out.

Magnilde scampers forward to block up the Paladins from attacking the Magus Conclaves while the Conclaves themselves attempt a third volley, and flub again. The Paladins are finally brought up to 13 damage, but survive.

Enduring for the victory.

I believe the Paladins were my only shot at the end. I think one of the Conclaves would not be able to see the Bowmen, and I decided that I really need to continue to focus fire the Paladins to have a prayer. Unfortunately even after several turns, they proved too much to move. 

Bottom of Round 7: Brothermark

Nothing of consequence happens. The Siege artillery are out of targets given intervening terrain blocking line of sight to my few remaining models, so my opponent does nothing, retains the 4-3 lead with the loot and wins!

Game Conclusion

Many thanks to my opponent for fitting this in on a weeknight. It took us longer to get through this than I expected, and that was due to me bumbling my way through a new army. So many many thanks for putting up with that. 

The scenario was neat. We are still making our way through the list of available scenarios, but making some good progress. I realized I didn't have the units to go wide and contest things so the general plan was to kill stuff and then try to secure things. Unfortunately, I was out deployed, and there wasn't any real blocking terrain like buildings or forests for the middle of the table, so all the siege artillery pieces all had shots basically every single turn into the Frostfang units of their choice. Brutal stuff, and I should have realized this sooner and yolo'ed them into stuff to make sure they did something besides just die ignobly. 

My list and my tactics definitely suffered from a lack of a familiarity with my army, and I definitely got outplayed, particularly on my right. Surprisingly though, it ended up as a very close game with several turns at potentially clawing my back to just a tie. But, the Def5 Paladins endured. I felt like I was rolling poorly against them, but the higher Defense definitely prevented a few wounds as well to help secure the win for the Brothermark.

Testing Conclusions

I didn't set out to test anything in particular, but there were a number of neat things going on in both lists that I think are worth commenting a little on. My opponent has been tracking his thoughts here on the Kings of War forum, should you wish to peek or contribute. We'll touch on my opponent's list first:
  • Penitent Regiments. My opponent said he wanted to outdrop me and that these would go a long way towards that. They did! With Crushing Strength and 14 Nerve, they also don't seem like bad buys at all to take up space on the field and bait some deployment drops. It will be neat to see if these show up again or not.
  • Exemplar Hunters. My opponent wanted to outdrop me as he was expecting a flier, and intended to have the Hunters (and Dictator) ground it. Overall, these seem like very cool specialist characters for the Brothermark. Lots of fluff, lots of stuff you can do with them both on the table and for hobbying. Very cool!
  • Order of the Abyssal Hunt. I believe he took these over normal knights to get their Slayer effect, to then slay the grounded flier. Monsters can really mess things up for humans, so I could see the desire to have these in some match-ups.
  • Horde of Bowmen. These were interesting! Having Phalanx is huge as it really dissuades folks from charging, and prevents the typical fast things from getting there too soon to disorder you. I don't think you would want more than one, but just having that much nerve in reserve throwing out 20 attacks a turn was really fascinating. They definitely surprised me and seemed great for these more casual games. My opponent also got to deploy these smartly in the forest from the beginning, so used them well. Very interesting.
  • Siege Artillery. My opponent has been tracking the performance of these, and per his math, he says they performed about average. Yikes! This seemed like an amazingly good match-up and map for them though. There was really no locking terrain in the center, so all the Height 4 Frostfangs I brought had nowhere to hide with the Height 3 hills. 
  • Def5 vs CS1 on the Paladins. I think I'd usually argue for CS1 on the Paladins and hordes, since you want to trade the chaff in order to get a killing blow from a big unit. However, the Def5 did arguably give them the win here. I think I default towards CS1 since my regiments are typically defensive, like Pikes. With the Penitents here though, a sturdier horde seemed to do well. 
Then for the Varangur, again I didn't set out to test or compare anything with this being the first game with them, but I do have some quick thoughts on a few things:
  • Magus Conclaves. I liked these, but felt that they underperformed, even when accounting for the early turns against the individuals. I think that is just "woe is me" bias though. They didn't have the reach of a typical war machine, but getting to move around and shoot with steady aim was great. These are definitely worth exploring more I think!
  • Jabberwocks & Feeding Frenzy. I really liked the special ability! The Monsters are pretty cheap too, which is nice. Unfortunately, I think it's mandatory that they have some kind of support. The Magus Conclaves didn't really get to weakening units for the Jabberwocks to feast on like I had hoped for since they were busy fighting for their lives and missing, but 
  • Magnilde. My mini is an old Valkia model with a headswap, hobbied up back in 2nd when Magnilde was Herja and the mini flew full time. I really liked the utility of her, though she did get stuck running interference all game. The one time fly is a really neat mechanic.
  • Huscarls. These have to be some of the most elite infantry in the game! Only Undead Soul Reavers some to mind as something stronger. I used them very poorly. They needed some protection as well. Unfortunately, I'm still a bit light on chaff units, so this turned out badly for them! But they seem fun and strong and they'll make another appearance when I have a better idea of a list.
  • Clansmen. These were neat, though also used a bit poorly. Their stats (namely Nerve and only 4+ to hit) aren't quite good enough to make them the generalists I was trying to use them as. They underperformed in their combats for sure, but are still neat. They have a lot of options, so I'll need to play around with them more I think.
  • Frostfang Cavalry. This was not a good game to be a Frostfang! Out-dropped, no good cover, and facing a trio of war machines. Any one of those is pretty bad, and I was not aggressive enough with them, so these did not have a good game. I still liked the unit though. Speed 7 is not as quick as I think it is, and I think if you run these, you need something like Horseraiders to help set the pace and aggressively escort them in. Snow Foxes are nice for taking a hit, but I think the Frostfang cav needs some aggressive chaff instead to help initiate those combat trades. 
All in all, this was a bit of a beating for me, but still a very good game. And a surprisingly close result too! Again, many thanks to my opponent for patiently helping me through the first game of a new army, and especially for fitting this in on a weeknight out of town. The printed army is still looking great and I think you've found some very neat things that the Brothermark can do!