

Intro and Lists
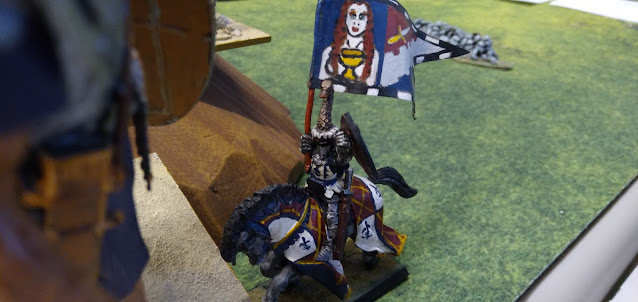
I was clued into a small but growing contingent of players nearby, and after about a month I was able to connect with one of They brought a wonderfully painted older Bretonnian army as the ever-powerful Brothermark, running something approximating the following:
 .
.Being up against a brand new person and their comfort with the game, I decided to bring my relatively straightforward (if arguably) underpowered Kingdoms of Men, running the following:

I have played a fair number of games with my Kingdoms of Men, but none recently. With Clash of Kings 2024 launching and invalidating most of my ready-made lists, I tried building a new one from the ground up. I'm running some old favorites with Pikes and Militia and flying Generals and Giants, but now acquiescing and exploring some hordes as well. Up to test for the new Kingdoms of Men are:
- Foot Guard Horde. I have accepted that my Kingdoms of Men needs to be running some hordes in order to be anywhere near effective. I wanted a generalist unit, so we'll see how the Foot Guard with two-handers perform!
- Bowmen Horde. A second horde for my list! My regular opponent had been bringing one often, when he runs his Brothermark. I like his version of the unit better, but wanted to give this approach a try as well. Their damage output isn't likely to be great, but they should be able to land some chip damage, and play objectives and such. We'll see what adventures they get up to.
- Knight Horde. The third horde for my list, and my first ever Knight Horde! They are easily one of the most expensive things I've ever run. We'll see if I can get a proper charge off with them!
- Ballista. These have been on my radar for a while, but I don't think I've had a chance to really properly run them since their points decrease with the last Clash. I
- Rampage Giants. I've used Giants before, but often forget to support them properly. We'll see how I do this time around. I also look to have accidentally selected Rampage over the usual Slayer, so we'll test that out as well, I suppose.
- Lifeleech ASB. I am not a huge fan of this buff. In the game, Lifeleech has a very "evil" connotation, with it showing up in armies like Undead. Nothing in the KOM roster gets this innately, and as I understand Auras, this won't stack if a unit is covered by multiple ASBs. I would have rather gotten something like Elite; a generic aura that would buff the jack of all trades army that is the Kingdoms of Men and support a variety of playstyles.
- Captain, Rallying, and Redeploy. The trickiest thing in my list.
- Magic Items. I'm running way more than usual! We'll see how each of them do post-game.
My opponent had been playing a lot of Kill recently, so we decided to try a scenario but also keep it simply and we eventually settled on Invade.
Table and Terrain
We were out at Gamers Realm in New Berlin - a fabulous little nerdy store. If you are in the Milwaukee area, check them out! They have quite the selection of games, hobbying supplies, and even bits boxes, sprues, and second-hand stuff for sale. My opponent and I gabbed through the store hours, so I came away with just a few paints for now, but will be
My opponent was familiar with the shop, and we were able to snag a table, use some of the shop's terrain and then supplement it with a few pieces brought by my opponent. As is usual, the forests are height 6, the hills height 3, and the obstacles height 2. The skull shrine in the middle we opted to make height 9 impassable, so we didn't have to balance anything over it. In retrospect, we should have been bolder and made it blocking terrain but height 3 or something. That might have been more interesting.
 |
| A nice, blurry shot to kick off the battle report! |
My opponent deployed in two areas. The Villein Bowmen and Skirmisher regiments deployed off on my far left behind a hill. The Ogre Palace Guard sat behind the shrine. Next to them were the Paladin Monster Slayers, the Priestess and the Chaplain. The trio of knightly orders, Paladin on horse and Paladin on Dragon were tucked into the corner, with the Dragon safe from my shooting.
 |
| My opponent's view. We normally don't get this angle! |
I had a deployment edge, increased by the Scrying Gem. I won the roll-off for sides, so dropped a Militia Mob, then my opponent was forced to deploy three things. I dropped the Knight Horde out on my left by the Pikes, which would be redeployed later on to my right wing. With the redeploy I had matched his hard flank with my own. For my deployment I had a rampaging Giant, Militia Mob, and General on Winged Beast screening the Knightly horde, and all tucked behind the hill. My center was a unit of Pikes, the horde of Bowmen, and two Ballistae. The line continued on with the other Giant, other Militia, Foot Guard horde, ASB, Pikes, and then the other General on Winged Beast. Some astute readers may notice that I did not mention the Captain. I realize this sometime around Round 4.
I also won the roll-off for first-turn turn decision, and figured with the Ballistae, I should seize the initiative and start shooting.
Top of Round 1: Kingdoms of Men
On the right, things moved up, cautiously. The Militia are the only thing in charge range, though any of the cavalry and the Dragon can all reach them. The Knights, Giant and General lurk nearby. (Though, when writing the report, I noticed that my General is only Height 5; the Knights would be blocking all of his line of sight. This was a fine place to start, but he should have moved over, by the Pikes or something, to be actively threatening and pressuring stuff next turn.)
 |
| The right wing moves up. |
Centrally, the Militia moves up 10" with the Giant in tow, protected by the blocking terrain. The Ballista roll well hitting 3/4 times and score 6 damage into the Paladin Monster Slayers. The Bowmen are out of range because I didn't advance them.
 |
| The left wing is more defensive. |
On my left, the General threatens the advance of the Villeins, while the units of Pikes and Foot Guard move up, since this is Invade.
Bottom of Round 1: Brothermark
On my left, the group of Villeins advance slightly, cresting the hill. The advancing bowmen score 1 damage against the Pikes, but this it is otherwise uneventful on this side of the table.
 |
| Magnificent use of the flame breath! And the Waver greatly complicates things for me. |
The Paladin on Dragon flaps over the line of patient knights, just out of the charge range of the Giant, but with range for a breath attack. The Dragon lands 4 damage against the Militia Mob, and wavers them, the worst of all possible Nerve check results. The blog had often critiqued folks (myself included) for not using the extra abilities of these "heavy fliers" but this was a fantastic use of the Dragon's breath attack from my opponent.
Top of Round 2: Kingdoms of Men
My Knight Horde would have needed the boots, but had a nice flank charge into the Paladin Monster Slayers, so I am very disappointed. That would have been a glorious move! Silly Militia getting all spooked. I decide the horde should not canter ahead and get triple- or quadruple-charged, so they say back. I am a little flustered and I don't even inch the Giant up to threaten the Dragon. This whole flank largely stays still.
If my opponent is being cagey, I decide I want to try and stall up the Paladin Monster Slayers and try for the charge again. I charge my other Giant into them, making use of the Rampage and thinking he should survive the attacks back. The Giant rolls a lot of dice, but not a lot of damage.
 |
| It's Top of 2: We forgot to adjust the fuzzy turn-tracking die. |
As they have no targets and I am just clueless at how I should be using them, the Bowmen move up, firing with a penalty into some opposing Knights (the central unit). The Ballistae take a penalty and shoot over the Bowmen into the same unit, some damage is done, but it's not impressive, and Iron Resolve kicks in to mitigate it.
Bottom of Round 2: Brothermark
Out of the left, the Villein Bowmen hold, and loose into the Pikes, landing 5 more damage and bringing them to 6, if memory serves. The Pikes will be wavered. The Skirmisher cavalry don't need to fear my General anymore, so move up quickly, aiming to sweep into my backfield.
The Paladin Monster Slayers are healed again, and slam back into the Giant, dealing 10 damage with their rebuttal. Ouch! The Ogre Palace Guard has a charge into the Militia around the terrain piece, but opts to pivot to threaten my nearby flying General.
 |
| The knights reposition, trying to avoid the obstacle. |
The Knightly Orders reshuffle. One enters the woods, one sidesteps the obstacle, and the other moves up to be even with it. The Dragon is just able to fit behind the Giant, hopping my line. Fortunately for me, he needed to pivot to get there, so it facing nothing for the coming turn. Unfortunately for me, he is safely out of charge-arc of my nearby General, and I still have a big, scary Dragon behind my lines.
Top of Round 3: Kingdoms of Men
With the Militia unwavered and the Paladins held in place by the maimed Giant, my Knightly Horde charges down into their quary. The charge is messier than I would have liked though. In the intervening turn, my opponent had moved Augustus up into the woods, but not far enough to block a charge completely.
We measured, and I would able to connect with about 20-30mm, not quite corner-to-corner, but not great either, especially given the huge frontage of the horde. My opponent let me have it, so I took it, popping the Boots. Charging off the hill, I should have gained an additional TC, but I forgot about it. We made it through the Giant's attacks, and about 1/3 of the attacks of the knights before the Paladins were teetering on being Devastated, and agreed to speed things up, making the Nerve check now and circling back if the Paladins were found to be insane. They were not, and the Paladins were removed from the table. Alternatively, I suppose I could have charged Augustus and hoped for the 2" overrun into the flank of the unit? That probably would have been more sporting. I will keep that in mind for next time.
 |
| Documenting my shameful charge. |
Given Augustus moving up, my Archers were forced to pivot to accommodate the footprint of the Knights, and not shoot. The Ballistae shot into the nearest Villein Bowmen on the hill to my left though, scoring 3 damage.
 |
| After combat against the Paladins. |
Centrally, my Militia attacked into the Ogre Palace Guard, landing 2 damage, but 1 would be Iron Resolved back immediately.
My Knight horde was likely to take a beating next turn, so over on my right, I tried to get things into position to retaliate. My General near the Palace Guard decided to fly ahead and nimbly pivot, eyeing the rear or flank of every knightly regiment. My other General ignored the nearby Dragon, and hid behind the giant, looking out over the hill.
Bottom of Round 3: Brothermark
Over on the left, the Villein Skirmishers hit the flank of my Pikes because I forgot to do anything with them last turn. I could have at least turned them to put up a fight, but they were wavered and I forgot to check if the Skirmishers were indeed within charge range during my turn. Their only target engaged in melee now, so the Villein Bowmen move up, smartly playing the scenario.
 |
| The contingent of Villeins move out! |
My opponent removes my unit strength where he can, and the Ogre Palace Guard murder the Militia Mob, and then reform to get the giant and the Foot Guard into their front arc.
 |
| The horde of knights falls to their superiors. |
Augustus and two regiments of the Order of the Abyssal Hunt make hindered charges into my horde. we realize the third regiment can get into their flank, and so it too makes a hindered charge. Bane Chant is attempted on the flanking unit, but does not connect. I don't think my horde was devastated, but a lot of damage lands, and my horde is bested, with me being a bit surprised to find that they were not inspired as we resolve the Nerve check.
The Knightly Bannerman charged my Giant out on the right, landing just 2 damage. But he looked really cool while doing it, so he's got that going for him.
 |
| Fabulous! My opponent had a number of free-handed banners that all looked great on the table. |
The Dragon in my backfield spun around, breathed more fire into the Militia, did another 4 damage to the unit, and routed them.
Top of Round 4: Kingdoms of Men
I was hoping to get just a little more use out of the Knight Horde for their debut... but that's the way it goes sometimes. Fortunately, I had some retaliatory strikes lined up.
 |
| Avenging the ungainly knightly horde! |
The leftmost unit of Knights of the Order takes a rampaging Giant in their front front while a General makes a hindered charge into the rear of the unit, routing them.
The Bowmen hold, and loose into the centermost unit of Brothermark Knights, landing a few hits while the Ballistae shoot in as well. I thought I came within one of routing them with a hot Nerve check, but since they do stuff next turn, evidently we forgot to mark that down or that was not the case. So they take some damage but stick around.
 |
| Several proud Brothermark regiments are routed. |
The third regiment of the Order's knights get flanked by the Pikes and hit in the front by the General, and they too are dragged down. The Giant pulverizes the knightly bannerman, and turns to face the center of the field.
The Foot Guard charge the Palace Guard, with a sliver of the movement tray clipping the forest and making it a hindered charge. I don't recall if my Bane Chant landed, but the Footies are able to cut the unit of Ogres down, and will victoriously reform to threaten the Villein Bowmen as they try to make it across the line.
Bottom of Round 4: Brothermark
The remaining knights from the Order of the Abyssal Hunt look to be on 2 damage, so they either got a some great heals or I was way, way off on the damage and check on my turn. Anyways on this turn, they make a hindered charge out of the woods and into my Bowmen horde, looking to remove my unit strength for the scenario. They deal a whopping 11 damage, get a boxcar result, and that's the end of my horde. It is about this time that I realize that I have left my Captain in the travel bin. The remaining knights from the Order of they Abyssal Hunt will turn and reform to protect themselves from any rear charges next turn.
 |
| The Order's knights hit hard, like they always do. |
Also trying to my remove unit strength is the Dragon, who hits the flank of the Pikes, deal 10 damage, and then only wavers them... My opponent's dice picked a poor time to turn cold.
The Villein Bowmen are forced to start running toward the corner of the table. They are able to avoid a charge from the Foot Guard on the coming turn, but are being held up by the obstacle a bit, leaving the potential for their pursuers to still catch them.
The Villein Skirmishers obliterate one of my war machines, but decide to stay put and bask in their victory, though this was really to give them more movement options as the game concludes.
Top of Round 5: Kingdoms of Men
The lone Ballista shoots into Augustus, and a hit blooms into a few damage and results in a waver. Not bad shooting from the war machine!
 |
| The scary things the Kingdoms of Men brought along get into some big combats. |
 |
| Ah! Insane Courage appears! |
The Generals charge the knights in the front. They had a few damage, so I am hoping to hit them and overrun, allowing the Generals to clean up the Villein units in the final turns while the rest of my army moves to score, but I get them up to 13 damage, and I roll up Insane Courage.
Bottom of Round 5: Brothermark
The Villein contingent flees the violence, playing the scenario. One regiment of archers pivots and moves, getting out of line of sight of their pursuers, and the other moves far enough to outdistance them. The Skirmishers opt to withdraw towards the corner as well. They could have attacked or picked off the other Ballista, but that would have opened them up to something from my Generals or Giants. and my opponent wasn't eager to make that potential trade.
 |
| The Villeins flee, and will all be scoring. |
The insane knights charge one of my Generals, sliding down into scoring for the scenario while dealing 6 damage, but the beast and rider hold firm. I believe the knights get some heals as well.
Top of Round 6: Kingdoms of Men
As we start Round 6, we agreed to wrap it up at the end of the round. My Giants turn and move to try and score, joined by the surviving Pikes. One Giant can't quite get over the line though. So for scoring, I have my Foot Guard Horde (4 US) one Giant (2 US) and one regiment of Pikes (3 US) for 9 total Unit Strength.
 |
| We've had one, yes. What about second Insane Courage? |
Both Generals again go into the insane Knights. They had Iron Resolved down to 12 at the end of my turn. They must have gotten some healing to be at 16 at the end of this turn. Regardless of the exact math, they again take their hits and then are again are found to be quite insane. Neither General is scoring for me as my turn concludes.
Bottom of Round 6: Brothermark
The insane knights countercharge, and land another 6 damage into the General, and then rout him. The Priestess swings hard, and lands 1 damage onto the other General, grounding him.
 |
| A very close conclusion to the game! |
The Brothermark have the two regiments of Villein Bowmen (2 US each), one regiment of Villein Skirmishers (3 US) and one doubly-insane regiment from the Order of the Abyssal Hunt (3 US), for 10 total Unit Strength.
The doubly-insane knights secure the win 10-9 for the Brothermark, surviving the game and even dragging down a mighty General too!
Game Conclusions
Well, wow, what a finish! My opponent brought a splendidly painted army and was a pleasure to meet and to play against. Triple knightly orders was a lot to try and manage! That was apparently a recent change to his list, and as we discussed, a great take. Getting CS on a basic cavalry unit is just stellar.
As for me, it's been about a year since I fielded my Kingdoms of Men in a proper game and the rust certainly shows! Looking at the picture my opponent took of my deployment... yeah, my guys are all over the place. I had a distinct drop advantage that I leveraged into... nothing significant. Deployment and grouping my units up has been a bit of a struggle for me since I am bouncing between armies and lists and not playing games close enough on the calendar to form good habits.
Forgetting to deploy the Captain was a new mistake for me! Despite that glaring error I think I was still able to shake off enough of the rust to put up a good fight and give my opponent a decent game. A big thank you to him for fitting this in, and making progress on getting a local group off the ground!
Testing Conclusions:
- Foot Guard Horde. I had deployed them back, hoping they would turn into a hard-to-remove threat in the late game. Success? They only saw one combat, but rolled hot enough that even hindered, they beat the Ogre Palace Guard in one go. Not a bad showing! The Chalice of Wrath didn't come into play at all, but still seems like a good buy if you have points to spare.
- Bowmen Horde. If I had a second redeploy, I would have moved them over to my left to face off against the opposing Archers. As it was I deployed them to try and focus-fire down the Paladins, but it quickly became apparent that that wasn't going to work. Luck was not on their side either when it came to their combat, but another game or two and I should have a better feel for this horde and what it can do for me.
- Scrying Gem. This was my go-to item as I was stumbling around in Second Edition. I think it pairs very well with the Captain, and could be a great way for a more elite list to get parity with deployment drops. I like it.
- Knight Horde. The horde is very unwieldy! Their solitary charge felt bad, but it would have been glorious a turn earlier.
- J Boots. I took it because I had the points. Getting a clear charge is wonderful, but they should be doing damage even with a hindered charge. It's a staple item, but I might give something else a try were I to run a knightly horde again.
- Ballista. These did well. I was impressed! The points decrease means they are cheap and can put out some great chip damage relative to their points. Unfortunately much of that damage was mitigated by the two Heal 5 casters on the other side of the table, so it wasn't a great game for the war engines, but it show their potential.
- Rampage Giants. This was probably the luckiest list building mistake I've ever made! Both giants contributed to fights and helped out. They can't carry by themselves and still need support to quickly win their combats. Early on I made a decision to throw one into the Paladins, but I got better at using them with other units as the game went on.
- Lifeleech ASB. Lifeleech didn't come up at all. I like that ASB's got buffs, but I still not sold on this particular one, either for usefulness or for fluff. My ASB with the Lute is a standard pick for me, so I am sure this will have another test soon.
- Captain, Rallying, and Redeploy. I'm still not sure how I missed deploying him, especially since I did remember the redeploy move. Like the Scrying Gem I liked him in Second Edition, but never got him to work well. Redeploying d3 units is tough to plan around, and I think I got into my own head a bit during deployment, and then got punished myself with only a single redeploy. We'll get him on the field for sure next time, and hopefully have more insightful thoughts regarding this unique choice for the Kingdoms of Men!
Thanks again to my opponent for the game! Hopefully we'll see each other across the table again soon!
No comments:
Post a Comment