 |
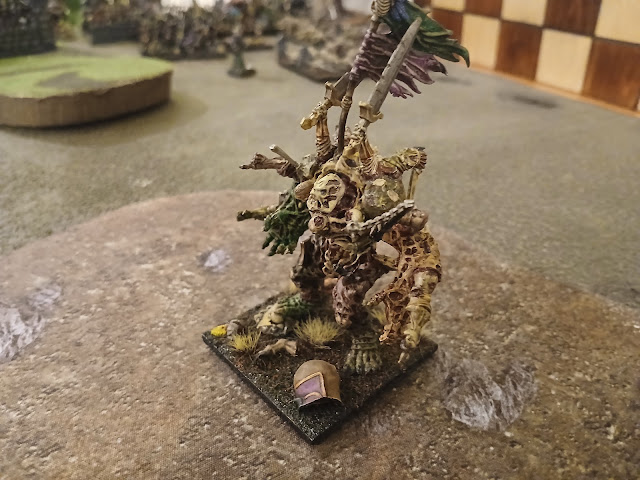
| Look at how neat that kitbashed Goreblight is! |
It was an interesting, classic gothic list just missing some rattling skeletons! Zombies, Zombie Trolls and Wights all play around with the Vicious Aura from the Necromancer and I was excited to see that in action here. He had two units of Deathpack which I want to hobby up and try out sometime, but was running them as hordes, which was peculiar to me. However, they and the Werewolves do interact with the D3 Slayer aura on the Lykanis, more interesting units. Soul Reavers are strong, and the foot Vampire lord intrigued me, as I don't know what to make of Blood Rage. The normie Vampire Lord comes with Duelist, so maybe there is something there. We'll keep an eye on her and see how she does in case there is something I can learn here.
I had the Herd again, with a different semi-balanced list to try some other things out, including Forest Shamblers and some Command Dice. Up to test was:- Tribal Spears, Chalice. I like the utility of Tribal Spear Hordes. They can carry items well, but with triple Guardian Brutes around for the time being, they get Fury to hopefully stick around just that little longer.
- Tribal Trappers. These have been nice positional pieces, pressuring and zoning out space with a little shooting as well as little Thunderous Charges. They do well when supporting units with similar speed since they can Scout ahead, so I am hoping they can do well here.
- Hunters of the Wild Troops. Scouting has been a lot of fun with the Herd, so I want to try these out as scouting blockers for the Wiltfather.
- Guardian Brutes x3. Three hordes still, as I needed to start somewhere. It's a lot of attacks, but with just Def4, they can be surprisingly fragile, so I'll need to protect them.
- Forest Shamblers. I've run these before, but I wanted to return to them again due to the Wiltfather and Command Orders. The Wiltfather's Aura gives them Vicious, and being just Def5, they are the tankiest thing that can use the Regeneration Order the Herd gets, so I want to play around with some aggressive moves.
- Centaur Bray Striders. They tend to do alright but not amazing due to the low number of attacks. Taking two to try and block for the Guardian Brutes and start piece trades.
- Great Chieftain and the Sacred Horn of the Great Migration. We debuted him last game, and since it's a double-header today, we'll try him again here. The takeaway last game was he was neat, but does poorly closely supporting the Guardian Brutes as they have Brutal and don't interact well with his aura of Dread. We'll try running him with the Spears or something.
- Druid with Bane Chant. A typical pick for me. A cheap, spammable source of Inspiring and Bane Chant has helped this style of Herd list out a lot, and I think taking one is usually a good call as I continue to try and figure out what other sources I like.
- Forest Warden. Everyone around these parts seems to like Large Infantry and Monstrous Infantry-sized units that can Inspire and score for scenarios. I have liked these alongside the Greater Earth Elementals, but think I do need to be running something with Shambling to get the most use out of them. We'll see if him and the Forest Shamblers are a good-enough combo to explore further.
- Wiltfather. I liked the idea of double Tree Herder, but that has been too expensive. With a "balanced" approach going on, we're taking just one. Since I am not playing around with any other sources of Healing, we'll upgrade him to the Wiltfather again.
- 3x Red Command Dice. I tried the first game of the day without any extra dice, but that's a bit rough. The Herd don't get great orders, but with four hordes, Regeneration is what I'll be shooting for, along with all the little rerolls and such.
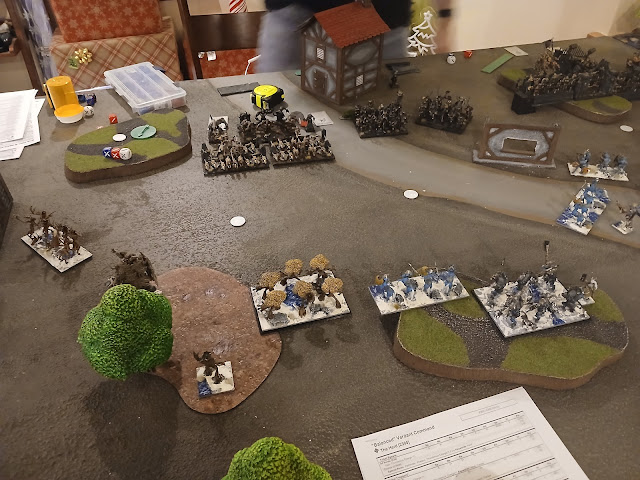
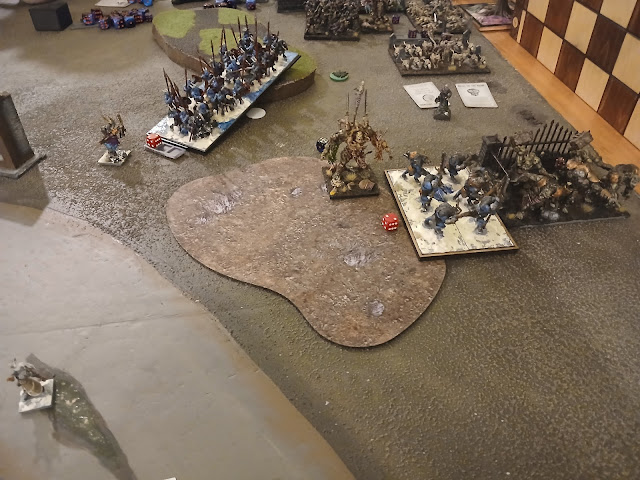
Table and Terrain
We were in the living room this time, on another big textured foam wargaming table. We were using our typical terrain rules, running the buildings as Height 9 blocking terrain, the two forests (both on my side) as Height 6 Difficult Terrain, fences as Height 2 Obstacles, Hills as Height 3, and the weird wall bit in the center as impassable terrain. This was how we found the table, and we decided to leave it and see how the building in the deployment zone changed things.
He rolled some dice for a scenario, and we got Salt the Earth. There is an Objective token in the center, and we each spread 3 tokens around the board. If we control a token, we can destroy it, so we can focus our attention elsewhere.
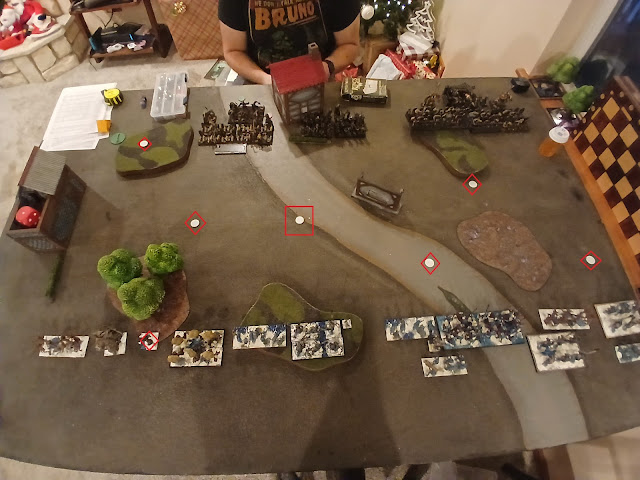 |
| Table, terrain, deployment, and tokens, with the squared one being the central token. |
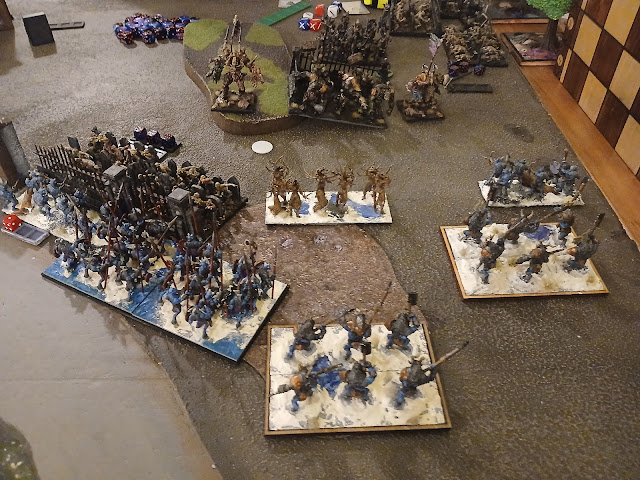
He won the roll for first token placement. I don't remember exectly who placed where, but I tried to place tokens more centrally, in scout-able locations, and my plan was to burn them as I went, and to try some extreme scouting and aggression. Most of the tokens ended up in the middle, and then I won the roll for sides, being lazy, though I also ended up on the side without the building.The drops were pretty close, so there wasn't any big surprises for deployment from either of us. The Undead deployed in three groups, playing around with the various synergies. On the left were both Deathpack hordes, along with with the Lykanis and the Werewolves and the Healing Necromancer. The center had both Soul Reaver units, and the Vampire Lord, and the building was near enough to the edge that it did not mess with deployment. The right had two zombie Hordes up front, two Goreblights right behind, the Zombie Troll Horde central, and the Inspiring Nercromancer and Aura out around here as well.
While the Undead stacked up, I spread out. Left-to-right we have a troop of Hunters ready to yolo out to the far objective on the hill, a Tree Herder, Warden and Forest Shamblers to all play around with the Vicious Aura for Verdant units. On the hill we have Centaurs, a horde of Guardian Brutes and the Druid. We then have more Centaurs to interdict in the middle, the Tribal Spears and some Trappers ready to scout up. Since these units don't have Brutal, I put the Chieftain here to try and make better use of his auras this game. On the right we have the other Hunters of the Wild ready to hop up into the forces, Trappers ready to hop up as well, and two Guardian Brute hordes ready to try and mulch some Zombies.
There are some shortcomings with my deployment. The right is uninspired, and could have positioned the Trappers better, such as both ready to hop up and claim the woods on the right.
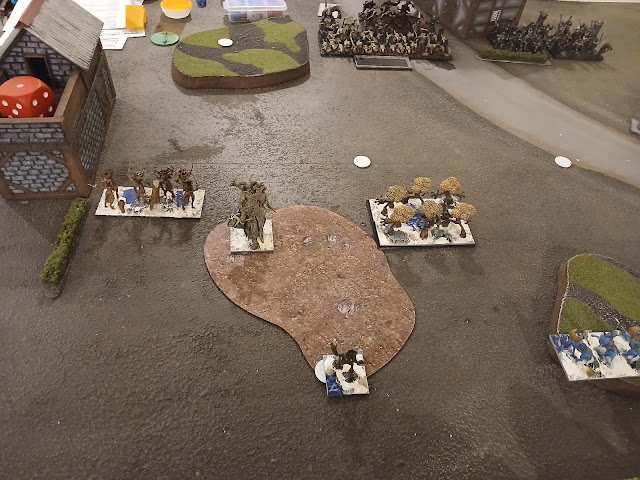 |
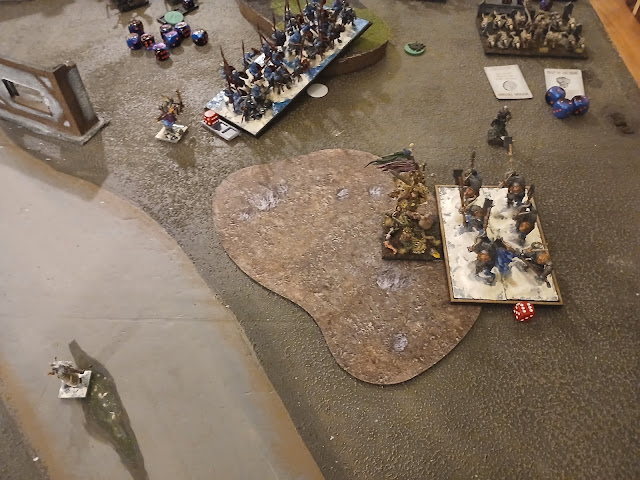
| Scout moves on the left. |
I did remember my Scout moves. There is a bit of a gouge in the center of the board. The Hunters moved up their 10 inches, the Tree Herder a little less. Ideally we throw the Hunters ahead to block for the Herder and get him to where he needs to go. The Warden did not scout up, as I wanted him to sit back and burn this Objective in Round 1. The Shamblers moved up 9 inches or so. I think the Werewolves are just out of range since they started so far back. The Trappers scout up to each land on a token, ready to burn it, or scooch up and let other units handle that in the early turn. The Hunters scouted up enough to keep their leader point in the woods, so they could see out of it.
My opponent won the roll for turn order, and opted to go first, and try and get out of his deployment zone.
Top of Round 1: Undead
My opponent bought no extra dice, but rolled up a strong 6 Swords to kick things off. Unfortunately, these all go to waste.
 |
| The Undead shamble up, but my Scouting units are safe. |
On the right, the Zombie blob all moves up, and nothing is Surged around, as he wants to keep it nice and even and prevent any early and unexpected big multi- or flank-charges.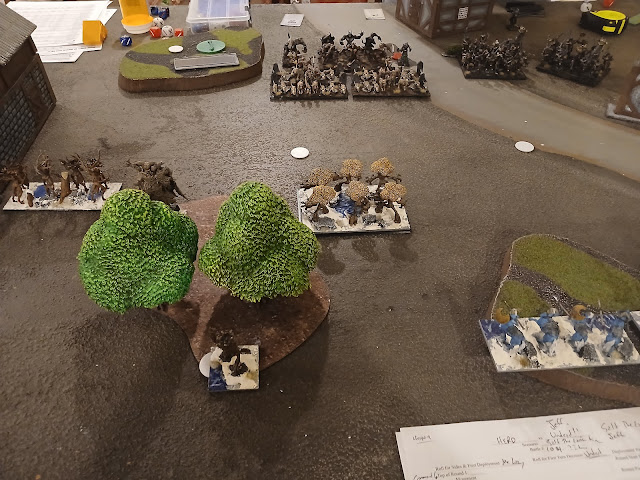 |
| The beastly contingent of the Undead move up as well. |
The Vampires inch up, getting ahead of the obstacle, and want to commit to the left side of the board, angling to get past the impassable wall next turn.The beast bloc moves up reservedly. The Forest Shamblers should have a charge, but nothing else.
As-mention, no Orders are issued this turn. There is no shooting or spells for rerolls, nothing is damaged, and not much to do since he is trying to make orderly progress.
Bottom of Round 1: Herd
I roll up something for the Command Dice. I think it's 3 Swords, with the rerolls going onto the Tribal Trappers and one going to waste.
On the left, the Hunters of the wild move up and pivot, as does the Wiltfather. I probably pivoted the Wiltfather too much. The Hunters of the Wild can probably hold if one thing charges them, but not two, and I could be planning for that.
 |
| The Herd pressure from multiple angles. |
The Forest Shamblers have a charge, but that seems silly to go in alone. They actually back up, so the Warden can move up slightly, still touch the token, and Hex the healing Necromancer. I guess nothing is actually damaged, but whatever. This felt good. The Warden burns the token at the end of the Round.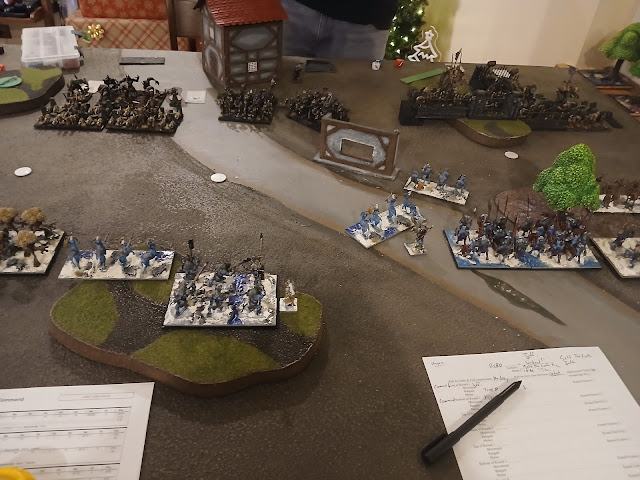 |
| The Herd make use of the impassable wall. |
I want to try and keep the hill if I can. The Centaurs inch up but stay on it, as do the Guardian Brutes. I also try to make use of the impassable wall. The other Centaurs canter forward to zone out the advance of the Vampires, and Trappers run up to try and dictate where the Zombie fights will start. With a penalty, they'll shoot into the Zombies on the hill, with the other troop on the far-fight holding and doing the same, and I think 1 damage is done? It's Def2, but the hits are not impressive, since half the shots need 6's.
 |
| The Herd ready themselves for Zombie charges. |
On the right, the Tribal Spears move up to secure an Objective and destroy it. The Hunters of the Wild move up to again dictate there the Zombie hordes will go, and some Brutes make it into the Woods. On the far-right, these Trappers hold, destroying the token, and more Brutes march up behind them.
Top of Round 2: Undead
My opponent rolls up... something for his Command Dice, I think getting a low result, and playing it similarly with some combination of Endurance and rerolls.
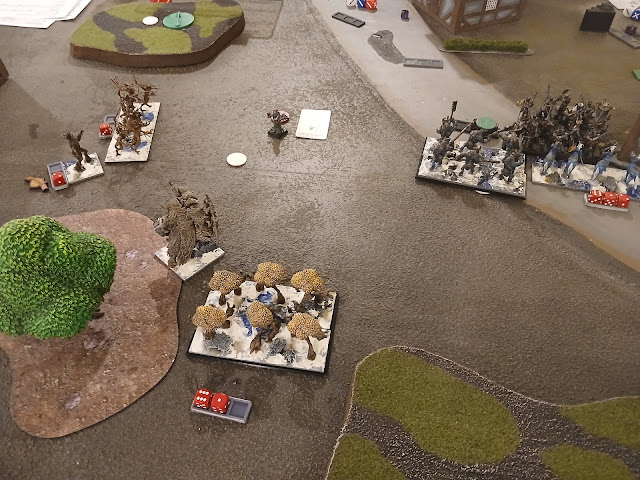
On the right, the Zombie hordes go in, hindered. They will land nothing on the Hunters, and just 1 on the Trappers, with some really unfortunate rolling.
 |
| The Zombies crash into the woods. |
The Zombie Trolls and both Goreblights advance, looking to help continue the push in the coming turns, with one of the monstrosities looming on the hill. 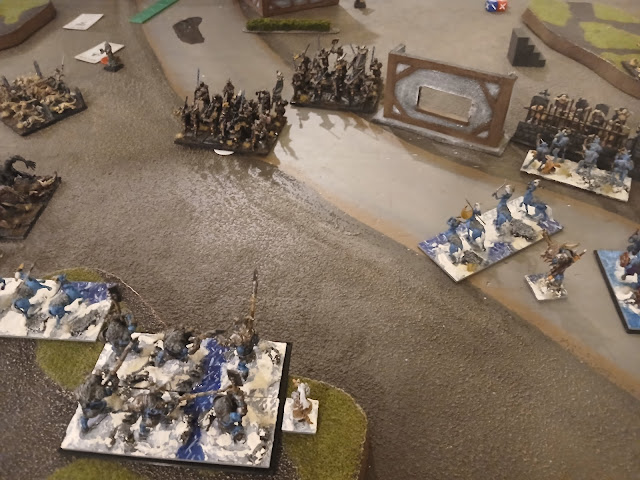 |
| The Soul Reavers set a trap. |
Centrally, one Vampire regiment takes the center objective, securing it. They're giving up a flank to the Centaurs, but the other Soul Reavers are safe, utilizing the obstacle to prevent any charges into them, and waiting to fight and bail out their brethren.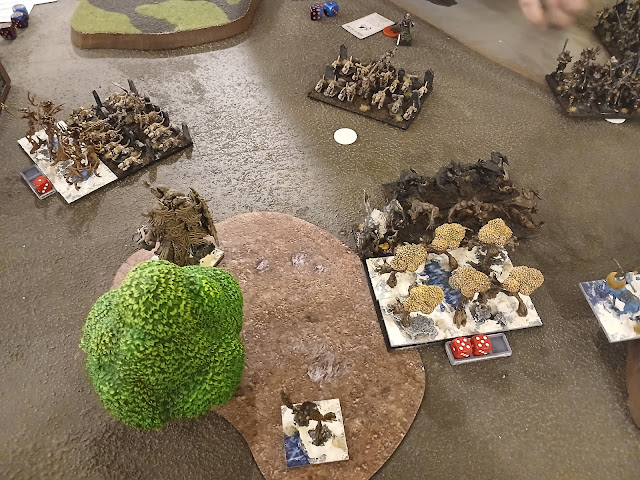 |
| The Werewolves tear into the trees. |
On the left, some Deathpack charge the Hunter troop, but their boney paws can only land 1 damage. The Lykanis and Werewolves charge the Forest Shamblers. The Lykanis howls, but only 10 damage is done, and the bark shudders but holds, and the undead fail to punch through.
Bottom of Round 2: Herd
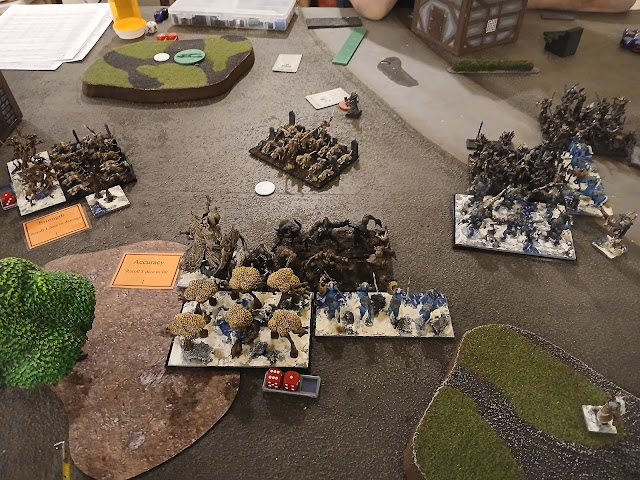
I roll up 6 Swords for my Command Dice, and since everything held, it should be a big turn for the Herd.
On the left, the Hunters countercharge the Deathpack, with the Forest Warden coming in from the flank, and rolling out of his mind, landing all 6 possible damage, with the Hunters getting a Strength reroll, and contributing 6 as well. The Deathpack are bested, with the Warden changing facing towards the center, and the Hunters pressing onward with an overrun.
The Shamblers get a Regeneration roll from Unshakable Will, going from 10 down to 7.
 |
| Big avenging charges from the Herd. |
I trip myself up. I counter-charge the Shamblers into the Lynanis to lock him up, and will hit them with a Bane Chant. I want to charge the Centaurs down the hill into the Werewolves. I originally sent the Wiltfather into the flank of the Werewolves, but they don't regenerate, so I change my mind, and hit the Lykanis instead to pick up the source of Inspiring. I think optimally, the Wiltfather hits the flank of the Lykanis, the Shamblers and Centaurs hit the Werewolves. Oh well.The Wiltfather rolls very good, and while not devastated, the Lykanis will need insane courage to stick around before we even get to the attacks of the Shamblers. He does not stick around. The Shamblers back up to allow the Wiltfather to change facing.
 |
| Reforms for the Herd. |
The Centaur Strider Troop is coming off the hill, but only had 2 attacks, and only 3 damage makes it through. They're tied up though, and this is fine for a chaff unit.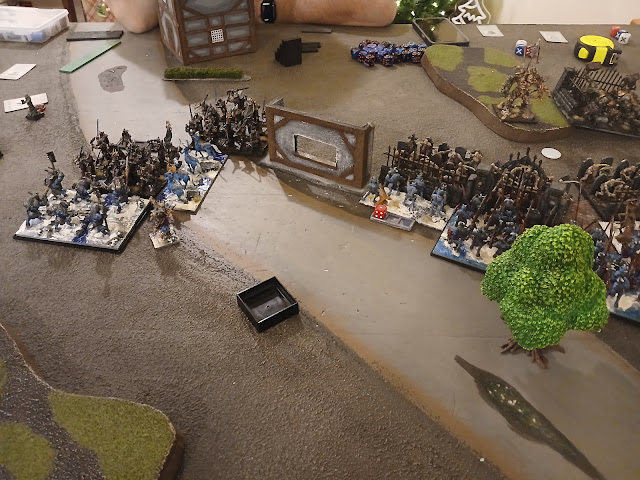 |
| Charges in the center. |
Centrally, the Centaurs hit the flank of the Soul Reavers, landing 5 damage, with Brutes coming off the hill into the front and landing 12, and the first regiment of vampires is trampled. For reforms, the Centaurs change facing to get the attention of the remaining Soul Reavers. |
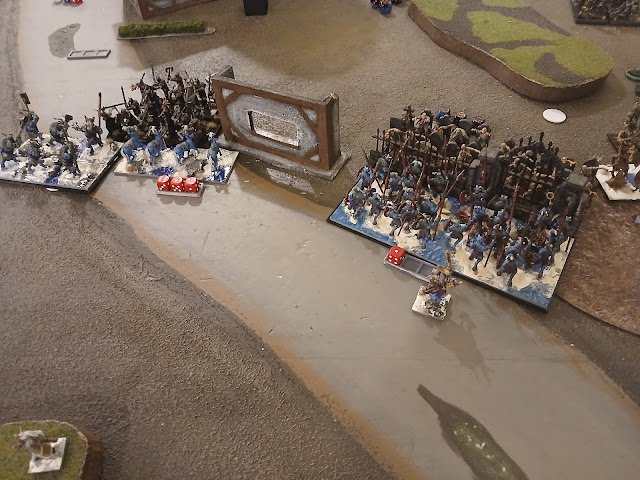
| Charges on the right. |
The right is also bloody, but congested. The Trappers counter-charge dealing a strong 6 with the Tribal Spears joining in and landing 12 damage. I roll low on the check and they hold.
One unit of Brute hordes can't get in, and just has to sit patiently. Their frontage isn't bonkers, but we had this issue in the previous game of the day as well. I must be positioning things poorly.
 |
| Herd reforms on the right. |
The Hunters countercharge their horde, joined by the other Guardian Brute Horde. The Trappers move up, and if I can break the horde, I can limit what hits my Brutes in the coming turn. We'll take this horde to 17 damage, but roll higher, and pick do it up. The Hunters overrun, and the Brutes sidestep to make way for the other horde to join in the fights in the coming turns.Top of Round 3: Undead
The Undead get 3 Swords for their Command Dice, which as we've mentioned in other reports, seems to be about right for not buying additional dice. With just 3 Swords to play with, the Command Orders are some combination of rerolls and Endurance.
On the right, the Zombie Trolls are within the Vicious aura from the Necromancer, and will pummel the Tribal Trappers and the overrun. The Goreblights charge in against the Guardian Brutes, hitting them with the cloak, and then hitting for 6 more.
The other Goreblight heads off the hill, spreading Cloak of Death out to my Tribal Spearmen. His extra attack roll is poor, and when all is said and done, the Hunters of the Wild are on 4, holding strong.
 |
| The stronger zombified units crash in. |
The surviving Zombie horde counter-charges the Tribal Trappers to pick them up and make use of the Giant Rats upgrade to Lifeleech 2 back. The impassable wall prevents them from sliding down, and the Tribal Spears are still in front-arc.
I goofed and don't have any Inspiring up here. This could have gone way worse for me.
Centrally, the Soul Reavers have one charge, and they and the Vampire Lord try to carve up the Centaurs. Dice Gods abandon my opponent's rolling though, and only 9 damage lands when the dust settles. It should be more like 15 damage. Rubbing salt in the wounds, the Centaurs are found to be insanely courageous... I am sorry Jeff.
 |
| The Werewolves claw down their Centaur unit, but fall short on the needed overrun. |
On the left, the Necromancer is no longer Hexed, and things are damaged now, and he is able to Heal up the Werewolves to full as they ravage the Centaurs here. They try to overrun to get out of arc of the Wiltfather, but they do not. Looks like they would need at least another inch, maybe two. The remaining Deathpack lands 2 damage on the Forest Warden, and a good check wavers him.
Bottom of Round 3: Herd
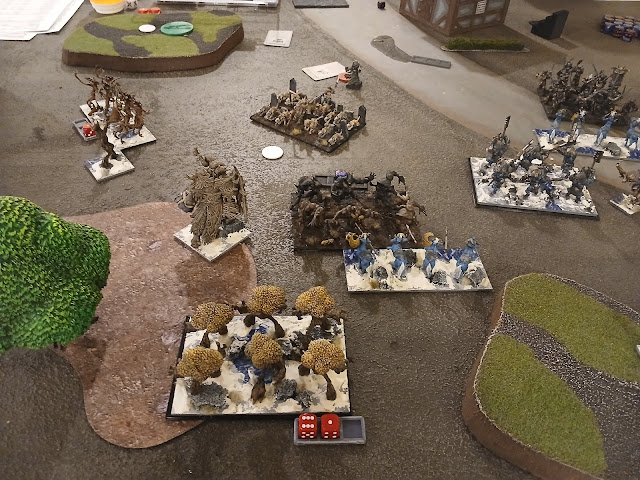
I roll up 5 Swords for my Command Dice.
On the left, the Forest Warden holds. I consider charging the Necromancer, but the Hunters do eventually come in from the flank, dealing 11 damage, and will pick up the unit, and then victoriously change facing, ending in front of the Warden.
 |
| More multi-charges from the Herd. |
The Wiltfather does take the flank charge, with the Forest Shamblers hitting the front. The hits are bad but the Vicious aura is great, and we take the Werewolves up to 17 damage, and will get the rout.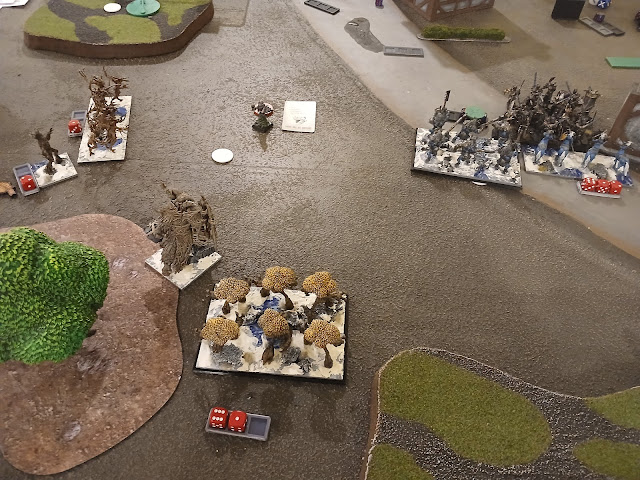 |
| Reforms for the Herd. |
I again am tripping over myself a bit. I feel like I am used to minimizing losses, not pressing advantages with the Herd. Jeff was graciously taking the dice in stride and being patient with my photos and thinking aloud as I figured out my moves. The insane Centaurs counter-charge the Soul Reavers. I originally want to charge the Soul Reavers with the Brutes, but realize that the Vampire Lord should be hanging over, so maybe I charge her instead? It's not a bad plan since the Vampires will be locked up, but this positioning is incorrect: the Centaurs should not have shuffled that far over. I can charge the Vampire, but won't be able to overrun into that combat if I get her.Thankfully, from a rules perspective at least, the Guardian Brutes only land 9 damage, and only waver her. The Centaurs land a few into the Soul Reavers, who hold.
 |
| Herd charges in the midfield. |
I'm desperately running my Great Chieftain over towards the fights on the right so that I have some Inspiring over here.
The Tribal Spears charge the maimed Zombies, pick them up and overrun.
 |
| Charges on the right. |
The Hunters of the Wild counter-charge the Goreblight, go crazy, and land 5 damage, about double what would be expected.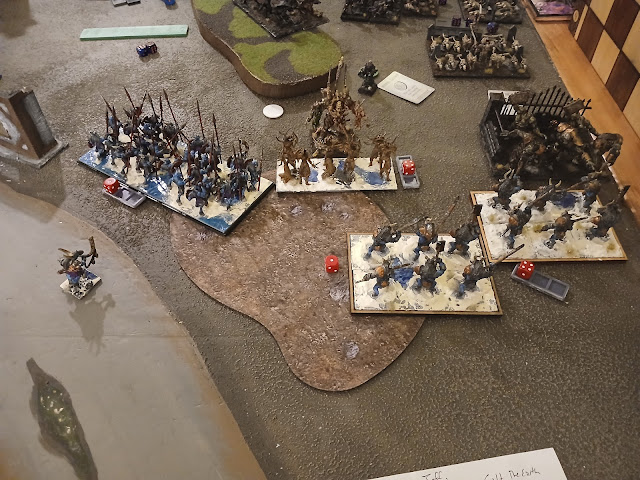 |
| Reforms on the right. |
I sent both Guardian Brute hordes into the other Goreblight. One is a countercharge (and that unit gets Unshakable Will to regenerate down to 4 damage), and the other in a clean charge, but my dice flake out, and only 11 damage is done. (The clean charge should do around 10.) Still, I've got Brutal, and the Nerve checks are good, and we do pick the monster up.
The injured horde holds, ready to take the charge from the Zombie Trolls, and the other backs up. My thinking here is that I don't want the Goreblight winning and overrunning past me. If I can't react to it next turn, it can do some screwy Shambling charges.
Top of Round 4: Undead
I don't know if we even rolled Command Dice here. Things are dire and a reroll or single damage heal isn't going to tip the scales back.
The Zombie Trolls smash through the Guardian Brutes and overrun, but can't get out of arc.
 |
| The Zombie Trolls break through the opposing horde. |
The Goreblight breaks through the Hunters of the Wild on the second try, and is able to overrun out of arc of the Tribal Spear horde.
 |
| Fights with the vampires. |
The Soul Reavers roll better this time, landing 14 into the Centaurs, but their options are limited. As mentioned above, I aligned things incorrectly, and they should be able to overrun if they wanted to.
 |
| Movement for the Undead. |
The Necromancer heals the Vampire for a good chunk, but she's wavering, and staying engaged.Bottom of Round 4: Herd
I neglect to roll Command Dice as well.
The Guardian Brutes pick up the Vampire Lord on the second try, and then due to bad positioning, can overrun into the Soul Reavers. I believe they are "in" enough to have gotten hit by Cloak of Death, the Brutes do 10, and the now-uninspired Reavers are bested in a combat that should never have been. Apologies to my opponent.
 |
| Charges for the Herd. |
The Wiltfather charges the healing Necromancer, Cloak of Death hits, and the legendary tree knocks him for just 5 more damage, but it is enough to break him.
The Forest Warden grabs a token and holds it. Next turn he could make a play for the one on the hill with the Hunters of the Wild backing up to grab this one since it is Round 4. The Forest Shamblers scooch up towards the invulnerable central token.
 |
| Positioning for the Herd on the right. |
Out on the right, the Great Chieftain arrives to keep the Spears Inspired, and the Druid races towards this side of the board as well. The Tribal Spears advance, and then pivot 90 degrees to secure a token, and spy the rear of the Goreblight.I opt to flank the scarier Zombie Trolls in an attempt to pick the unit up. This is a Pathfinding charge for me and clean, and we do manage to just devastate the unit, rout it, and then spin to get the Goreblight into front-arc. The monster shambles, but its options are limited.
Top of Round 5: Undead
The Goreblight takes the hindered charge into the Brutes, and the Necromancer lurks, providing Inspiring and Vicious. The Brutes get hit by Cloak of Death, and take 3 more in melee to bring them to 6 damage, and they hold.
 |
| The hindered Goreblight vents its frustrations. |
It's a quick turn. This is all my opponent has left on the battlefield, but he soldiers on.
Bottom of Round 5: HerdThe Great Chieftain charges the Necromancer, lands 3 and picks him up.
 |
| Final charges from the Herd. |
The Tribal Spears are not majority on the hill, and no longer in the rear of the Goreblight, but still charge the monster, with the Brutes counter-charging from the front. The Herd controls only a few tokens in Round 5, but the Undead have no units at all remaining on the field, so this is an overwhelming victory for the Herd!
Game Conclusions
I think the game basically comes down to the efficacy of multi-charges vs single charges. In Round 2, the Herd had basically every unit fighting, and those were all multi-charges with good chances to rout that did indeed gave me numerous victories, and while the Undead did get a few multi-charges in throughout the game, nothing broke, and overall they mostly made single, delaying charges, which could not hold the line.
Testing Conclusions
- Tribal Spears, Chalice. With something to block for them (Trappers), they were able to make it into combat. They had a great game but definitely had some luck.
- Tribal Trappers. They worked really well paving the way for the Tribal Spears. They shot Zombies and still didn't do a ton, so I think one definitely wants to prioritize positioning for charges over positioning for shots with them. These had a really good game.
- Hunters of the Wild Troops. Defense 5 let them hold on in instances where something like Harpies would have routed. A real hammer should easily take them off, but with thoughtful positioning they might be able to bait stuff out to punish it. I liked them!
- Guardian Brutes x3. I spread them out a little bit this game, and think that's probably the key to running three hordes. Their frontage is only 120, but Speed 6 slows them down enough that all three have trouble engaging down the line. With multi-charges, they were able to do a lot this game, but definitely had some luck since they were not Inspired.
- Forest Shamblers. I had tried them at least once before and was unimpressed as they didn't seem to do a lot. Hitting on 4's with CS1 they are definitely not hammers, and Def5 with -/17 they were expensive and ineffective anvils. I liked them here though. With other stuff scouting up with them, there was more of a battle line here and a lot of pressure. Running them alongside the Wiltfather seemed like a good call as well.
- Centaur Bray Striders. They had a great match up with not a lot of speed opposing them, so were able to do what I needed this game.
- Great Chieftain and the Sacred Horn of the Great Migration. I again like the concept here, and deploying with the Spears was a better call. Still, Triple Brutes are not a good pairing for him, so we'll need to try one or the other I think. If I don't got Guardian Brutes and Brutal, then he becomes much more interesting.
- Druid with BC. I was most worried about the Soul Reavers, but I think I should have put her our on the right since that flank was not Inspired.
- Forest Warden. Running him next to the Wiltfather was silly as that is two sources of Inspiring, but the terrain and tokens kinda dictated all that. I was able to leave him behind for a turn to burn a token and then come up to help. He had some hot dice and a great game. These scoring heroes tend to be strong as long as they are cheap.
- Wiltfather. Yeah, strong, especially when supported. I think I did a good job with him and with supporting him, and that seems like a strong contender to lead future Herd lists, ubiquitous as he is.
- 3x Red Command Dice. Oddly, this highlighted the Order disparity in a different light. The Undead have far better Orders than me, but not buying additional dice, struggled to make use of orders. The Herd arguably have worse Orders, but we were able to make good use of them and the extra dice all game, really pressing advantages.
I really loved the look of Jeff's army, as well as it's theme, even it it was just "what's painted." The entire army had a suitably grim style, and was just neat to see since how someone else approached the army since I've been looking at them more myself lately. The Undead have some neat keyword interactions, and seeing distinct battle groups exploring some of those auras and interactions was a lot of fun for me. He plays Forces of nature as well, so we had a good time chatting and comparing ideas throughout the game and I came away with a lot to chew on. I don't think I got to properly thank him again before he left for the night, so Jeff, thanks for the game!


