

Intro and Lists
The weekends tend to fill up quickly, especially over the summer, but I had an unexpectedly free Saturday, and tried to fill it with wargaming. I was unfortunately only able to get one game in, but my opponent for the day was Rob and his ravenous Halflings! He brought the following:

Frequent readers will recognize everything in the list - Rob's been iterating with the Halflings for about a year and a half, securing many, many victories against me, and taking 2nd at Kings of Memphis the weekend prior to our game. The lynchpins of his list are the Auras, Headstrong from the Iron Beast, but mostly Strider from the Muster Captain, and Rob's choice each turn of Wild Charge, Brutal, Lifeleech, and Rally from the Sauceror, all of which boost the Ravenous Halflings. The Halflings aren't much for magic, but his list has a strong shooting component, a few Def6 units, lots of unique upgrades, and lots of rude, nimble heavy cavalry. He's off to US Masters in late July and settling on his final tweaks. The Midwest is a little spread out and Rob is the only Wisconsinite going, so we're all trying to give him as many practice games as we can, against a variety of things.

- Spirit Walkers with Brew of Haste. The Spirit Walkers (and the Brew) are a longtime staple for Keith, showing up in every game of his that I've stumbled up. They are fragile, and not likely to survive a full game, but have a ridiculous charge range thanks to the item. Keith typically deployed them centrally, so I’ll take the cue from him and do the same, and we’ll see what trouble they get up to before they break.
- Harpies. As-is pretty typical, I brought both of my Harpy units. Chaff with flying has been great to have, as you can hide behind buildings and then zip out to block, and I wanted to put these on the wings with the Lycans if as all possible.
- Gur Panthers. I wanted a little more chaff, so brought out a unit of Gur Panthers as well. We'll run these with the Spirit Walkers, which should be central in my deployment. If Harpies are disordered, they lose Fly and also Nimble, so I wanted to play around with a unit of Panthers, which might be able to make use of a Nimble back-up It's unlikely they'll take a hit and survive, but we'll see.
- Lycans. We’re running 2 Lycan Hordes, both with some waver mitigation. These usually deployed on the wings, trying to stretch out an opponent’s line and then catch a flank, so that’s what we’ll try here, and we’ll see how things go.
- Forest Shambler trio. Scout moves will be very important for them, so I will try to be mindful of where they start. They are indeed some nice, thick chaff, and we’re taking three, to maximize what I can learn. The plan is to scout these up for early pressure. If I get charged, my opponent is at least slowed down, and I should be able to respond with plenty of speedy stuff, and who knows, they may even hold.
- Beast of Nature. The flying Beasts were another staple in this style, and just a strong pick for the Herd overall. If you can find a flank or a multi-charge, they should do well, so that’s the goal, and we’ll spread them out and see what they can find.
- Mounted Druids. Keith liked Mounted Druids, and with all this speed, the pick is growing on me as well, so we’ll keep trying them out. The a la carte spell selection helps us out, as we can keep them pretty cheap. The Conjurer's Staff is great, but points are tight and I don't want to stress over where the Staff goes, so we're not taking it here.
- Wiltfather. I’ve been swapping between the Avatar of the Father and the Wiltfather in a lot of my Herd lists over the last year. The flying Avatar looks great in this kind of list, but tends to always find an insanely courageous unit and then get piled on, which feels bad. The Wiltfather has a strong reputation these days, and has delivered for me before, so I wanted to tag him in here to see what he can do for me. I am hoping for one Vicious Aura interaction with the Shamblers, and we’ll see if I can achieve that.
Table and Terrain
We were out at Gamer’s Realm in New Berlin, WI, and if you find yourself in the area, you should check them out. As mentioned in other reports, they moved into a new shop at the start of the year, one which is far larger than their old place. It’s a bit of a labyrinth, with separate rooms for board games, card games, war games, role playing games, in addition to being a normal shop selling all that, hobbying supplies, and all sorts of things. They also have a neat second-hand room, and now a bidding room, with new items monthly. All this to say, we were there, and making use of their tables, mats, and terrain for our meet-up.
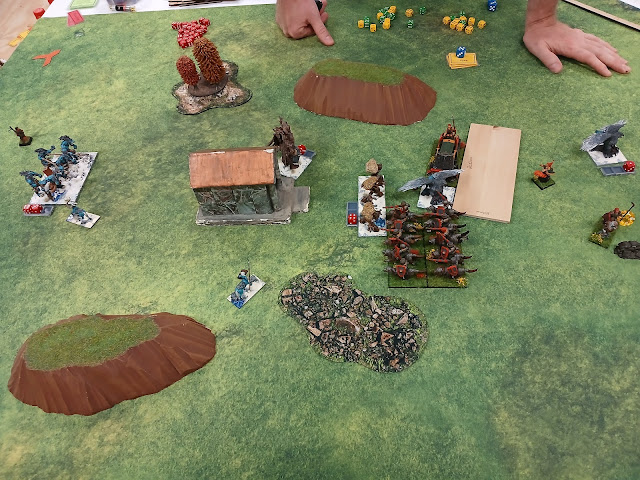
 |
| Quick picture of the table while we unpack. |
We utilized Data and Dice's new Kings of War App for one-click games, and after the click, it indeed generated a table for us. Rob had the event pack for Masters, and Rob randomed a scenario from it, getting Hold the Line for us. Hold the Line is an area control scenario. We mark a 6-inch wide corridor along the center line, and split it into three equal zones. Units count where most of their base lies; ties don't score. Control a zone by having the highest Unit Strength there. Score 3 VP for the center zone and 2 VP for each outer zone you hold.
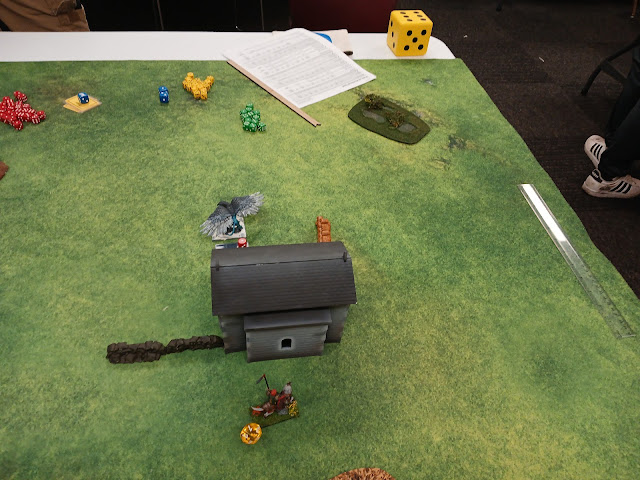
 |
| Deployment from the left. |
The Halflings won the roll for determining sides, and we got down to it. Rob has been going hard for tournaments and such, and has been touching up a number of units in the army with an eye to maxing out paint scores at events. Unfortunately, two Halfling units were left on the painting table. Fortunately, Rob is a very clean player, and we can manage.
 |
| Deployment in the center. |
The Halflings can definitely fill up a table. Starting on my left we have Grenadiers screening for missing Juggers, then Poachers, the Engineer, and other Poachers. There was a bit of a forest with the Iron Beast just outside. Both Stalwart troops sat with leader points on the hill. In the center we had the Harvester, missing Heroic Stalwart Horde with Sauceror, The other Harvester guarded the other flank of the horde, and on the far right we had two Jugger regiments, the Muster Captain, and the other Grenadier unit.
 |
| Deployment on the right. |
I know the Halflings can stretch across the table, so wanted to try and play more compactly. I have fliers that can help late game, but to start, I wanted to play for just two zones. With both obstacles showing up on the right, that's the zone that I need to ignore to start off.
 |
| Overview of deployment. |
For the Herd, we have a messy line. On the left, we have Forest Shamblers, Flying Beast, and the Wiltfather on the front with Lycans in reserve. Behind the hill are angled Shamblers, and then we have an odd stack of Spirit Walkers, with Druid and Gur Panthers in reserve, with Harpies in double-secret reserve. These Harpies were a pretty late drop, and looking at the board, figured that central wasn't a bad spot for them. The right got donked up a bit, and I can't remember the original sin here. The Shamblers were an early drop, and I think the issue was that the Lycan's couldn't fit on the line when they were coming down later. So, we have a Beast on the line, Shamblers behind with a Druid, and then Lycans and Harpies in reserve.
My deployment goals were to put Lycans on the wing with the Spirit Walkers more central, and then spread the Forest Shamblers around. The Shamblers are just thick blocking chaff, and I'm not looking to do tricky surges with them, so was looking for decent Scout moves for them. It's messy, but overall, I am happy with my deployment.
The Halflings win the roll for scout moves, and nudge some Poachers forward. I forgot to ask the reasoning behind this, but my intuition is that he was trying to bait out some super-aggressive scout moves from me, as the other unit doesn't move.
 |
| Overview of the table after scout moves. |
As for my scout moves, I did remember them all , and everything zipped ahead. On the left, the Shamblers moved up maybe 8 inches, and the Wiltfather moved up to Inspire. Centrally, the angled Shamblers zipped ahead the full 12 inches to plug the gap and project threat out into the center. And on the right, the Shamblers moved up pretty far as well, as I am not too concerned with them and the obstacle and being hindered since they are essentially chaff and just here to block, not deal damage.
For scout moves, I am mostly happy. On the left I am pressuring good, and having the Wiltfather around to keep the Shamblers Inspired is wise. It looks aggressive, but the Shamblers are pretty safe, since they outrange the Stalwarts, and even with max Wild Charge, the Halflings cannot get it. The right deserves some scrutiny though. It won't matter but I should note that have been a touch more conservative with their advance. I am out of innate charge range of the Juggers, so the move isn't terrible, but if the Shamblers fall, any victorious result backwards will get the Halfling back over the obstacle, and be forcing a hindered charge from me. If I am back a few more inches, I am still zoning thing out and pressuring, and the Halflings could eventually still come striding in if they wish, but I make the trade less attractive if they can't safely get away. Scout moves are fun, but difficult!
I ended up winning the roll for turn order, and decided to take it. The Herd always likes going first!
Top of Round 1: Herd
On the right of my line, the scouting Shamblers hold, but the Beast and Druid hop up to support. I am wary of the Grenadiers getting behind my line, so the Harpies flap up to be ready to interdict.
The Lycans on the right have the Chalice, and aggressively scamper ahead. They are out of maximum charge range of everything, potential Wild Charge Aura included. With an 18-inch range themselves, they are threatening a lot, like the Stalwart troops.
 |
| View from the center. |
A hot Wild Charge result could get the Iron Beast in range against central Shamblers, so they hold, out of sight. I just don’t want to deal with the contraption as I don’t have a lot of CS in the list. The Spirit Walker horde pushes up into the forest to threaten the center, and is supported by the other Druid and Gur Panthers.
The Harpies from the center get their leader point on the hill. I want to zone out the possible landing zones for the Grenadiers out on the left.
The Beast on the left is out of range of the Grenadiers, just getting ready to threaten and support.
 |
| View from the left. |
The Lycans on the left have the Ale, and they move up to get into range of the Grenadiers, keeping them in front arc. I'm not sure what the best play to contain the Grenadiers is, so I’m giving them an “out” on purpose, and my thinking here is that since they are in the front, I am likely to survive the Grenadier assault, and be able to pick the unit up if they do commit. If they flee, that's probably fine as well.
The forest blocks line of sight from the Iron Beast for charges out to the left, so the Shamblers and Wiltfather moves up, keeping everything they can in front arc.
Bottom of Round 1: Halflings
The Sauceror goes for Wild Charge, and gets two successes.
On the left, my opponent takes a long time to decide his moves. With his experience, I’m counting that as a win! The Grenadiers eventually do take the bait, charging in to slow up the Lycans, and will land 3 damage, tying them up. With the fliers charging out, the path is cleared for the base-only Juggers and the Poachers to multi-charge the Forest Shamblers, land 10 damage combined, and pick the unit up. In victory, both hold, careful to protect their flanks.
The other Poacher unit goes into the Wiltfather, landing a ridiculous 11 hits – but thankfully only 1 damage makes it through the bark.
 |
| Aftermath of the fights on the left. |
The Iron Beast turns to face the Wiltfather and my push on the left. With the move, it’s just able to get the Beast in range, but no hits land, as I think there was a cover penalty from the towering Wiltfather.
Centrally, the Stalwart troops take the hill, and the Harvester lurks nearby. The Heroic Halflings and other Harvester I believe sidestep out towards my right, trying to create some distance and buy time.
 |
| View from the center. |
Wild Charge 2 is achieved with some Hot Pot rerolls, and is just enough to get one unit of Juggers from the right into the scouting Shamblers on the obstacle. The Muster Captain is able to give them his Striding Aura, but the damage dice are a little cool at 5, and the Shamblers hold.
 |
| My opponent shows me the error of my overly-aggressive ways. |
I was trying to be very aggressive, getting the Lycans angled to threaten the Iron Beast, and get my flying Beast a bit over to see around the building, but my opponent is showing me that I am playing a bit sloppily here. It would be better to have the Lycans more dead-on, and the Beast just moving up instead of moving up and directly behind the Shamblers. Oh well.
The Muster Captain, Grenadiers, and second unit of Juggers reposition on the far right, looking for angles in the coming turns.
Top of Round 2: Herd
On the right, the Juggers bounced, but my angles are all funky. The Lycans don’t have the cavalry in-arc, and the central Shamblers are an inch from getting into the flank of the stalled halflings.
I don’t like any of the charges for the Lycans. I can’t align to the far Stalwart troop. I could probably pop the closer troop, but don’t like my reforms, since it looks like I’d need a 4+ overrun to escape flank charges. I could hit the Harvester but hitting in the front, I am not likely to rout it, and would be looking at devastating flanks in-turn, and have the same issue with charging the Heroic horde. Not liking anything, they back up, trying to create a little space and stay safe for now.
The Beast is in a similar situation. I can’t help out the Shamblers since I’m dead-on with the leader point relative to the Shamblers. This is my own error, since I started off center. It flies nimbly 10 inches out to the left, looking to stay safe for now too.
The Harpies use the building the block, and angle out to face the empty right and zone it out.
My only option here is a flank charge from the Spirit Walkers into the Juggers, but the reforms are going to be nasty. Inches are tight, and I can’t really get the Gur Panthers in position to prevent a proper slide down, but the Panthers do hop up to mitigate charges into them next turn.
 |
| The Herd collapses in against the impetuous Jugger regiment. |
The Druid lands a Bane Chant on the Spirit Walkers, and the Juggers are devastated and routed, as is proper. Reforms are indeed nasty. Ideally, I overrun the Shamblers to block as well, and pivot the Walkers, but that is improbable given the alignment. So the Shamblers back up 1” and the Walkers spin around to face the halfling line.
 |
| Reforms for the Herd. |
Centrally, the Shamblers advance a bit, now threatening the Stalwart troops.
On the left, the Harpies catch a Bane Chant and Join the Wiltfather in a charge against some Poachers. Cloak of Death hits both Poachers, the Juggers and the Grenadiers, but spares the Engineer. The damage dice here are meager, and the Poachers are just wavered. This is a disappointment, but not terrible, as the Harpies will prevent the Iron Beast from flanking the Wiltfather, and the other Poachers are in his front arc.
 |
| Some nice wavers on the left. |
The Lycans regenerate 2 to get down to 1 damage, and will countercharge the Grenadiers, best them, and reform slightly.
The big result is the Beast flying in against the Juggers on the far left. Only 3 damage lands (lots of 2’s..) but I spike the check and am able to waver the cavalry.
Bottom of Round 2: Halflings
The Halflings go for Wild Charge 2, again achieving it with a Hot Pot Reroll.
I was feeling pretty good, as my opponent was taking some more time to think through the left, but he does come up with some very clever plays. Wavering, the Juggers disengage and withdraw from the flying Beast, letting the Poachers hit it in the flank, but the high defense prevails for the Herd, and the hungry Halflings are mercifully kept to just 3 damage.
 |
| Great moves from the Halflings to counter-punch as hard as possible. |
The Iron Beast has a third Aura for the army, and the Poachers pass their headstrong check, counter-charging the Harpies while the Iron Beast flanks them. The Harpies are obliterated, as should be expected.
 |
| Reforms on the left. |
Centrally, Stalwarts leave the hill, charging down into the central Shamblers, land 2 damage, but ultimately bounce.
 |
| Charges in the center and on the right. |
The Harvester and the Heroic Horde fight and beat the Gur Panthers. In victory, the Horde backs up, allowing the Harvester to pivot.
 |
| Reforms out here. Only the Gur Panthers fled! |
Wild Charges lets the other Stalwart troop charge off the hill into the flank of the Spirit Walkers, with Grenadiers in the front. A total of 12 damage Lands, and the Grenadiers get Brutal 2, but it’s not enough, and the horde holds.
The Muster Captain sticks near the building, trying to plink away at the nearby flying Beast with Lightning Bolt, but fails to connect this turn.
Top of Round 3: Herd
On the right, the Harpies slowly stalk around the building. Perhaps I can sneakily claim this zone for the scenario.
The Shamblers on the right are boxed in a bit, so pivot slightly, looking for angles as I expect the Spirit Walkers to fall next turn.
 |
| Movement on the right. |
The Lycans will front charge the Stalwart troop handing off the Spirit Walker’s flank. I believe I roll this combat first, and the Lycans should get a Bane Chant, since I since I really want to make sure I pick them up. I do, and the Lycans spin.
 |
| Reforms on the right. |
The Spirit Walkers will countercharge the Grenadiers in their front, and weight of attacks will bring the intrepid Halfling fliers down. They will sidestep 1” to get the Harvester into front arc.
The central Shamblers counter-charge the Stalwart troop, and I believe they receive a Bane Chant from the Druid, though I look to have not turned her. Hitting on 4’s is swingy though, and only 2 damage is clubbed onto the unit.
 |
| Herd Charges on the left. |
On the left, the Beast ignores the Poachers and goes after the Juggers again, simply charging ahead. I think we deal another 3 damage, but again luck out on the Nerve checks to pick the unit up, and then the Beast turns to face the center of the field.
The Lycans here will relieve the Beast, and flank-charge the Poachers. We’ll devastate and rout the unit. I can’t get away from the Iron Beast, so I turn to face.
 |
| And reforms on the left. |
The Wiltfather charges the maimed Poachers again, and Cloak of Death hits everything but the Juggers, spreading around another 4 damage. His rolls are pretty low again, but on double-digits of damage, the Poachers are picked up. After some hemming and hawing, I choose to simply face the Iron Beast as well.
Bottom of Round 3: Halflings
The Halflings got for Brutal, getting 1 success.
On the left, it’s finally an easy choice for my opponent here, and the Iron Beast steams ahead into the Lycans, avoiding the equally defensive Wiltfather. The extra attacks are low, and the hit dice abysmal, but 4 damage still makes it through, bringing the Lycans up to 5.
The Engineer makes himself scarce, hiding out of arc of the Beast and the Lycans. I believe he is able to take some shots, but forget against what. No damage lands.
 |
| The Iron Beast lurches into the Lycans. |
Centrally, the Stalwart troop continues against the Shamblers, landing another 2 to bring them to 4, but the trees hold firm.
The Harvester sputters ahead to hit the Lycans. I think this is an error on my part, I rolled the Lycan combat first on my turn, and did not have a plan with the reforms. I think I could have been cagier with their reform to prevent alignment. The Harvester Deals 4, but the Lycans hold.
 |
| Charges from the Halflings. |
The Heroic Halflings charge the Spirit Walkers, and the Hammer of Measured force works in my favor for this fight! Unfortunately, the Spirit Walkers are still quite injured, and 8 new damage is enough to easily see them off the field. I believe the Stalwarts hold. I think they have the flying Beast in front arc, and with the Juggers pulling in after the charge of the horde, I cannot get into them either.
 |
| Reforms for the Halflings. |
The Juggers wait in reserve, and other Harvester repositions to hopefully get around the horde of halflings.
The Muster Captain wheels around, and draws line of sight to the Harpies on the far right, zapping them for 2 and wavering them.
Top of Round 4: Herd
The Harpies back up, out of line of sight. They are wavering, but not disordered, so I pivot them as well as they retreat. We’ll give them a break and try again later.
 |
| The eager Harpies back away. |
Getting the Lycans caught out by the Harvester is not great, and I’m not sure what to do in the center. Eventually, I make a play for the Harvester, with the Shamblers from the right making a hindered flank charge and the Lycans hitting from the front. Bane Chant connects with one of them, but we deal 7 and waver it, which is not great – I really needed to break this, and in retrospect, just offering up the injured Shambler to slow the Halflings down would have been the better play.
 |
| The Halfling waver, but don't break... |
Spacing is tight and the Beast can’t align to help the central Shamblers break through their stalemate, so it repositions again, making vague threats into flanks. Still the trees land 1 damage, and waver the Stalwarts.
On the left, with no charges, the Wiltfather moves up around 8 inches. I should have repositioned him a bit better, looking to zip around the building. Alas.
 |
| The Lycans go in alone. |
My big choice here this turn is what to do with my flying Beast out here. I have a flank into the Iron Beast, but ultimately decide against it. It is so tanky that I don’t want to tie up multiple units against it all game. I put my trust in the Lycans and their regeneration, and fly the Beast out into the center to threaten things.
The Lycans charge the Iron Beast along, and get a Bane Chant from the Druid. They regenerate from 5 down to 4, and dish out an astonishing 8 damage. The Iron Beast doesn’t budge, but it’s still an impressive showing. I have the advantage in unit strength there, so maybe I can actually grind the Beast out.
Bottom of Round 4: Halflings
The Halflings go for Rally, looking to hold on a little longer in order to grind out the comparatively low-defense Herd. They get Rally 1.
On the left, the Iron Beast again rolls low for the extra attacks, but contributes 6 to bring the Lycans up to 10 and waver them. I may have miscalculated, as he’s wounding me on 2’s and that's going to add up very quickly.
 |
| In the movement phase. |
The Engineer goes 3/3 for his shots, and brings the escaping Beast up to 6 damage. I should have a cover bonus here, but apparently the Engineer is all dialed in this turn, and he’ll help the Iron Beast in the grind with Radiance of Life as well.
 |
| The Halflings with some devastating charges. |
The center zone is a mess. The Herd did not break the Harvester, the Stalwart Horde gets a rear into the Shamblers, which lets the Juggers then nimbly get around and into the flank of the Lycans, and with the Muster Captain nearby, it’s a striding charge. Both units are devastated and routed. The reforms are tight, but the Halflings are able to sidestep to get both Beasts in front arc, and the Juggers pivot slightly.
 |
| Reforms for the Halflings. |
The Harvester is engaged, but wavered, and does not get a reform since it did not get issued a charge / counter-charge order.
The wavering Stalwarts hold.
Top of Round 5: Herd
As should be expected, my opponent is making this difficult. I again don’t like any of the charges for the flying Beasts.
One Beast eventually charges the Muster Captain. I am looking for the disorder to let the Harpies do their thing, but land just 1 damage. He's disordered, but this is Top of Round 5, so this probably wasn't the best play, as even if I got a waver here, he'll have a turn to shake it off. Meanwhile, the Harpies are back, flapping up tentatively to secure the right zone for the scenario.
The other Beast takes a rear into a Harvester, looking to just pick up unit strength. I am victorious, but up against Juggers, the Stalwart horde and the other Harvester, and cannot get everything into front arc. I eventually choose the horde and the Juggers.
 |
| Charges from the Herd. |
The Shamblers continue on against the Stalwart troop, I believe getting a Bane Chant from the nearby Druid, not that it is really needed with the Wiltfather hitting the stubborn Halflings in the flank. Victorious, the Shamblers spin around to face things, and the Wiltfather, and I think the Wiltfather spins slightly as well.
 |
| The Lycans shake it off and push back in. |
On the left, the Lycans again pass their Headstrong roll from their Ale, and then get a Bane Chant to counter-charge the Iron Beast. They are on 12, and regenerate 3 to end at 9 damage, though they also land a fresh 7 damage onto the halfling contraption. At 15, the Iron Beast implodes.
 |
| Reforms for the Herd. |
With the building ahead of them, there is basically no way I can reform the Lycans to get them into another combat without getting a Round 7. Instead of futilely chasing the Engineer around, I just have to sit here and take it.
Bottom of Round 5: Halflings
The Engineer takes aim, and hits the Lycans for 1 damage, bringing them to 10, and getting another waver.
 |
| The Halflings continue to fight hard for the center. |
The Muster Captain disengages and withdraws, bringing the aura to the center, letting the the Halflings leverage their unit advantage.
 |
| Reforms for the Halflings. |
The Juggers use the aura and charge around the Sauceror and into the injured Shamblers to pick them up, while the Harvester and Heroic Horde go into the flying Beast, with the Juggers preventing and significant slides. The Harvester is hitting in the flank, and the Beast is mauled, and all three turn to face the Wiltfather, standing tall on 2 damage.
Top of Round 6: Herd
On the right, the Harpies do their best to hide, and secure this zone for me.
The remaining flying Beast has no charges this turn. It moves ahead, out towards the right, and once scoring, nimbly pivots twice to face the center. Even if the Harpies fall to more lightning, I’ll still be claiming the right zone.
 |
| Securing the right zone. |
In the center, the Wiltfather has tough choices. I measure, and neither the Harvestor nor the Heroic Horde can get out of the center next round. The Juggers are a danger though, and so the Wiltfather goes in, hitting them, the Stalwarts, the Sauceror, and the Harvester with Cloak of Death. He’s up to something like 12 damage with the Cloak this game, which isn’t shabby. I am opening him to a flank from the Stalwarts, but keeping the Halflings stuck in the center is my only shot at winning the scenario, so that’s what we gotta do. He only lands the roughly-expected 6 damage, but the Nerve checks are with me, and I am able to beat the Juggers and reform to face the Stalwarts.
 |
| The Wiltfather unexpectedly crushes the Juggers. |
On the left, on 10 damage, I think the Lycans regenerate 1, but pass their headstrong check again. Still, we can’t pin down the Engineer, so I just need to wait and hope.
At the end of the round, the Herd controls both side zones for a total of 4 Points, while the Halflings control the center, for a total of 3 Points.
Bottom of Round 6: Halflings
The Sauceror goes for Brutal, getting Brutal 1 as the Halflings look to fell the Wiltfather.
On the left, the Engineer reloads, fires, and lands 1 damage, and is able to best the Lycans this time, so the Herd loses this zone.
 |
| The Lycans fall and the Herd loses the left zone. |
With Brutal, the Stalwarts go into the Wiltfather, but dice trend low, and only 5 damage lands, to bring the towering tree up to 7 damage total. He holds.
 |
| The Halflings continue brawling in the center, and holds it with both of their remaining units. |
The Muster Captain can’t score, so runs out, and is able to land 1 Lightning Bolt into the Harpies on the right, and gets the rout against them as well. Still the flying Beast is holding this zone, as intended.
 |
| The Herd still controls the right zone. |
At the end of Round 6, the Herd hold only the right zone, for a total of 2 Points, while the Halflings control the center for a total of 3 Points.
We are each down to two scoring units. I am hoping for a Round 7, as Wiltfather in the front with a Beast in the rear should hopefully be enough to spell doom for the Stalwarts and then we bully the lone Harvester for the win … but the dice end the game here.
A narrow victory to the Halflings, but a victory nonetheless!
Game Conclusions
It is always an uphill battle against the very finely-tuned Halflings! Rob played a very crisp game as-always, though I did make him work for it this time!
In retrospect, the Lycans should not normally be able to regenerate through the Iron Beast’s attacks and prevail over it out like they did. I think the right call is flanking with the Beast and trying to rout it instead of grind against Def6, but that combat was a bit of an experiment that just happened to luck out for me.
I had some favorable dice, mainly with the Lycans vs the Iron Beast and a handful of nerve checks. Otherwise many of our combats seemed to trend low, and my Beasts and Wiltfather all struggled to land the expected hits in each of their combats. So, favorable results for me at times, but not necessarily one-sided.
Nitpicking my play, I had a number of small arc and positioning errors again, mainly with the flying Beasts. I have gotten better at making "aggressive" pivots to minimize pivots to move and threaten in the future, and generally do a good job at keeping the scariest things in front-arc, but counterpunching had been given me trouble, as I am having a hard time envisioning how and when I might be charged, and thus the best way to set-up a counterstrike. I don't have a foolproof solution yet, but I think if I am trying to set-up aid or avenge a unit, trying to line up the edge of my arc with it's leader point might be a good rule of thumb to explore to help on this front. I also gummed myself up in the center, but that was mostly due to the infantry horde needing to flank charge. I can definitely clean up some things there, but overall, we’re trending in the right direction, so I won’t dwell on any particular move or choice. Overall, it was a close game, and I am happy with my play and with my progress with aggressive lists like this.
Testing Conclusions
- Spirit Walkers with Brew of Haste. I’m getting a better appreciation for the unit. It’s a glass cannon and is obviously very unlikely to survive the game, but it’s got the best Nerve in the roster for infantry (a Centaur Strider Horde gets up to 21/23), and being Fearless and hitting on 3’s outshines my usual Spear hordes. I don’t think I’ve made good use of the item or Wild Charge yet, but we’ll give it a few more tries.
- Harpies. I think I used these well, containing the Grenadiers early by threatening landing zones, and then contributing as they could throughout the rest of the game. I think I just tipped my hand a little too soon making a play for that right zone, giving my opponent several chances to remove them with the Boomstick instead of just one.
- Gur Panthers. I wish I could have used these just a little better, but they did limit things heading into the Spirit Walkers, so I got what I needed out of them.
- Lycans. One overperformed, and one got caught out by a Harvester, so they had a middling kind of game. They have generally been in good places, but I need to improve my arcs a bit to get a little more out of them each game. But I’m making progress. Waver mitigation has very important though, and these items have been crucial.
- Forest Shambler trio. Again, I have room to improve with minor positioning and scouting tweaks (for example, I don’t need to be right next to a building so long as the threatening unit can’t fit or align to me), but they did good jobs as thick chaff.
- Beast of Nature. I am used to operating with a little more space and independence with my fliers, and I struggled to get these I wanted them a few times given the tight quarters. I think preserving them was the right call, but their output was mediocre when they did connect. I think these were a weak point in my play this game.
- Mounted Druids. They miraculously hit every two-dice Bane Chant that I attempted, so they overperformed and really helped me out. I was messy at the very end trying to block for the Wiltfather, and probably could have done that better, but oh well, they still did good overall. I liked the foot Druids with all my Tribal Spears, but the mounts really help with all the speed in these lists, and I think taking just one with the Conjurer’s Staff is probably a goal to work for, if I want to get more competitive with the army.
- Wiltfather. He made it into multiple combats, survived the game, and really spread the hurt around with Cloak of Death. He’s got a reputation for a reason and really worked nicely with the Shamblers, if only to keep pace and keep them Inspired with the pressuring scout moves. The only Vicous combat would have been the flank against the wavering Stalwart troop, but we’ll still count it as a success!
- Scout. I tried deploying the Shamblers with Scouting moves in mind, and they did well to apply pressure and hold the line, though I did struggle a bit to deploy other units to properly support them. I should be positioning the Shamblers a little further away from buildings, and staggering the leader points of the support units, to help myself out in the future. I think it’s rare I will get a Round 1 charge even on the bottom of the order, so I think I only want to scout as long as I can a) keep them Inspired or safe and b) keep units around to threaten some counter-punches if they are threatened, and I think that I c) don’t want scout into opposing charges ever, like against cavalry for a risky Round 1 scout. So, decently done and definitely some lessons learned here! Making progress on this front still too.
Unfortunately, this was the only game I got in at the meetup due to an odd number of attendees again, which is a bummer as it is essentially a full-day commitment for me to get out to these. Fortunately, it was an amazing and very enjoyable game against a great player, and well worth the trip out! Kings of War Wisconsin has more meetups on the calendar already and we have least one more Master-prep game coming in mid-July. So, thanks for the game Rob, and we’ll see you across the table again soon!
No comments:
Post a Comment